I've never seen clamps like the Shop Foxes in the 7th and 8th pictures -- cool!
You are using an out of date browser. It may not display this or other websites correctly.
You should upgrade or use an alternative browser.
You should upgrade or use an alternative browser.
Table saw outfeed tables
- Thread starter woodtickgreg
- Start date
woodtickgreg
scroll, flat, spin
Staff member
Administrator
Global Moderator
Founding Member
Full Member
Forum Moderator
- Thread Starter Thread Starter
- #22
Those are cabinet clamps, shop fox brand. I purchased them from a member here but I can't remember who.I've never seen clamps like the Shop Foxes in the 7th and 8th pictures -- cool!

 they are actually made for 3/4" wood, so I had to sand down the wood where the clamps where since the wood I'm using is almost an inch thick. Lol.
That's sweet. A little Google brought up these CLAMPSThose are cabinet clamps, shop fox brand. I purchased them from a member here but I can't remember who.they are actually made for 3/4" wood, so I had to sand down the wood where the clamps where since the wood I'm using is almost an inch thick. Lol.
woodtickgreg
scroll, flat, spin
Staff member
Administrator
Global Moderator
Founding Member
Full Member
Forum Moderator
- Thread Starter Thread Starter
- #24
After cutting and fitting all the cross members I drew lines around all of them so I would know where to put glue. Easier to glue that way rather than the individual boards and getting glue all over the place and my fingers trying to get them in.
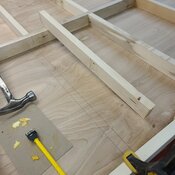
Glue spread, now I just insert the boards until they are fully seated and imbeded in the glue.
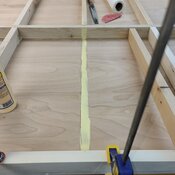
Since I'm not using any mechanical fasteners in this table I added some glue blocks in the corners for a little extra strength.
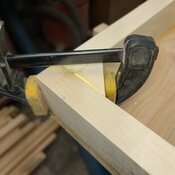
This grid work should help keep the top flat. Also using a good quality plywood will help with that also.
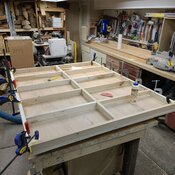
Now the glue needs to dry then I'll pull the clamps and give it a sand all around the outside just to clean it up some from glue squeeze out.

Glue spread, now I just insert the boards until they are fully seated and imbeded in the glue.

Since I'm not using any mechanical fasteners in this table I added some glue blocks in the corners for a little extra strength.

This grid work should help keep the top flat. Also using a good quality plywood will help with that also.

Now the glue needs to dry then I'll pull the clamps and give it a sand all around the outside just to clean it up some from glue squeeze out.
woodtickgreg
scroll, flat, spin
Staff member
Administrator
Global Moderator
Founding Member
Full Member
Forum Moderator
woodtickgreg
scroll, flat, spin
Staff member
Administrator
Global Moderator
Founding Member
Full Member
Forum Moderator
- Thread Starter Thread Starter
- #26
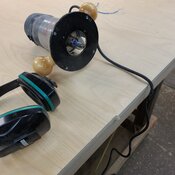
Came home from work today and went down to the shop, took all the clamps off and flipped the top over to pattern rout the one circular saw cut edge flush.
Here you can see the material being removed.
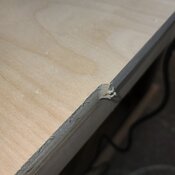
A little better view.
Then I sanded all the way around to remove glue squeeze out.
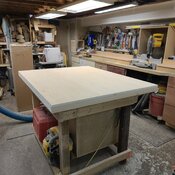
Then I flipped it back over to plan out the legs and base. I think I want a 6" overhang on the sides and about a foot on each end. This should give me a 36" x 37" base. This will also give me a place to attach the top to the base. The base will be plenty heavy and sturdy, and I think one end will be attached to the table saw.
Here you can see the material being removed.

A little better view.

Then I sanded all the way around to remove glue squeeze out.

Then I flipped it back over to plan out the legs and base. I think I want a 6" overhang on the sides and about a foot on each end. This should give me a 36" x 37" base. This will also give me a place to attach the top to the base. The base will be plenty heavy and sturdy, and I think one end will be attached to the table saw.
woodtickgreg
scroll, flat, spin
Staff member
Administrator
Global Moderator
Founding Member
Full Member
Forum Moderator
- Thread Starter Thread Starter
- #27
Legs? I salvaged some walnut 3x4's a little over a year ago, they have been in the garage since then. I think I'll use these for the legs.
I'll just cut around the defects.
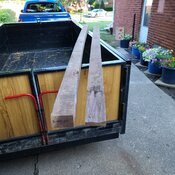
Found free wood. It helps to date wood so you know how long it's been drying for. After I make a fresh cut into it I'll take a end grain moisture reading.
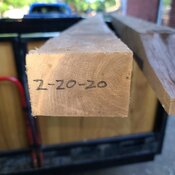
I'll just cut around the defects.

Found free wood. It helps to date wood so you know how long it's been drying for. After I make a fresh cut into it I'll take a end grain moisture reading.

woodtickgreg
scroll, flat, spin
Staff member
Administrator
Global Moderator
Founding Member
Full Member
Forum Moderator
- Thread Starter Thread Starter
- #28
Let me show you my legs! 


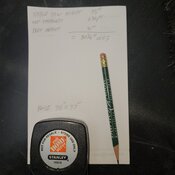
A little measuring and calculating and I think I have the leg length. 30 1/4"
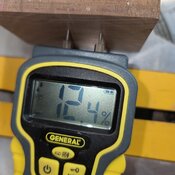
A fresh cut end reads 12.4% on the moisture meter, good enough. The garage kiln did its job.
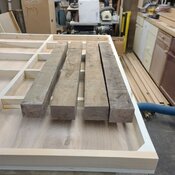
I cut 4 blanks a little oversize.
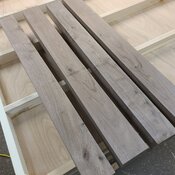
Then jointed 2 edges to give me a square corner, 2 passes and they cleaned right up.
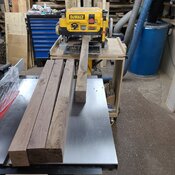
Then it was off to the planer to clean up the last 2 sides.
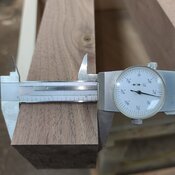
A little over 2 1/4" on one side.
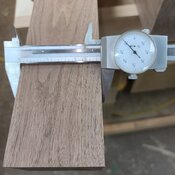
And 2 7/8" on the other. Plenty big enough for free walnut.
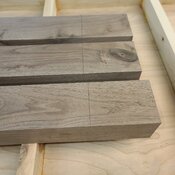
So now I have 4 legs all squared up and milled to equal size.
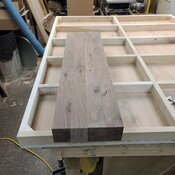
Not exactly how they are going to go but you get the idea.
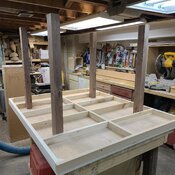


A little measuring and calculating and I think I have the leg length. 30 1/4"

A fresh cut end reads 12.4% on the moisture meter, good enough. The garage kiln did its job.

I cut 4 blanks a little oversize.

Then jointed 2 edges to give me a square corner, 2 passes and they cleaned right up.

Then it was off to the planer to clean up the last 2 sides.

A little over 2 1/4" on one side.

And 2 7/8" on the other. Plenty big enough for free walnut.

So now I have 4 legs all squared up and milled to equal size.

Not exactly how they are going to go but you get the idea.

Last edited:
woodtickgreg
scroll, flat, spin
Staff member
Administrator
Global Moderator
Founding Member
Full Member
Forum Moderator
- Thread Starter Thread Starter
- #29
Then I picked the ends that where knot free and marked the centers.
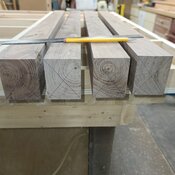
And drilled the countersinks in the ends with a forstner bit.
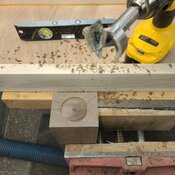
Just enough to get the flange flush.
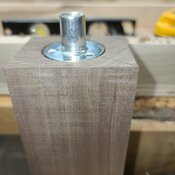
Then I switched to a smaller bit and bored the center out for the flange post.
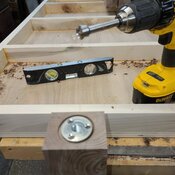
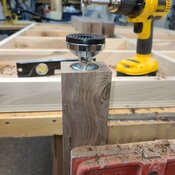
And this is all so the leveling feet can be attached.
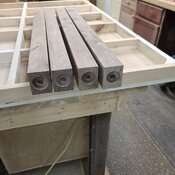
4 legs all drilled out for the leveling feet flanges.
Next I marked them for the correct length. 30 1/4"
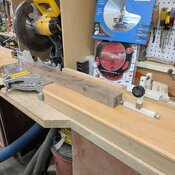
And I set up a stop on my miter saw fence so they will all be the same length.
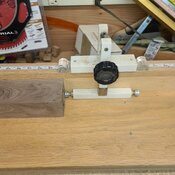
Here's the set up.

And drilled the countersinks in the ends with a forstner bit.

Just enough to get the flange flush.

Then I switched to a smaller bit and bored the center out for the flange post.

And this is all so the leveling feet can be attached.

4 legs all drilled out for the leveling feet flanges.

Next I marked them for the correct length. 30 1/4"

And I set up a stop on my miter saw fence so they will all be the same length.

Here's the set up.

On your measurements, did you allow for the leveling feet height? Oops, I see you did. Duh!
WHAT!!!! no tapers? 

woodtickgreg
scroll, flat, spin
Staff member
Administrator
Global Moderator
Founding Member
Full Member
Forum Moderator
- Thread Starter Thread Starter
- #32
Lol, not done yet, maybe just some chamfer at the bottom. Cross bracing has to go on yet to support a shelf. And besides this is utilitarian not furniture, lol.WHAT!!!! no tapers?
Last edited:
Gonna be nice when done, but I gotta ask about that tape measure. How'd you get it?? .............. Jerry (in Tucson)
woodtickgreg
scroll, flat, spin
Staff member
Administrator
Global Moderator
Founding Member
Full Member
Forum Moderator
- Thread Starter Thread Starter
- #34
I worked at 2 home depots for 8 years as a tool rental tech and a hardware associate. I'm just borrowing that one.Gonna be nice when done, but I gotta ask about that tape measure. How'd you get it?? .............. Jerry (in Tucson)

woodtickgreg
scroll, flat, spin
Staff member
Administrator
Global Moderator
Founding Member
Full Member
Forum Moderator
- Thread Starter Thread Starter
- #36
Ha ha! Now that's funny.

Yep............... Jerry (in Tucson)I worked at 2 home depots for 8 years as a tool rental tech and a hardware associate. I'm just borrowing that one.
woodtickgreg
scroll, flat, spin
Staff member
Administrator
Global Moderator
Founding Member
Full Member
Forum Moderator
- Thread Starter Thread Starter
- #38
The design I see in my head for the legs calls for some more material the same thickness as the walnut legs, I don't have any walnut that I want to cut up for that.
But I do have some maple from pallets.
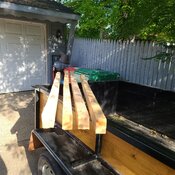
These boards have some defects but I can cut around them to get what I need out of them.
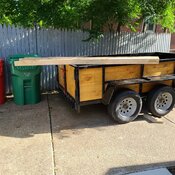
I batch cut all the legs to length.
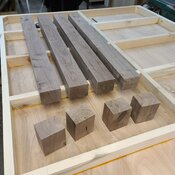
Not bad for pallet wood, it'll work for the shop table.
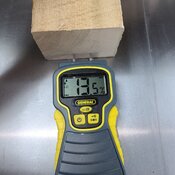
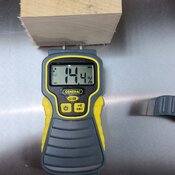
This one's a little high, could have used some more time in the garage but I need it, lol. So I'm using it.
4 cross braces rough cut tonight. Need to be jointed and planed.
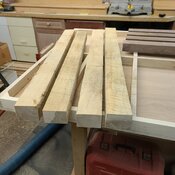
But I do have some maple from pallets.

These boards have some defects but I can cut around them to get what I need out of them.

I batch cut all the legs to length.

Not bad for pallet wood, it'll work for the shop table.

This one's a little high, could have used some more time in the garage but I need it, lol. So I'm using it.

4 cross braces rough cut tonight. Need to be jointed and planed.

woodtickgreg
scroll, flat, spin
Staff member
Administrator
Global Moderator
Founding Member
Full Member
Forum Moderator
- Thread Starter Thread Starter
- #39


