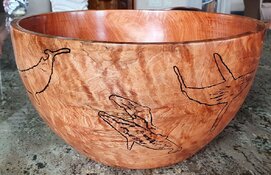
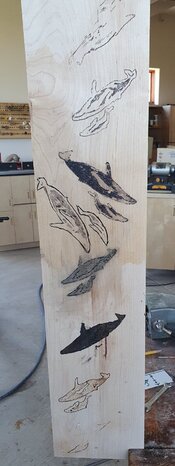
A friend wanted a large salad bowl to be housed in Nantucket. And then she said she wanted humpback whales on it. Although I considered that an insult to the wood, and I am absolutely not an artist, I had to figure out how to put whales on the bowl. Through a lot of trial and error I came up with a technique that might be useful. These are the condensed steps I followed.
For the techies in the group, I got my images ready for the bowl by doing an internet search for humpback whale pictures, captured or saved the ones I wanted, used Photoshop to resize them to what I wanted, and turned them into line art using the “photocopy” filter.
Below are pictures of the finished bowl and my trial and error board.


- I complete turning and sanding the bowl as normally done.
- I applied a couple coats of finish, I used polyurethane, to the inside and outside.
- I had found and created appropriately sized pictures of whales as line art.
- I printed the images on paper, trimmed off most of the excess paper around the images, and positioned them on the bowl with masking tape until I was happy with the placement.
- One by one, I removed each image and sprayed the back with an adhesive (I used 3M Super 77) and put it back in position. I pressed it down so the whole image was uniformly attached.
- I then used a v-bit in a Dremel tool to carve along the outline of the image, and dark shaded areas, being sure to cut into the wood of the bowl. I had the bowl mounted on the lathe for this and following steps.
- I applied black gel stain over the images with a paper towel, working it into the carved areas. I used a gel stain because it would not penetrate beyond the carved areas. The bowl was pre-finished so the stain would not stain areas that were not carved.
- When the stain was dry, I peeled off the paper and re-sanded the outside to remove any glue and paper residue.
- I then re-finished the outside of the bowl.
For the techies in the group, I got my images ready for the bowl by doing an internet search for humpback whale pictures, captured or saved the ones I wanted, used Photoshop to resize them to what I wanted, and turned them into line art using the “photocopy” filter.
Below are pictures of the finished bowl and my trial and error board.


