
Byrd Shelix jointer head installation

woodtickgreg

scroll, flat, spin
Staff member
Administrator
Global Moderator
Founding Member
Full Member
Forum Moderator
Messages
21,457
Reaction score
35,501
Location
Eastpointe, Mi. usa
First name
Greg
This is a picture tutorial on how to change the cutter head on a jointer. Most of them are pretty much the same, some may have minor differences.
Mine is a Grizzly G0586 8" longed.
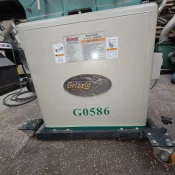
20210816_182042.webp
I moved it closer to my tool box to save some footsteps and also because it gave me access to both sides of the machine.
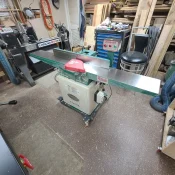
20210816_182051.webp
Here's the new Byrd Shelix cutter head, a thing of beauty. And it's balanced.
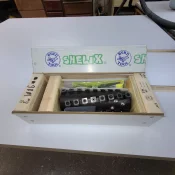
20210816_182059.webp
I started by removing the blade pork chop guard and the fence.
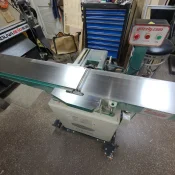
20210816_182304.webp
Then backed both tables all the way down and away from the cutter head.
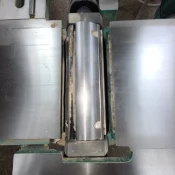
20210816_182725.webp
Next I removed the belt cover and the belts, just rolled them off. If you look carefully at this pic you can see one belt was rolled and twisted, don't know how that happened?
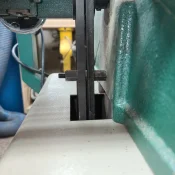
20210816_182744.webp
So here's what I removed so far......
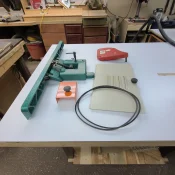
20210816_183046.webp
Good time to sweep up the floor where the jointer lives, lol.
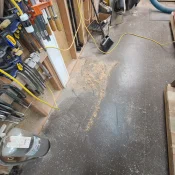
20210816_183103.webp
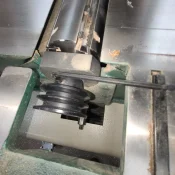
Next I loosened the 2 set screws holding the pully on. Keep in mind that this is a Taiwanese machine so everything is metric, even the Allen keys.
20210816_183347.webp
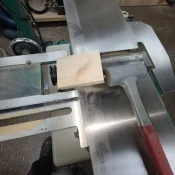
Of course it didn't want to come off so a block of wood and a dead blow mallet persuaded it.
20210816_183557.webp
 
  • Thread Starter Thread Starter
  • #2
Next a 14 millimeter wrench was used to remove the nuts holding the bearing blocks. 20210816_183838.webp
1 nut on each side.
20210816_184014.webp
And then the whole cutter head assembly just lifts right out.
20210816_184213.webp
I took this opportunity to blow everything out with compressed air and wiped the bearing surfaces clean.
20210816_184221.webp
I tried a brass rod tapping gently with a hammer to see if the bearing might come off the shaft, it didn't, so I used a puller.
20210816_185925.webp
Came right off easy peasy with the puller.
20210816_190307.webp
I marked the bearing holders so I could put them back in the same place. I don't think it makes any difference but I did it anyway.
20210816_190315.webp
The back bearing was stubborn and dint come off with the holder.
20210816_190737.webp
So I had to use a bearing puller to get it off.
20210816_190743.webp
Bearings are now off the cutterhead shafts.
20210816_191128.webp
 
  • Thread Starter Thread Starter
  • #3
Now for the re assembly.
I cleaned up the shafts of the new cutterhead with some 400 grit Emory cloth.
20210816_191351.jpg
Both sides.
20210816_191650.jpg
I used my arbor press to re install the bearing in the holder. It's better to push it in than beat it in.
20210816_191902.jpg
Here's what the shafts look like after cleaning them up. You don't want any dirt or burrs on the shafts.
20210816_192031.jpg
I used the shipping wood blocks that had holes in them for the shafts to seat the bearings, gently tapped them on with the dead blow mallet.
20210816_192208.jpg
I check that they turned freely and smooth and then set the assembly in place.
20210816_192321.jpg
I tapped the Key for the pully in place with the brass rod.
20210816_193148.jpg
And then installed the pully and tightened the set screws.
20210816_193353.jpg
I re installed the belts. They looked great, no cracks or signs of wear so I'm just going to re use them. There easy enough to change if I need to at a later time.
20210816_194342.jpg

20210816_194451.jpg
 
Last edited:
  • Thread Starter Thread Starter
  • #4
Then the belt cover went back on.
20210816_194647.jpg
Then the fence and the cutter guard.
20210816_195601.jpg
And then the shellix sticker. I wiped the surface with DNA before applying it. The switch cover was the only smooth surface on the machine, lol. Everything is a wrinkle powder coat texture.
20210816_195832.jpg
Then it was just a matter of getting the outfeed table set back up again and giving it a test. Cuts really nice, and much quieter.
Now for the bad news, I get to do it all again, I got one bearing making noise. Guys just order new bearings if you do this. Mine are just common 6204 sealed bearings. I'll pick some up and do this again, lol. It was really easy though, the whole job only took a couple of hours.
 
Last edited:
Great job Greg, you're gonna love it. Make sure you have a few spare cutter bits on hand.
 
Then the belt cover went back on.
View attachment 214467
Then the fence and the cutter guard.
View attachment 214468
And then the shellix sticker. I wiped the surface with DNA before applying it. The switch cover was the oy smooth surface on the machine, lol. Everything is a wrinkle powder coat texture.
View attachment 214469
Then it was just a matter of getting the outfeed table set back up again and giving it a test. Cuts really nice, and much quieter.
Now for the bad news, I get to do it all again, I got one bearing making noise. Guys just order new bearings if you do this. Mine are just common 6204 sealed bearings. I'll pick some up and do this again, lol. It was really easy though, the whole job only took a couple of hours.
Just outstanding! I need to do the same thing with my Grizzly 8" Jointer! I don't have a bearing puller or arbor press though. Chuck
 
  • Thread Starter Thread Starter
  • #8
Just outstanding! I need to do the same thing with my Grizzly 8" Jointer! I don't have a bearing puller or arbor press though. Chuck
If you dont have a bearing puller it's not a big deal, just get new bearings as there cheap. Then all you need is a deep well socket or a piece of pipe the inside diameter of the shaft to set the bearings. You dont want to beat on the outer race as that's what I did and it damaged one of the bearings.
 
Great job. a a a a a would your next video be on how to get yer shop that clean- Mine was once 20 years ago....
 
Great explaination of the process.......the shop is simply too clean!

Does anyone have a similar documented process for converting a 12 1/2" Delta planer to the Shelix head. I've got one ordered, it should be
here in a couple weeks, any help is appreciated.
Thanks
Larry
 
  • Thread Starter Thread Starter
  • #14
Great thread! I’ve never heard a bad thing about those shelix heads… just the price tag.
For me it's well worth the price to never ever have to sharpen again and mess with setting the blade heights. Way less money than a new jointer too.
I picked up some new bearings so I'll tear this down and do it again.
 
  • Thread Starter Thread Starter
  • #15
Well new bearings are in. Boy is this cutter head quiet. And since the cutter head wouldn't fit in my arbor press I used two pipe clamps and just turned the handle evenly at the same time and it worked like a charm. I didn't want to drive them on with a hammer again and damage the bearings like I did last time. So if you don't have an arbor press this is a great way to smoothly press the bearings on the shafts. I did use the arbor press to press the bearings into the holders, but that could have been done with a vice or C clamp as well.
20210903_173931.webp
I fine tuned everything, set the fence square, adjusted the belt tension a little bit, and reset the pointer for the cut depth as that changed a little too. A few test boards where run through it and wow am I impressed with the quality of the cut from this thing. And I still can't get over how much the noise has been reduced.
Thats another thing off the to do list.
 
Well new bearings are in. Boy is this cutter head quiet. And since the cutter head wouldn't fit in my arbor press I used two pipe clamps and just turned the handle evenly at the same time and it worked like a charm. I didn't want to drive them on with a hammer again and damage the bearings like I did last time. So if you don't have an arbor press this is a great way to smoothly press the bearings on the shafts. I did use the arbor press to press the bearings into the holders, but that could have been done with a vice or C clamp as well.
View attachment 215480
I fine tuned everything, set the fence square, adjusted the belt tension a little bit, and reset the pointer for the cut depth as that changed a little too. A few test boards where run through it and wow am I impressed with the quality of the cut from this thing. And I still can't get over how much the noise has been reduced.
Thats another thing off the to do list.

Good job! I cheated and ordered mne with the new bearings installed, only a couple bux more and worth it. I wish I would have upgraded mine a long time ago. Have a great weekend.
Larry C
 
Back
Top