

Some one asked how the hidden pin hinges were made for boxes. I'm certainly not the expert (Ray D showed me) but here's how I do it. This is only one way, there's probably lots of other (better ways) but the main points will be covered and you can develop your own methods that work for you.
Step 1: Save the cut offs from your lid and sides. You can use them as you create the pins and drill the holes. Saves a lot of steps taking the box apart, putting it back together, drilling holes in the wrong places so you have to remake the lid / sides, etc.
Step 2: Select your pin material. Depending on the thickness of your lid and sides, you might choose 1/8" brass. The box I'm making is smaller (roughly 10" x 4") and has a lid and sides that are 5/16" thick so I decided to just use a metal coat hanger for my pins.
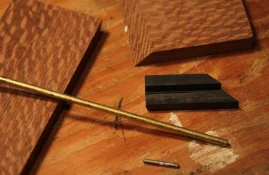
Using the cutoff, you can figure out how long you want your pins. I prefer not to have the pins visible from the outside, so I keep my pins inside the sides. They can go as deep as you want into the lid (it won't show) but generally something around 1/2" - 3/4" is plenty. Cut two pins slightly shorter than the combined depth of the holes you plan to drill in both the lid and sides. It's okay if the pin can slide a little back and forth, just not all the way into one hole or the other. You can place the cutoff side you saved against the lid and lay the pin along it to test the length. If the pin is too long, nip it off. Then use a file to smooth off any sharp edges and slightly round the ends (just makes it easier to insert the pins). NOTE: If you want your pins to show on the outside of the box, you can simply drill the holes and make a pin sufficiently long to go all the way into the lid, then cut it off and sand it smooth.
Step 3: Figure out where the holes will need to be drilled. Using the cutoff from the lid, measure equal distances from the back of the lid, and from the top of the lid. I usually aim for exactly mid-point in thickness. If you decide to make your dimensions something other than equal, you will need to figure out how much room you will need to allow the lid to rotate. I use a micrometer to set the half - thickness dimension of my lid, and then use that setting to mark where the drill needs to be made on the lid. Again, measure your dimension from the both the top and from the back, you want the same dimension from both. You can cheat closer to the top/back but if you make this dimension larger than half the thickness, you'll need to leave more room for the lid to rotate upward. NOTE: If you cheat too close to the edge of the lid you risk someone opening the box too far and causing the pin to crack the lid.
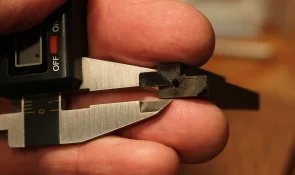
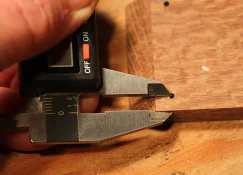
I also mark the location on the cutoff I saved from the making the sides. For the holes on the sides, measure from the top and from the inside edge of the miter. Once happy, I drill a hole all the way through the test side. This is going to become a guide for drilling the holes in your lid. I use the cutoff from the lid (in which I drilled a hole) and this cutoff from the side to test the hole location. If the lid doesn't fit where I want it to, I can use the opposite edge of the side to drill another hole and re-test). When I think I have the hole in the cutoff side in the right place, I clamp the drill guide in the proper location on the lid, making the top flush and the back adjacent to the inside bevel, and drill the hole to depth.
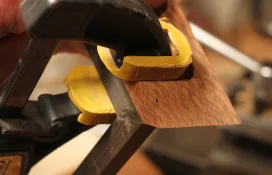
Figure out how deep you want the holes, considering how long you want the pins and the thickness of your sides. Place a depth guide (tape) on a drill bit and drill the holes in the lid.
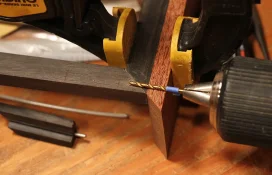
Drill the holes in the lid and test fit the pins using the cutoff from the side. Try to keep the holes as straight as you can (otherwise, your pins will come out at an angle and the lid will open off center). If you drill a hole to the depth you want in the cutoff from the side, you can test fit the pin length now. Make sure your miters still join properly too (see photo below).
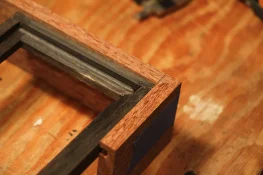
Step 4: So now you have the holes in the lid and need to make the holes to match in the actual sides of your box. I make a drill center point (not sure what this is called) using a cutoff finishing nail. If you don't have a nail that fits snug in the hole you drilled in the lid, you can wrap a layer of tape until it fits snugly. An alternate is to cut another section of your pin material, make it long enough that about 1/16" sticks out beyond the hole. Sharpen that end of the pin to a point.
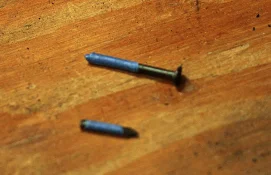
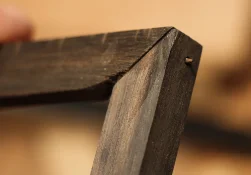
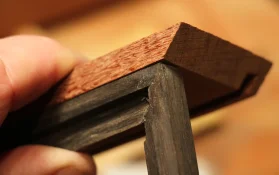
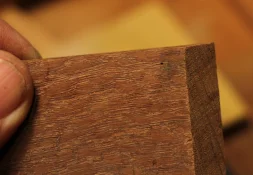
Insert your drill center into the lid (see above photos) and then placing the actual side against the lid, getting it flush with the top and adjacent to the inside of the 45 degree miter. Press the lid and side together until your drill center makes a mark you can see in the side (see photo below). This is where the hole in the side has to go. If you want to leave some clearance between the lid and the back of the box, cheat the lid away from the inside edge of the miter. If you want the lid to stick up slightly above the side of the box, cheat up a little, reverse if you want the lid to sit slightly below the top of your box. Just remember if you do this, the lid won't open past 90 degrees. Remember also that you can still sand the lid and sides, round the corners, etc. so you can adjust the fit some also when you do that.
Step 1: Save the cut offs from your lid and sides. You can use them as you create the pins and drill the holes. Saves a lot of steps taking the box apart, putting it back together, drilling holes in the wrong places so you have to remake the lid / sides, etc.
Step 2: Select your pin material. Depending on the thickness of your lid and sides, you might choose 1/8" brass. The box I'm making is smaller (roughly 10" x 4") and has a lid and sides that are 5/16" thick so I decided to just use a metal coat hanger for my pins.
Using the cutoff, you can figure out how long you want your pins. I prefer not to have the pins visible from the outside, so I keep my pins inside the sides. They can go as deep as you want into the lid (it won't show) but generally something around 1/2" - 3/4" is plenty. Cut two pins slightly shorter than the combined depth of the holes you plan to drill in both the lid and sides. It's okay if the pin can slide a little back and forth, just not all the way into one hole or the other. You can place the cutoff side you saved against the lid and lay the pin along it to test the length. If the pin is too long, nip it off. Then use a file to smooth off any sharp edges and slightly round the ends (just makes it easier to insert the pins). NOTE: If you want your pins to show on the outside of the box, you can simply drill the holes and make a pin sufficiently long to go all the way into the lid, then cut it off and sand it smooth.
Step 3: Figure out where the holes will need to be drilled. Using the cutoff from the lid, measure equal distances from the back of the lid, and from the top of the lid. I usually aim for exactly mid-point in thickness. If you decide to make your dimensions something other than equal, you will need to figure out how much room you will need to allow the lid to rotate. I use a micrometer to set the half - thickness dimension of my lid, and then use that setting to mark where the drill needs to be made on the lid. Again, measure your dimension from the both the top and from the back, you want the same dimension from both. You can cheat closer to the top/back but if you make this dimension larger than half the thickness, you'll need to leave more room for the lid to rotate upward. NOTE: If you cheat too close to the edge of the lid you risk someone opening the box too far and causing the pin to crack the lid.
I also mark the location on the cutoff I saved from the making the sides. For the holes on the sides, measure from the top and from the inside edge of the miter. Once happy, I drill a hole all the way through the test side. This is going to become a guide for drilling the holes in your lid. I use the cutoff from the lid (in which I drilled a hole) and this cutoff from the side to test the hole location. If the lid doesn't fit where I want it to, I can use the opposite edge of the side to drill another hole and re-test). When I think I have the hole in the cutoff side in the right place, I clamp the drill guide in the proper location on the lid, making the top flush and the back adjacent to the inside bevel, and drill the hole to depth.
Figure out how deep you want the holes, considering how long you want the pins and the thickness of your sides. Place a depth guide (tape) on a drill bit and drill the holes in the lid.
Drill the holes in the lid and test fit the pins using the cutoff from the side. Try to keep the holes as straight as you can (otherwise, your pins will come out at an angle and the lid will open off center). If you drill a hole to the depth you want in the cutoff from the side, you can test fit the pin length now. Make sure your miters still join properly too (see photo below).
Step 4: So now you have the holes in the lid and need to make the holes to match in the actual sides of your box. I make a drill center point (not sure what this is called) using a cutoff finishing nail. If you don't have a nail that fits snug in the hole you drilled in the lid, you can wrap a layer of tape until it fits snugly. An alternate is to cut another section of your pin material, make it long enough that about 1/16" sticks out beyond the hole. Sharpen that end of the pin to a point.
Insert your drill center into the lid (see above photos) and then placing the actual side against the lid, getting it flush with the top and adjacent to the inside of the 45 degree miter. Press the lid and side together until your drill center makes a mark you can see in the side (see photo below). This is where the hole in the side has to go. If you want to leave some clearance between the lid and the back of the box, cheat the lid away from the inside edge of the miter. If you want the lid to stick up slightly above the side of the box, cheat up a little, reverse if you want the lid to sit slightly below the top of your box. Just remember if you do this, the lid won't open past 90 degrees. Remember also that you can still sand the lid and sides, round the corners, etc. so you can adjust the fit some also when you do that.
Last edited:


