A new build.....if you're interested.

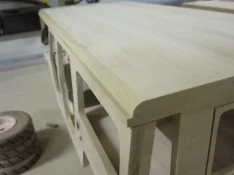
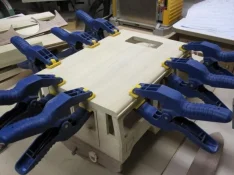
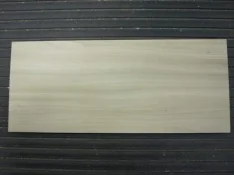
Well, I was pleased with my lamination from yesterday and the joint in the board is pretty much invisible.
[attachment=27003]

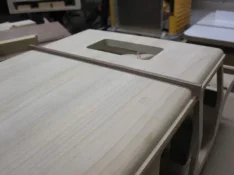
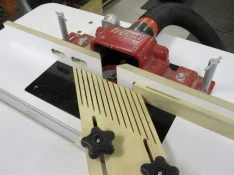
I then set up the router table to rout the profile of the roof panel to incorporate the rain gutters.
[attachment=27004]

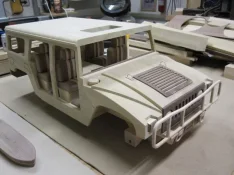
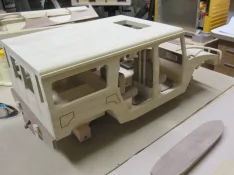
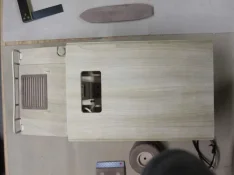
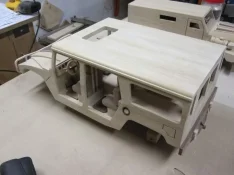
After a couple of test cuts, I ran the final roof panel through the table, dry fit the panel to the Hummer and glued it in place.
[attachment=27005]

I decided that I wanted a sunroof in the Hummer, so I cut that out before glueing the roof to the body.
[attachment=27006]

[attachment=27007]

[attachment=27008]

[attachment=27009]

[attachment=27010]

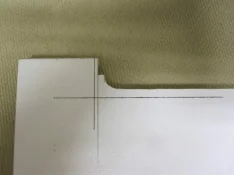
I then made a primitive template of the profile of the roof.
[attachment=27011]

I used that template to mark out and cut the roof rack brackets that I needed.
[attachment=27012]
IMG_3897.webp

IMG_3898.webp

IMG_3899.webp

IMG_3900.webp

IMG_3901.webp

IMG_3902.webp

IMG_3903.webp

IMG_3904.webp

IMG_3905.webp

IMG_3906.webp
 
I then cut out all 4 brackets that I needed using my scroll saw.
[attachment=27013]

I then glued in all of the roof rack slats. I had to come up with some inventive ways to clamp them down. By inventive, I mean a peanut butter jar full of bolts and screws.
[attachment=27014]

[attachment=27015]

[attachment=27016]

[attachment=27017]

[attachment=27018]

[attachment=27019]

I also got the framework cut for the roof rack rails. The glue was still wet on those so I left them alone and will hopefully work on them again tomorrow.

Thanks for looking in.

IMG_3907.webp

IMG_3908.webp

IMG_3909.webp

IMG_3910.webp

IMG_3911.webp

IMG_3912.webp

IMG_3913.webp
 
I am really struggling to wrap my head around this thread. This is one of the craziest things I have ever seen. Amazing work. WOW!!!!!
 
I started off today by sanding the little frames that I made yesterday for the roof rack.
[attachment=27062]

I then had to cut all the upright pieces for the rack.
[attachment=27063]

I started glueing in the uprights, which was a chore in itself (for reasons I wont bother getting in to) but I managed by using my setup blocks to assist me.
[attachment=27064]

[attachment=27065]

I then glued and clamped the second frame onto the lower frame and uprights.
I kept it together by using a couple of clamps. :rotflmao3:
[attachment=27066]

After everything was dried, I sanded and installed the complete roof rack rails. I used my wonderful jar of bolts and screws to "clamp" the rack down until it was dry.
[attachment=27067]
[attachment=27068]

I then started to work on the running boards. I broke the first one so I had to make 2 more. I only finished shaping one of them but I don't like the look of it. There's something just not right and all of the hand sanding has made the running board a little oddly shaped. So sadly, this one is headed for the designer firewood pile and I will have to rethink my method for these the next time I get to the shop.
[attachment=27069]
[attachment=27070]
[attachment=27071]

IMG_3916.webp

IMG_3917.webp

IMG_3918.webp

IMG_3921.webp

IMG_3922.webp

IMG_3923.webp

IMG_3924.webp

IMG_3925.webp

IMG_3926.webp

IMG_3927.webp
 
Well, I headed out to the shop to get some work done on the Cougar today and it was going well until I threw my back out. I have no idea what I did, but I can hardly walk now. Either way, I managed to get the driver's side bins and the passenger side bins made and glued in place. The lighter is one that Mrs Kenbo bought me to use as a size reference in my build pictures so you will probably be seeing a lot more of the blue lighter. Thanks for looking in.......I have a date with a heating pad I think.
[attachment=27305][attachment=27306]
[attachment=27307][attachment=27308]
[attachment=27309]

IMG_3998.webp

IMG_4000.webp

IMG_4001.webp

IMG_4002.webp

IMG_4003.webp
 
I'm sorry to hear about your back Ken. Since you aren't sure what caused it, mI'll offer a guess that it could be the long hours in the jeep yesterday. Sometimes that will do it to me during the ride but most usually a delayed reaction which culminates the next day while doing something that normally wouldn't cause it by itself. :unknown:

Thanks for putting the bic in the pic - it's a little larger than what I was thinking and until you used the lighter I didn't really realize it. The cougar is really looking good! Take 'er easy on the back buddy.
 
Ooh I can relate to the back out all to well. Ibuprofin will be your friend. :empathy2:
 
One of those slow progress days but I guess slow progress is better than no progress. :good2:

Worked on the Cougar today seeing that my last Cougar work got interrupted by a bad back that lasted 9 days. It was a fully day of nasty angle cuts and test fittings that eventually worked out. Either way, enough of my whining.

Here's where I'm at now.
[attachment=28333] [attachment=28334]
[attachment=28335] [attachment=28336]
[attachment=28337]

IMG_4017.webp

IMG_4023.webp

IMG_4024.webp

IMG_4025.webp

IMG_4028.webp
 
Glad your back is better buddy, I can truly relate to that. The work is still very cool. :hatsoff:
 
Brink said:
Long time without an update, glad your back.

9 Days with a bad back will do that to ya. It went out on Sunday and the following weekend it was still bad. The next weekend, I went away with Mrs Kenbo and this weekend..........well, you know that story. Sorry about the long wait for an update. Believe you me, I would have rather been in the shop than to deal with the bad back.
 
Nice work. Glad you're back, and glad your back, is better. :good:
 
I spent some time last weekend resawing some walnut to 3/4" for the tires and today, I worked on all 5 tires for the Hummer. There is still a ton of work to do on them (sanding, shaping, rims and one 1/4" thick center tread for one of the tires) but I was happy with the progress for today. You have no idea how long it takes to cut all 360 tread grooves for the tires. Jobs like that scare my a bit because redundant work is exactly when the saw will bite ya. Paid extra attention to the digits today.
[attachment=29218] [attachment=29219]

[attachment=29220] [attachment=29221]

[attachment=29222]

IMG_4082.webp

IMG_4083.webp

IMG_4084.webp

IMG_4085.webp

IMG_4086.webp
 
Today was another day to work on the tires of both vehicles. There were some serious problems with the wheels for the Cougar and I needed to turn some discs to fill the voids in the back of the tires.
These drilled out voids are not supposed to be there. I needed to come up with a way to fill them without it being to obvious on the tire.
[attachment=29538]
Using my pen mandrel, I ended up turning oak discs that were the same thickness as the void. The idea was that if noticed from underneath, they would end up looking like part of the rim.
[attachment=29539] [attachment=29540]
I then used the mandrel to line everything up and glue the discs into place.
[attachment=29542] [attachment=29543]
I then moved on to the Hummer tires and started drilling the voids needed to house the rims for these tires.
[attachment=29544] [attachment=29545]
[attachment=29546]
I switched gears again and went back to the Cougar wheels. I needed to make the discs for the hub caps but was puzzled by how to make them exactly round and have the holes symmetrical. I ended up turning the disc on the lathe, using the pen mandrel again. I then came up with an indexing jig for the drill press to drill all the holes needed in all 5 larger discs.
[attachment=29548] [attachment=29549]

IMG_4092.webp

IMG_4093.webp

IMG_4094.webp

IMG_4095.webp

IMG_4096.webp

IMG_4097.webp

IMG_4098.webp

IMG_4099.webp

IMG_4100.webp

IMG_4101.webp
 
One of the larger finished discs.
[attachment=29554]
And a test fit into the rim to see how it looks.
[attachment=29556]
I then carried on to drill the other four discs.
[attachment=29557]
From there, I turned all of the smaller discs, using the same method as before and drilled all of the holes in the smaller discs. I'm glad I came up with the indexing jig because I'm please with how they came out.
[attachment=29558]
And finally, a test fit.
[attachment=29560]
And THAT, was my day.

IMG_4102.webp

IMG_4103.webp

IMG_4104.webp

IMG_4106.webp

IMG_4105.webp
 
Started off the day by making some axel caps for the Cougar. Here they are rough cut on the scroll saw and ready for the lathe.
[attachment=30226]
I then started glueing all of my hub caps into the wheels that I had already made. I had to use my pen mandril to clamp and align the hub caps.
[attachment=30227][attachment=30228]
Here are the finished axel caps after I turned them.
[attachment=30229]
One tire finished, four more to go.
[attachment=30230]
All five tires finished and ready for mounting.
[attachment=30231]
First one mounted for the spare tire.
[attachment=30232]
It was at this point in time, that the "wheels" fell off so to speak. I realized that the axels of the vehicle had been made incorrectly and that I needed to remake them. That will have to be a job for later. I was hoping to have all the tires on this one today, but I'm not about to rush it now. I'll work on the axels tomorrow and try to get the wheels mounted.
I also have some very small parts to cut and I was hoping to use my table saw for accuracy and repeatability but there was no way that I was getting my fingers close to the blade. For that reason, I took some time away from the build and made a small parts cross cut sled that mounts to my existing miter fence. I will be mounting a stop block on it tomorrow and hopefully cutting some smaller parts.
[attachment=30233]

IMG_4152.webp

IMG_4153.webp

IMG_4156.webp

IMG_4157.webp

IMG_4158.webp

IMG_4159.webp

IMG_4161.webp

IMG_4162.webp
 
Back
Top