Bocote Guitar Build

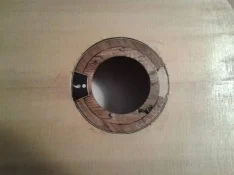
Put a spit coat of shellac on the top to protect it a bit as I continue to work on the other side. I may need to put a little reinforcement on the inside of the rosette. I think it is flexing more than I like. (Won't affect sound or appearance.) the picture is a little bit washed out. The colors are more vibrant in person. Most of this will get sanded off again when I go to really finishing the guitar.

Jacob

image.webp
 
Got home today and went straight out to glue up kerfed lining for the back. I'm using reversed kerfing as it is supposed to be a little cleaner look on the inside. I also put in some spruce for the sound hole reinforcement. Not pretty now, but it will be. While letting that dry a bit, I worked on cleaning up the wood pile. Maybe now I can find stuff...

Jacob

image.webp

image.webp
 
Last photo before I close the box. The first two show the process for the end graft. This is a decorative piece at the butt end of the guitar. By using a wedge shape, the piece will stay in on it's own for gluing and I don't have to be particularly accurate as long as the piece is a little longer than the depth of the body. The last photo shows the cut outs for the back braces. I cut the width of each one with a pull saw, then carefully chisel out the waist.

Jacob

image.webp

image.webp

image.webp
 
Getting ready to start binding the guitar. Decided that using the Bocote that I cut for binding, would blend too much and look as if there were no binding. So, I A-B'd some flamed maple and Padauk. Think the maple would be too different. I've decided on the Padauk. (It will match the bridge.) I glued some black and white fiberboard up for the purfling lines, trimmed the the Padauk up, bent the strips, and clamped them into the mold.

Jacob

image.webp

image.webp
 
Little sneak peak (test fit) as I start in on binding the guitar. Here, I'm working on the binding ledges and purfling channels. Measure twice, cut once...unless you feel like making more purfling.

Jacob

image.webp

image.webp
 
This is and has been such an awesome build to watch! Thank you for doing this, I really am enjoying watching it.:thanx2::good:
 
Finally getting to an end with gluing the binding. Hopefully will have more shop time starting this week. Think I'll be really working to make the deadline with this one. Haven't taken many pictures of binding the guitar, because I don't have three hands. Robert O'Brien who does videos for lmii does and this is the method I used for this guitar. Link to the page: https://www.lmii.com/tutorial-videos. Scroll down to "Binding with CA glue".

Here's a shot before I start scraping and prepping.

Jacob

image.webp
 
Wow... this is a LOT more work than I realized. I'm impressed, Jacob! And thanks for sticking with keeping us updated with the build... it is a fun one to follow!
 
Wow... this is a LOT more work than I realized. I'm impressed, Jacob! And thanks for sticking with keeping us updated with the build... it is a fun one to follow!
Haha! But it's fun! Actually have finish going on right now, just been trying to get it wrapped up. I'll be posting photos and commentary soon to get it all caught up, but been trying to be in the shop as much as possible to get it done. Finish takes a bit to cure and I want it as stout as possible before it gets shipped up north.

Jacob
 
I'm just glad we worked out a trade before your operation gets too big and I can't afford your work! I think C. F. Martin IV might be reaching out to you sometime soon.
 
I'm just glad we worked out a trade before your operation gets too big and I can't afford your work! I think C. F. Martin IV might be reaching out to you sometime soon.
I hope not! Not sure I want to move out of Texas! I hadn't seen a post from you in a while. Glad to see you're still around down there. When I get to your build, what would you think about ziricote for the fretboard and bridge?

Jacob
 
Well, somehow I skipped taking photos of shaping the neck and heel. Sorry, been trying to finish the guitar! Basically, I use a sharp chisel to get the shape of the heel. I use a spokeshave to rough the neck almost to dimension. I go back to the chisel to smooth some of the transition of the neck to the headstock. I clean up the transitions of the neck/headstock/heel with a rasp and file. Then I go to sandpaper and scrapers to finish it up.

Here are a couple of pictures of my shellac "Frenchish" polishing. (I'm not really French, so American? polishing?) For the first two coats of polish, I'm just trying to build something on the guitar, so I use approximately a 2lb cut and wipe straight on to the guitar with a fine lint-free cloth. (Always make a fresh batch of shellac for each session, it doesn't stay good forever.) On subsequent coats, I use an approximately 1lb cut and begin 'french' polishing the guitar. Again with a fine lint-free cloth. (Some of you reading this will notice the cloth I'm using is cotton. I cut up some old underwear. This works pretty well. Also, I am positive there is more fecal matter in the shellac than in the cloth... we wash regularly.) Load the cloth with shellac and work in a small area of the guitar making circular motions. Occasionally you will need to reload the cloth with shellac. When the cloth starts to stick too much, add a drop of extra virgin olive oil and continue. (I'm not sure how they get the extra virgins in the bottle...) Work for 10-15 minutes and walk away. Come back later and start over. Repeat until it looks the way you want it to and stop. When it is dry you can 'spirit off' the excess. Let it sit a week from there and buff the finish out.

Also, a picture to tease y'all. (After 3 polishing sessions.)

Jacob

20140424_200429.webp

20140424_200437.webp

20140424_202624.webp
 
One of the more important steps for playability is fretting the guitar. You can put frets in before you glue the fretboard or after. I prefer after. Once you've cut the frets to length, add a little glue (titebond regular works well) to the fret slot, wipe the excess, and tap in the fret with a small hammer. The less tapping, the less work later. Make sure the frets are fully seated. With the frets in and glue dry, trim any excess length from the fret. Then, use a file to make the ends flush with the wood and profile the top edge at the end of each fret to about 35 degrees. Now draw a line on the top of each fret with a sharpie. Use a flat file, sharpening stone, block of wood with sandpaper, or other flat sanding device about 8" long to sand the tops of the frets level. Go until you are positive that you have touched all of the frets. Check level with long and short straight edges. Use a triangle file to recrown the frets and remove some of the sanding marks. One edge of my triangle file has been ground smooth so I don't mare the fretboard. Round the edges of the frets so they won't cut the player. And finally, use some fine steel wool to polish the frets. First along the length of the fret, then to remove marks from the fretboard, along the length of the fretboard.

Jacob

image.webp
 
Last edited:
More pictures. Filing the fret ends.
image.webp

Sanding the frets level.
image.webp

Recrowning with the triangle file.
image.webp
 
I hope not! Not sure I want to move out of Texas! I hadn't seen a post from you in a while. Glad to see you're still around down there. When I get to your build, what would you think about ziricote for the fretboard and bridge?

Jacob
Are you kidding me? Ziricote would be awesome!
 
Some parting shots of the finished instrument. I'll post a video or two as I'm able. Cliff, I hope you enjoy this guitar. It sounds great and I really enjoyed building it.

Jacob

DSC00952.webp

DSC00946.webp

DSC00953.webp
 
thank yu more than words can describe jacob, For all who dont know the backstory: My daughter goes to high school at Interlochen center for the Arts, this was an opportunity for her to recieve and participate in a world class education and environment. I asked jacob to build this guitar for her when she was struggling
mightily as it should be, This build gave her mom and I an uplift during some scary and challenging times . It was our vision to give her something all HER own
as a final graduation present -(this aside of course from college tuition-) something that NO One in the world owned but her, unique as her and as lovely, I think yu all would agree JACOB surely did that and more, He took us all on a journey of his vision and talents, and my wife and I are forever grateful. If anyone is wondering what my end of the trade is, Jacob will recieve a pallet of wood, stuff he has never seen Im sure, He asked for a rather modest amount and my feelings are: this is hokey!!! he will get what I send :yipee::old::cool2: As Forrest Gump the great philiospher said "thats all i have to say about that" Oh my daughter is turning into an amazing, songwriter,poet and player, Her final senior project was to record her own original album of songs and poems, and design the art for the album cover. She like jacob also hit it out of the park and, this is a BIG AND , she knows now she deserves sucess and has talent, I hope yu guys enjoyed this journey as much as Helen and I. Peace to yu Jacob

 
Last edited:
Here's a couple of links to two short videos I made on my iPad. Hopefully, they capture a little of the awesome sound of this guitar.

Jacob


Back
Top