You are using an out of date browser. It may not display this or other websites correctly.
You should upgrade or use an alternative browser.
You should upgrade or use an alternative browser.
First guitar - dreadnaught
- Thread starter DLJeffs
- Start date
- Thread Starter Thread Starter
- #82
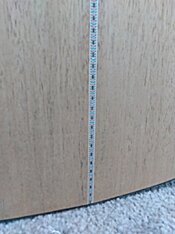
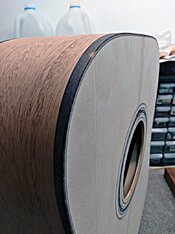
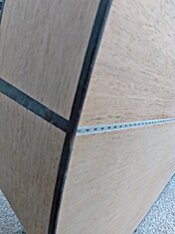
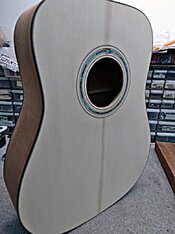
Went down to my coach's shop today, hoping to watch his CNC mill cut out some necks. Unfortunately, minor glitches forced us to stop partway through. But I got to fondle the body. It's out of the cordage wrap and tape and is cleaned up and ready for finish. Looks and sounds really great. I forgot my camera so these pics are from my phone. The color isn't quite accurate.


- Thread Starter Thread Starter
- #83
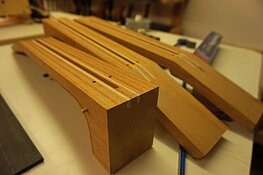
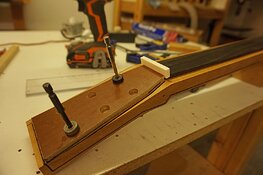
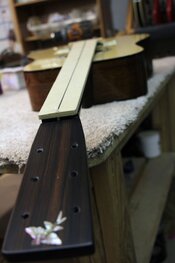
Worked on the neck today...and re-bent a second set of mahogany sides so I can start on guitar #2. My coach is making a few accoustics for his boss so made some jigs and cut out the neck on his CNC. First we joint one side so we have a flat surface to register to. Next, we rough the sides out on the band saw. Then we clamp them to a jig on the CNC and cut two grooves for maple stiffeners. After we glued those in and sanded flat, we clamp the necks back in the CNC and it planes the headstock and the fingerboard surface. It also cuts the groove for the truss rod and the alignment holes for the fingerboard.
I bent a second set of mahogany sides a while ago and put them into a body jig I made from cardboard. One of the sides must have shifted in the bender so the ends wouldn't butt against the other side when I put them in the form. So we tried to re-bend them today. The first side came out better and the second side was still in the bender. Hopefully I'll be able to use them. If not, I have a set of ebony sides and back that will be a gorgeous guitar. I also have a set of figured myrtle sides and back that will be the third guitar.
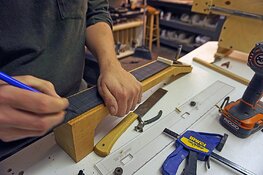
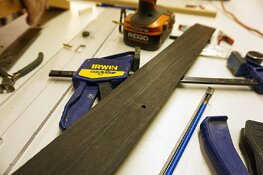
So while the side was cooling, we worked on the fingerboard. Using another jig, we drilled holes to match the alignment pins the CNC drilled in the neck. The fingerboard I got already had fret grooves but it wasn't 100% square so we had to mark it up and square it off. Then we checked the length and how it fit against the rosette (if it's off center that's where it will really show).
Next I'll finish truing the sides of the fingerboard and we'll finish cutting out the neck. Then I'll shape the back and heel of the neck. My coach is working on transferring my design for an inlay for the headstock and we'll use the CNC to cut it out. Then we'll drill holes for the neck attachment and the tuners and get ready to attach the neck and then the bridge.


It’s looking good. Have you and your coach decided yet on the neck heel joint whether it would be dovetail or bolt-on?
- Thread Starter Thread Starter
- #85
We're doing bolt on for this one. He's doing a dovetail on the one he's building for his boss. He's there's pluses and minuses to both (like just about everything we've done so far). Do you have a preference? And if so, why? I'm working on getting a second set of sides bent so I can start on #2 when this one goes to the spray booth. I screwed up on half of the mahogany set I had so we're tried to re-bend them yesterday. If they don't come out usable, I'll switch to a set of ebony sides I have.
I am a traditionalist when it comes to joinery, so I prefer the detail and coupling of wood to wood. However, I don’t mind the bolt-on because of the “convenience” factor and you will thank yourself if the neck needs a little tweaking without having to do a reset.We're doing bolt on for this one. He's doing a dovetail on the one he's building for his boss. He's there's pluses and minuses to both (like just about everything we've done so far). Do you have a preference? And if so, why? I'm working on getting a second set of sides bent so I can start on #2 when this one goes to the spray booth. I screwed up on half of the mahogany set I had so we're tried to re-bend them yesterday. If they don't come out usable, I'll switch to a set of ebony sides I have.
If you are adventurous enough and open to it, I would do one of each since you have the same specs. on both. You can then compare to see if you hear a subtle difference in the sound transfer as the neck is a “tone filter”. The bolt-on will have a very slight bright sound projection in my playing experience. YMMV.
Ebony sides? You have to make sure you have this guitar properly humidified during the winter season. Ebony likes to drink. If it is not properly hydrated, you will see checking and cracking. This is the trouble with ebony.
Last edited:
- Thread Starter Thread Starter
- #87
Arn -
Do you have a favorite humidifier for inside a guitar case? I have a very old, very cheap one - it's a piece of porous ceramic inside a plastic yellow snap lid container.
Do you have a favorite humidifier for inside a guitar case? I have a very old, very cheap one - it's a piece of porous ceramic inside a plastic yellow snap lid container.
Arn -
Do you have a favorite humidifier for inside a guitar case? I have a very old, very cheap one - it's a piece of porous ceramic inside a plastic yellow snap lid container.
Doug @DLJeffs - I use the product below and stretch it out to about 6 months on the acoustic (they suggest shorter period; but 6 months is the max for me). For my electrics, I use the same thing but stretch it out a bit longer because 95 percent of the guitar has a finish on it (the fretboard is unfinished); whereas the acoustic inside the box is totally unfinished including the fretboard and the saddle. I locate this bag underneath the neck close to the neck heel and for acoustic inside the sound hole. See links below.
Humidipak Maintain | Accessories | D'Addario
D'Addario Humidipak is the only maintenance-free, two-way humidity control system for guitar. It automatically maintains the optimal 45%-50% relative humidity level within your instrument case, eliminating the guesswork and potential mess
www.daddario.com
^This method can be costly depending on how fast you changed the paks. It could run you $ 50 per year or $ 100 per year, but you deal with no water mess or the sanitary debate with using a standard drop in humidifier at the sound hole or loose pod in the case.
The below also works which is a “manual sponge” and what basically most people use because it is economical to use, but you have to do more monitoring to make sure the sponge does not become dry- so refilling schedules is a must. I have used this and it works fine- so does the luthiers that I know. See link below:
Acoustic Guitar Humidifier Pro | Accessories | D'Addario
The D’Addario Humidifier Pro protects your guitar even in the driest conditions. Using a specialized hydrophilic sponge that holds 12x its dry weight in water (much more than an ordinary sponge), the Humidifier Pro allows for longer periods between re-fills and increases protection in drier...
www.daddario.com
Then there are the room humidifiers that works well, but requires monitoring when you need to refill with water and it does add to your electrical bill as it gets plugged into your electrical outlet. My brother and sister in law uses this in tandem with the humid packs because they have very old and very expensive violins and violas.
Oh and you need to invest in one of these and it is a must to have a hygrometer in the room were your instruments reside-
The maintenance factor is the challenging aspects if want your acoustics to stay healthy and be playable at optimal level. It is almost like “following a 2 year old around” to make sure they are fed, they get there proper nap time, time for the bottle and whether it is that time to change their diapers again- I don’t know what is worst between the two?

Last edited:
- Thread Starter Thread Starter
- #89
This is actually going to be for my second guitar. But I got my rosette jig from StewMac and gave it a try today. I cut some ebony thins to the same width and diameter as my abalone. I have a vision of a mixed abalone / black ebony main rosette ring with a couple cream & black purfling rings one each side.
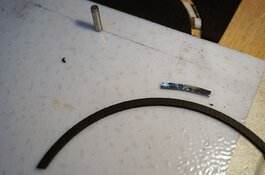
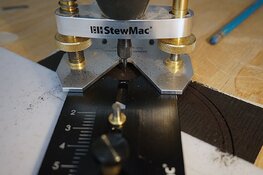
Oh yeah, my coach texted me and we're going to work on the neck Sunday. Sweet. Getting closer.


Oh yeah, my coach texted me and we're going to work on the neck Sunday. Sweet. Getting closer.
Last edited:
- Thread Starter Thread Starter
- #90
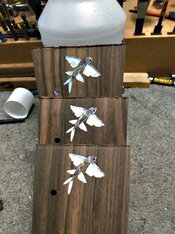
My coach finished the headstock inlays on his CNC. They came out really really nice. He made three headstock plates since I hope to make a minimum of three guitars.
Flying fish are very cool fish. The family name is exocoetidae, which is from the ancient Greek roughly meaning "sleeping outside". It was thought that flying fish left the water to sleep on land because of the way they flew across the waves and because they were often found on boats. The Exocet missile is named after flying fish. I worked up a design that I thought would incorporate the abalone and mother of pearl nicely.
Flying fish are very cool fish. The family name is exocoetidae, which is from the ancient Greek roughly meaning "sleeping outside". It was thought that flying fish left the water to sleep on land because of the way they flew across the waves and because they were often found on boats. The Exocet missile is named after flying fish. I worked up a design that I thought would incorporate the abalone and mother of pearl nicely.

Last edited:
- Thread Starter Thread Starter
- #91
- Thread Starter Thread Starter
- #92
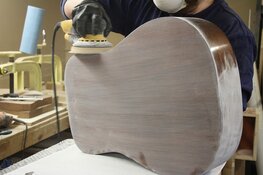
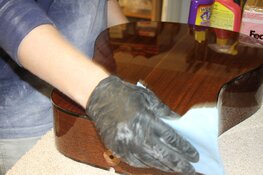
Finally got time in the guitar shop with my coach. We got both first and second bodies buffed. They looked pretty darn good just after spraying. Then my coach took a random orbital sander to one, with 800 grit paper. I cringed! But as they say, sometimes you need to crack a few eggs to make a cake - or something like that.
So we sanded the finish down, stopping to wipe and search for any shiny spots, grain pores, etc. Next, buffed them on the wheels using red rouge and then white and finally with no compound. Last we took them to the workshop and did a final wipe with wax and buffed that off with a soft cloth. These things glisten like glass now (check out the reflexion of the top of one guitar in the back of the other below). The tortoise shell binding and heel plate show up way better, the mahogany sparkles with red-gold sparks, and the rosettes look three-D. Really amazing how much better they look from before. Next up we'll be attaching necks and bridges.
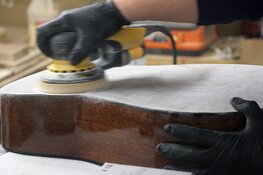
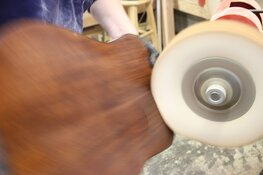
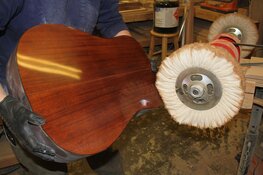
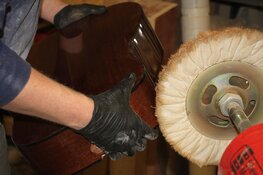
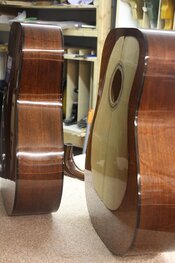
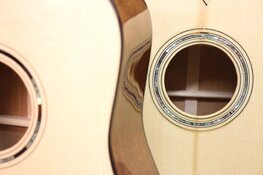
So we sanded the finish down, stopping to wipe and search for any shiny spots, grain pores, etc. Next, buffed them on the wheels using red rouge and then white and finally with no compound. Last we took them to the workshop and did a final wipe with wax and buffed that off with a soft cloth. These things glisten like glass now (check out the reflexion of the top of one guitar in the back of the other below). The tortoise shell binding and heel plate show up way better, the mahogany sparkles with red-gold sparks, and the rosettes look three-D. Really amazing how much better they look from before. Next up we'll be attaching necks and bridges.


Last edited:
That’s an amazing and very impressive transformation! Chuck
That is a first class finish! You found a jewel when you got this coach!
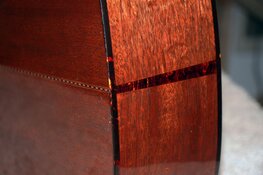
Well done Jeff- looking like dipped glass When you get a chance next time is if you can get a close up of the tortoiseshell binding with the mahogany to show the members here- it is the perfect combination with Honduran mahogany. I love that combo with koa (it looks incredible with snakewood too).
 When you get a chance next time is if you can get a close up of the tortoiseshell binding with the mahogany to show the members here- it is the perfect combination with Honduran mahogany. I love that combo with koa (it looks incredible with snakewood too).
- Thread Starter Thread Starter
- #96
Arn asked for a shot showing the tortoise shell binding on the mahogany sides and back. Here's a shot of the heel plate and binding. This might be a little lighter than actual, but when we buffed them out the contrast between the tortoise shell and mahogany did increase and you could see the color variations in the tortoise shell more. They do look really good together. Forgive the dust on the back, I didn't stop to wipe it off.

- Thread Starter Thread Starter
- #98
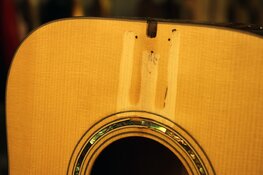
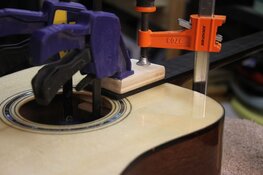
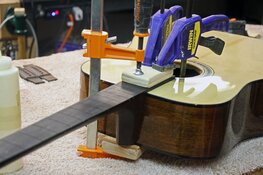
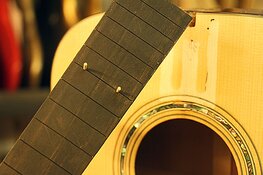
Got one neck attached today. Planned to do both but my coach had a pesky guitar / customer who needed attention. We'll do the second one and attach the bridge on this one tomorrow (we hope).
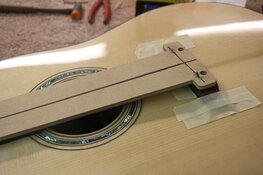
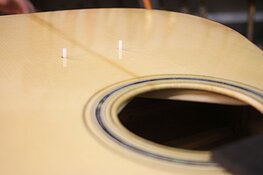
We final fit the neck - required a little careful sanding and chiseling, removing glue beads, places where finish had accumulated, etc. Then, we marked where the neck would go and drilled two small holes for inserting toothpicks so we could align the neck in that exact place when we glued it. These toothpicks will be hidden beneath one of the fret wires later.
Next we used a router to remove most of the finish where the fingerboard attaches to the body. This is actually the only area that gets glued.
Then it was time to glue. Applied glue, used the toothpicks to align the neck, positioned cauls and applied clamps. Cleaned up glue squeeze out and then it was set aside to cure.


Last edited:
Looks like quite the process. Still watching from the easy chair...
- Thread Starter Thread Starter
- #100
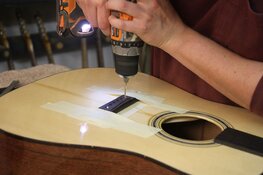
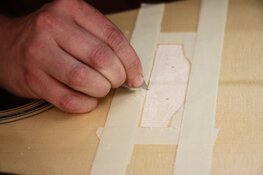
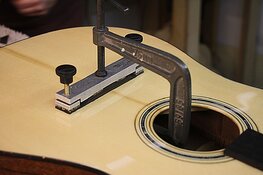
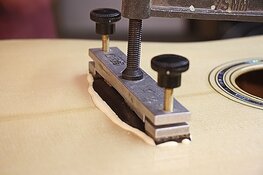
Glued the neck on guitar #2 and then glued on the bridge on guitar #1. Once again, it was a little scary taking a router and drill and scraper to that beautifully finished and buffed top. Steps to attach the bridge are:
1. locate bridge - distance from the 12 fret, and centering on the fingerboard, we used a templated and long straight edge
2. once properly located, drilled registration pins so we can get it back into that exact placement after we routed off the lacquer finish
3. mask off the location, carefully scribe the edge of the area we want to clean up, then use a router to remove the lacquer finish
4. using a razor blade as a scraper, clean up any remaining lacquer and put a slight chamfer on the edge, remove any fuzzy shavings, etc.
5. tape a caul to the bridge plate inside the guitar body, apply lots of glue, and then using the registration pins, stick the bridge back on
6. apply the bridge clamp on the outside, then using a long reach clamp tighten it all down until we see lots of squeeze to clean up using Q tips, toothpicks and a damp cloth


