

The boss declared this year's Christmas tree to be decorated with only white lights and wooden ornaments, so off to the shop I went to make the lights… No… the ornaments. Thought you folks might like to see one way of making bell style ornaments. There are certainly lots of ways to do it, and there are a lot of folks who do it better. If anybody has a trick or pearl on the topic, please don't be shy.
I generally start with a stopper sized blank of something… In this case, it's a little piece of cherry burl I got from Cory(burlguy72). I glue it to a block that's held in a chuck. I use thick CA, but there are lots of opinions and options with adhesives.
[attachment=14522]
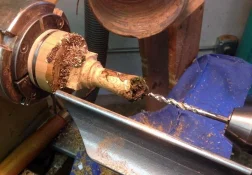
Next, I rough the outside shape of the lower 2/3 of the bell. I like to leave a little meat close to the glue block to give some stability while hollowing the inside. After that, I load a 1/4" drill bit on the tailstock, and I drill all the way through the blank. Any sized bit would work, but I tend to use 1/4" for all my finial joints.
[attachment=14523]
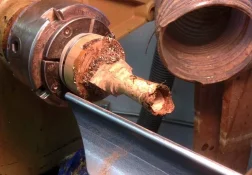
Next, I hollow the inside of the bell. I don't make an effort to get all the way to the top of the bell, but I do try to keep the walls an even thickness at least to a point above the highest reach of the natural edge.
[attachment=14524]
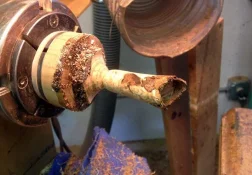
Now, it's time to finish the outside profile and sand. Don't forget that there's a 1/4" hole all the way through… Been there, done that.
[attachment=14525]
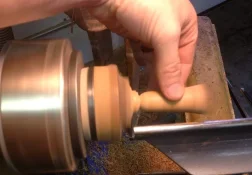
This picture shows how I gently hold the spinning bell with my left hand while I'm parting it off with my right hand. I couldn't figure out how to hold the bell, the tool, and the camera at the same time… I've asked for a third arm for Christmas.
[attachment=14526]
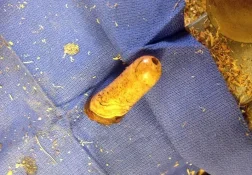
Here's a shot of the finished bell with a slathering of walnut oil.
[attachment=14527]
Next up, the handle….
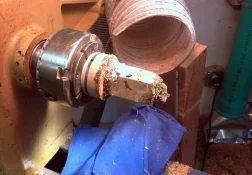
I generally start with a stopper sized blank of something… In this case, it's a little piece of cherry burl I got from Cory(burlguy72). I glue it to a block that's held in a chuck. I use thick CA, but there are lots of opinions and options with adhesives.
[attachment=14522]
Next, I rough the outside shape of the lower 2/3 of the bell. I like to leave a little meat close to the glue block to give some stability while hollowing the inside. After that, I load a 1/4" drill bit on the tailstock, and I drill all the way through the blank. Any sized bit would work, but I tend to use 1/4" for all my finial joints.
[attachment=14523]
Next, I hollow the inside of the bell. I don't make an effort to get all the way to the top of the bell, but I do try to keep the walls an even thickness at least to a point above the highest reach of the natural edge.
[attachment=14524]
Now, it's time to finish the outside profile and sand. Don't forget that there's a 1/4" hole all the way through… Been there, done that.
[attachment=14525]
This picture shows how I gently hold the spinning bell with my left hand while I'm parting it off with my right hand. I couldn't figure out how to hold the bell, the tool, and the camera at the same time… I've asked for a third arm for Christmas.
[attachment=14526]
Here's a shot of the finished bell with a slathering of walnut oil.
[attachment=14527]
Next up, the handle….


 I love that design. I have made ornaments in the past but more in the style of your 3 on top. I really like the bell design. I bet that makes an awesome looking tree... you should post pics when its decorated.


