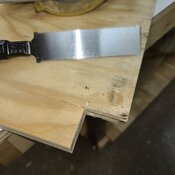
Outdoor cat shelter.

woodtickgreg

scroll, flat, spin
Staff member
Administrator
Global Moderator
Founding Member
Full Member
Forum Moderator
Messages
19,743
Reaction score
29,668
Location
Eastpointe, Mi. usa
First name
Greg
I have fed a colony of outdoor feral cats for years. I leave one board off on the end of my porch so they have a place to go to get out of the rain, wind, and cold. But this year in addition to that I'm also going to build them a shelter.
I'll start with a free shipping crate on a pallet.
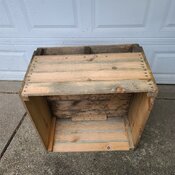
20211023_162841.jpg
Pulled these 2 blocks from the inside so it will be easier to fit a plywood bottom.
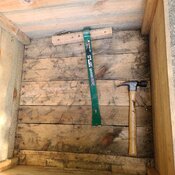
20211023_163438.jpg
The whole thing will be wrapped in plywood to make it more windproof. This is 5/8" exterior grade plywood that I salvaged.
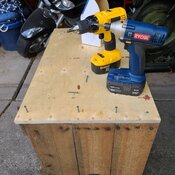
20211023_163952.jpg
Here you can see how some of the screws came through on the inside, a 4" grinder with a flap disc took care of that quickly.
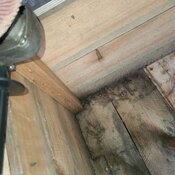
20211023_171400.jpg
I cut a piece of ply wood for the bottom and notched the corners to clear the inside corner post.
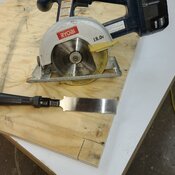
20211023_173200.jpg 20211023_173242.jpg
I layed it in the bottom and screwed it down.
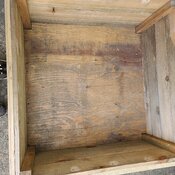
20211023_173743.jpg
So now I need some boards for the roof. I want to make it a hinged top so I can clean it out as needed and add fresh straw bedding as required.
this is some rough saw poplar I've had on hand for a long time, I figured this would be a good use for it. So I dimensioned it to 2x3. Actually 11/2"×2 3/4"
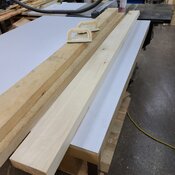
20211023_180701.jpg
So here's the dimensioned boards. I'll probably have to make some more for the roof rafters.
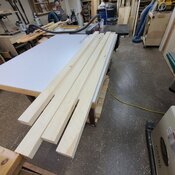
20211023_185656.jpg
I'll post more as this progresses.
 
Last edited:

woodtickgreg

scroll, flat, spin
Staff member
Administrator
Global Moderator
Founding Member
Full Member
Forum Moderator
Messages
19,743
Reaction score
29,668
Location
Eastpointe, Mi. usa
First name
Greg
  • Thread Starter Thread Starter
  • #2
Well today it was raining still so I worked in the shop a bit on the cat shelter roof.
I set the stop on my miter saw fence and cut the 4 boards for the roof lid to length.
20211030_155256.jpg
And here they are, the ends that didn't clean up will get nibbled away when I cut half lap joints.
20211030_155718.jpg
I love this arbor lock on my saw! Removed the blade to install a dado stack.
20211030_155740.jpg
I stalled the new dado Insert and Leveled it.
20211030_160749.jpg
This is my set up for cutting the half lap joints. I clamped a stop block to the fence so I could safely use the miter gauge and not worry about kickback.
20211030_161632.jpg
Test cut is fine.
20211030_161930.jpg
I used some tb2 since I was out of tb3 and screwed the joints together.
20211030_165117.jpg
Some simple 45 degree roof rafters to keep things simple.
20211030_171105.jpg
I need one more rafter so I scrounge up some more scrap poplar, it's a little narrower but it'll work just fine.
20211030_171250.jpg
So here's the rafters all screwed on.
20211030_174531.jpg
 

woodtickgreg

scroll, flat, spin
Staff member
Administrator
Global Moderator
Founding Member
Full Member
Forum Moderator
Messages
19,743
Reaction score
29,668
Location
Eastpointe, Mi. usa
First name
Greg
  • Thread Starter Thread Starter
  • #3
Next I cut a strip of scrap pine 1" wide to use as a soffit to close the gap so drafts would be minimal. 20211030_175604.jpg
This is where the 1" strip for the soffit is needed.
20211030_175839.jpg
And here it is ready for plywood. It will be attached with hinges when it's done.
20211030_180232.jpg
 

woodtickgreg

scroll, flat, spin
Staff member
Administrator
Global Moderator
Founding Member
Full Member
Forum Moderator
Messages
19,743
Reaction score
29,668
Location
Eastpointe, Mi. usa
First name
Greg
  • Thread Starter Thread Starter
  • #4
I salvaged 2 more pallets for the roof plywood.
20211101_183901.jpg
 

woodtickgreg

scroll, flat, spin
Staff member
Administrator
Global Moderator
Founding Member
Full Member
Forum Moderator
Messages
19,743
Reaction score
29,668
Location
Eastpointe, Mi. usa
First name
Greg
  • Thread Starter Thread Starter
  • #5
Worked on the main box for the shelter today. Used left over roofing materials from my garage roof job.
I wrapped the corners with ice and water shield.
20211113_112741.jpg
And then covered everything with shingles. The shingles are wider than the box so I wrapped them around the corners too. The shingles should keep it dry.
20211113_123201.jpg
Then I drilled a 6" hole in the box.
20211113_124148.jpg
Most online instructions say to use a 6" hole or opening.
20211113_124806.jpg
The double wall wood and the shingles should also add some insulating properties I hope.
 

2feathers Creative Making

Member
Full Member
Messages
5,138
Reaction score
6,706
Location
Crossville Tennessee
First name
Frank
Worked on the main box for the shelter today. Used left over roofing materials from my garage roof job.
I wrapped the corners with ice and water shield.
View attachment 218336
And then covered everything with shingles. The shingles are wider than the box so I wrapped them around the corners too. The shingles should keep it dry.
View attachment 218337
Then I drilled a 6" hole in the box.
View attachment 218338
Most online instructions say to use a 6" hole or opening.
View attachment 218339
The double wall wood and the shingles should also add some insulating properties I hope.
Used to be a pretty good hole saw there. Love those quick change arbors.
 

Nubsnstubs

Where is it???
Full Member
Messages
3,468
Reaction score
7,735
Location
Tucson, Arizona
First name
Jerry
Gregg, it looks like a ground floor Penthouse for stray cats. How are you gonna entice then into entering that top class accommodation?? ............ Jerry (in Tucson)
 

woodtickgreg

scroll, flat, spin
Staff member
Administrator
Global Moderator
Founding Member
Full Member
Forum Moderator
Messages
19,743
Reaction score
29,668
Location
Eastpointe, Mi. usa
First name
Greg
  • Thread Starter Thread Starter
  • #8
Gregg, it looks like a ground floor Penthouse for stray cats. How are you gonna entice then into entering that top class accommodation?? ............ Jerry (in Tucson)
Cold weather....... .
 

woodtickgreg

scroll, flat, spin
Staff member
Administrator
Global Moderator
Founding Member
Full Member
Forum Moderator
Messages
19,743
Reaction score
29,668
Location
Eastpointe, Mi. usa
First name
Greg
  • Thread Starter Thread Starter
  • #9
I stripped the last pallet for the final sheet of plywood. Then layed out for the ends of the roof/lid.
20211113_160342.jpg
Stood it on end on the floor......
20211113_160459.jpg
And screwed the panel on.
20211113_161353.jpg
Snoopy would be proud, lol.
20211113_162241.jpg
Found some hinges for the lid.
20211113_162504.jpg
And screwed them on.
20211113_162944.jpg
I'm hinging the roof so I can clean it out as needed and put fresh straw bedding in from time to time.
 

JerseyHighlander

Member
Full Member
Messages
1,185
Reaction score
2,224
Location
Hurdtown, New Jersey
First name
Kyle
That's awesome. I have three in the house now, all of which were once feral, decided to stay around, were given access to the crawlspace under the corner of the house that has the wood burning stove, then guilted their way inside. Spoiled little mongrels one and all.
Think about putting a shelf along each side of the roof cover with access from the box, they love to sleep higher up and that's where the heat will collect too.
 

woodtickgreg

scroll, flat, spin
Staff member
Administrator
Global Moderator
Founding Member
Full Member
Forum Moderator
Messages
19,743
Reaction score
29,668
Location
Eastpointe, Mi. usa
First name
Greg
  • Thread Starter Thread Starter
  • #11
I got the roof on and shingled today. Just gotta pick up some straw for bedding now. Kitties have already been using it so I guess they approve.

I carried the roof up from the shop and set it in place, just enough overhang.
20211120_130455.jpg
Then I screwed the hinges down. It'll be nice to be able to lift the lid to clean it out and replace the bedding as needed.
20211120_130511.jpg
Starter strip and ice and water shield on the peak, it was all I had left.
20211120_133408.jpg
Shingled the sides.
20211120_135747.jpg
Roofs all done and capped.
20211120_143625.jpg
This should help keep the little furballs warm and dry this winter.
20211120_143657.jpg
This is where it will stay, protected from the wind, opening is on the left.
20211120_143938.jpg
The kitties used to shelter under my front porch, but there's a possum living under there now so I made them a new house. The possum needs a place to live too, lol. Folks don't realize how beneficial possums really are, they eat more rodents and insects than the cats do. All those sharp pointy teeth aren't for veggies.
 

woodtickgreg

scroll, flat, spin
Staff member
Administrator
Global Moderator
Founding Member
Full Member
Forum Moderator
Messages
19,743
Reaction score
29,668
Location
Eastpointe, Mi. usa
First name
Greg
  • Thread Starter Thread Starter
  • #13
I had a hard time finding straw without buying a whole bale that would be wet from being stored outside. None at the pet food store, none at home depot, tractor supply was out and had no idea when they would get more. I finally found some at a farm and home store about 20 miles from my house. Cost $12 and there's enough to change it several times or add to it.
20211121_170454.jpg
It's about 6 inches deep here.
20211121_170506.jpg
 

Mr. Peet

Member
Full Member
Messages
7,269
Reaction score
7,904
Location
northeastern PA
First name
Mark
Not to add work, but, a piece of insulating foam in the cap might help. Looks like you have nearly 1.5 times more air space in the peak than in the box, therefore much more air space absorbing body heat. Or do you add another piece of plywood to create a second story in the peak, with a hole to crawl in from the first? Have it hinged to open for maintenance, or use it to store the extra straw...
 

woodtickgreg

scroll, flat, spin
Staff member
Administrator
Global Moderator
Founding Member
Full Member
Forum Moderator
Messages
19,743
Reaction score
29,668
Location
Eastpointe, Mi. usa
First name
Greg
  • Thread Starter Thread Starter
  • #16
You also can use cedar shavings to keep fleas down. They are available many places around here.
I saw the cedar bedding but didnt think it would be as good with moisture, most recommend straw for bedding because it's better with moisture.
Not to add work, but, a piece of insulating foam in the cap might help. Looks like you have nearly 1.5 times more air space in the peak than in the box, therefore much more air space absorbing body heat. Or do you add another piece of plywood to create a second story in the peak, with a hole to crawl in from the first? Have it hinged to open for maintenance, or use it to store the extra straw...
I have been thinking of adding some kind of a light in the peak that may create some heat, but I haven't had the ah ha idea yet.
 

Mr. Peet

Member
Full Member
Messages
7,269
Reaction score
7,904
Location
northeastern PA
First name
Mark
I saw the cedar bedding but didnt think it would be as good with moisture, most recommend straw for bedding because it's better with moisture.

I have been thinking of adding some kind of a light in the peak that may create some heat, but I haven't had the ah ha idea yet.
Like a brooder lamp on a thermostat. Winter Watchman would work, but needs to be on a 12 gauge extension cord and in the box to monitor temps. Use a lower heat rate to limit cooking the cats or fire risk. Careful using heat tape, as the new units have the thermo on the plug end, not the action end where it is needed.
 

JerseyHighlander

Member
Full Member
Messages
1,185
Reaction score
2,224
Location
Hurdtown, New Jersey
First name
Kyle
I know there are heating mats of different types made specifically for outdoor cat condos. Not sure they're made to work under the straw though. I never bought one cause I couldn't find one that wasn't made in China+electrical+under my house.
If straw is an issue, Tractor Supply sells large bagged bales of Pine chips, made specifically for stall bedding & it's dirt cheap. We use it instead of litter for one of the litter boxes. Plenty of moisture there and it's no issue at all.

Any thoughts about throwing a cheap web cam inside so you can see that they're doing in there?
 
Last edited:

woodtickgreg

scroll, flat, spin
Staff member
Administrator
Global Moderator
Founding Member
Full Member
Forum Moderator
Messages
19,743
Reaction score
29,668
Location
Eastpointe, Mi. usa
First name
Greg
  • Thread Starter Thread Starter
  • #19
I know there are heating mats of different types made specifically for outdoor cat condos. Not sure they're made to work under the straw though. I never bought one cause I couldn't find one that wasn't made in China+electrical+under my house.
If straw is an issue, Tractor Supply sells large bagged bales of Pine chips, made specifically for stall bedding & it's dirt cheap. We use it instead of litter for one of the litter boxes. Plenty of moisture there and it's no issue at all.

Any thoughts about throwing a cheap web cam inside so you can see that they're doing in there?
Thanks for the info. I saw the pine bedding at the stores but most info I found said to use straw so that's what I got.
And no, I don't have any webcams, lol.
 
Top