Redwood Burl Coffee table

GS-76

Member
Full Member
Messages
94
Reaction score
204
Location
Myrtle Point OR
First name
Gary
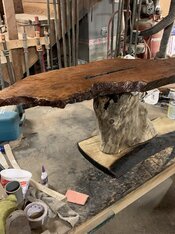
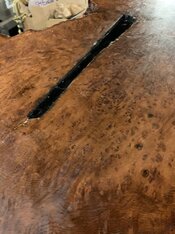
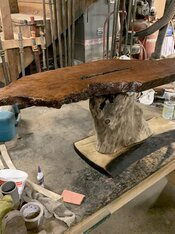
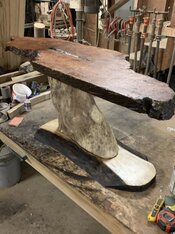
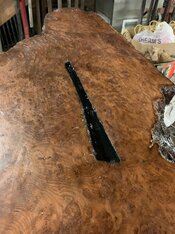
Working on a 150 yr old Redwood Burl top coffee table with a Myrtle live edge base, with a Myrtle crotch stump. Sealer coats are on and gap on top is partially filled with black tinted epoxy. Now i am adding small river rock and will do final fill with clear epoxy. Also going to do another coat of amber shellac to darken base top
a bit to match Redwood top a bit more. Need to do sealer coat in base stump yet and do final finish with top coat.
C21A9CFE-1980-4AA1-A1BA-565C3634C3A3.jpeg

8C107841-2387-4F0A-8269-313F2A2C16D9.jpeg

0CBF339A-34AD-4CD5-83DB-B1F949F9A71B.jpeg

2BD9C30E-0C55-45D0-82AC-A0028445D1C8.jpeg

00330261-D316-4872-9213-B5CCBB2408E7.jpeg
 
Last edited by a moderator:

Karl_TN

Member
Full Member
Messages
1,986
Reaction score
2,903
Location
Rosemark TN
First name
Karl
Looking good so far. How did you fasten the top and bottom the the upright part?
 

GS-76

Member
Full Member
Messages
94
Reaction score
204
Location
Myrtle Point OR
First name
Gary
  • Thread Starter Thread Starter
  • #5
Cliff, will do when i get the rock in. Karl, top and bottom are glued and pegged with 1-1/4" dowels.
 

DLJeffs

Member
Full Member
Messages
4,336
Reaction score
10,082
Location
central Oregon
First name
Doug
Nice looking table Gary. The offset between the top and base made me think of the coastal cypress trees that are always leaning one way or another.
 

GS-76

Member
Full Member
Messages
94
Reaction score
204
Location
Myrtle Point OR
First name
Gary
  • Thread Starter Thread Starter
  • #9
Well i am down to spraying finish on this table. Long hole filled with black tinted west sytem epoxy and then small colored rocks added and final pour done in clear system west epoxy. Top is still wet and finish is laying down still. I will let dry for a few days and sand & buff out.

AE6EAC03-9350-44FE-A92C-AB99FDE28C0E.jpeg

32EBB5CD-0710-4B93-91A8-0CC42D3E8E97.jpeg

57236963-4F03-42C9-A60D-2DCA041CE7BF.jpeg

F27DC3EB-C457-4864-91F0-34CC02B1E9B9.jpeg

D7C9F586-588C-43BD-A431-74D0AA1FED50.jpeg
 

2feathers Creative Making

Member
Full Member
Messages
5,047
Reaction score
6,557
Location
Crossville Tennessee
First name
Frank
Well i am down to spraying finish on this table. Long hole filled with black tinted west sytem epoxy and then small colored rocks added and final pour done in clear system west epoxy. Top is still wet and finish is laying down still. I will let dry for a few days and sand & buff out.

View attachment 217071

View attachment 217072

View attachment 217073

View attachment 217074

View attachment 217075
Was the hole that you filled naturally occurring or a result of some part of processing?
 

GS-76

Member
Full Member
Messages
94
Reaction score
204
Location
Myrtle Point OR
First name
Gary
  • Thread Starter Thread Starter
  • #16
Twofeathers: It was in the wood when i got it and i think it is a chainsaw cut from loggers. The slab is thought to be 150 yrs according to family members. There were 2 of them and one i already made a coffee table of .
 

ScoutDog

Member
Full Member
Messages
301
Reaction score
311
Location
Texas
First name
JB
Very interesting table!
The attitude kinda reminds me of the acacia tree silhouette:

1635879532499.png

I suppose it's full circle when a finished project made of wood resembles a tree...
Nice work, @Gary Schuler !
 
Top