

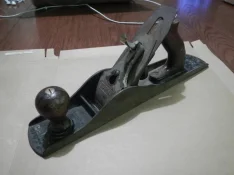
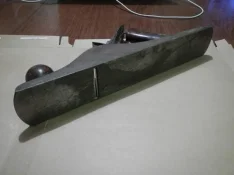
Well, I had bought an old stanley a while back while I was at school and this is the first time I've had free to actually start working on it and doing the restoration. So here it is...
[attachment=26215]
[attachment=26216]
It's not in the best of shape, there is a significant amount of rust on most of the parts and the rear handle is snapped in half. I am still deciding on whether or not to try to repair the handle with epoxy or just make a new on from the extra cocobolo that I have here. I'll save that part for later so I have a little more time to think about what I am going to do.
[attachment=26217]
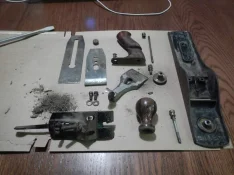
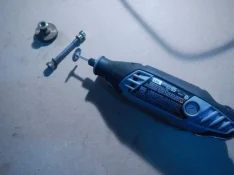
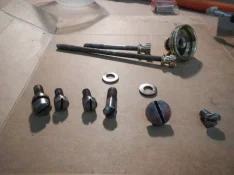
All taken apart, my first section to attack was the all of the different nuts and threaded rods. I took out the dremmel with the metal brush attachment and got to work. I went pretty light on them to not create scratches but it did a pretty nice job getting rid of most of the rust.
[attachment=26218]
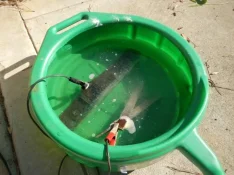
Now, for the main body. There is no way I'm spending a lot of time try to strip this thing by hand, it has a ton of rust on it. Time for electrolysis. Just a disclaimer, never do this indoors, keep the positive lead of your battery charger out of the water, and make sure the scrap steel and the main piece you are stripping never touch or your battery charger might catch on fire. Ok, so I have the plane bed, I've used hot water and baking soda as the wash liquid to saturate the water creating an electrolyte medium for the charge to travel through. This will probably have to sit for a full 24 hours to get it stripped to the level I want it to be.
[attachment=26219]
[attachment=26220]
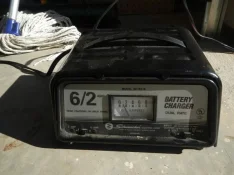
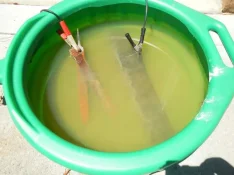
Keep an eye on the charger periodically, the amperage shouldn't be up super high, if it does start raising up it's best to turn it off and add more space between your scrap metal and your main piece to keep your charger at a lower level since you'll be using it for a long period of time. Here's a picture after about 2 hours, you can see some of the water is clouding a copper color and that the electrolysis is starting to work, now all that's needed is some more time.
[attachment=26221]
Next thing I did was I took the polishing attachment on the dremel and with mother's polish I started giving that shine to the different metal components. The brass pieces were scraped and polished to a fine sheen but the steel components were left with a decent amount of patina left on them. The big thing in this project is that I didn't want the plane to look brand new to keep some of the age with it after restoration.
[attachment=26222]
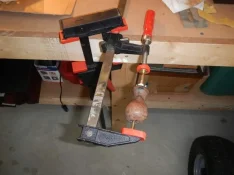
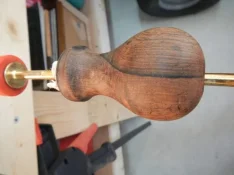
Here is the first part of the project where I have to start creating some "jerry-rigged" contraptions to get the work done. Normally it would be easiest to pop the front handle on a drill press to sand it down but I don't own one so I used a couple clamps to hold it in place while is worked up to 2000 grit. I didn't sand all of the way past the scratches but just resurfaced the bulk of the handle so it feels nice, but still has the look that it's been used in the past.
[attachment=26223]
[attachment=26224]
That's the last little bit for today. I might work on it a little more tonight once I get back from work around 11:30 but that's where I am at now. I'm looking forward to start working on the steel components and redoing the japaning on the various parts.
[attachment=26215]
[attachment=26216]
It's not in the best of shape, there is a significant amount of rust on most of the parts and the rear handle is snapped in half. I am still deciding on whether or not to try to repair the handle with epoxy or just make a new on from the extra cocobolo that I have here. I'll save that part for later so I have a little more time to think about what I am going to do.
[attachment=26217]
All taken apart, my first section to attack was the all of the different nuts and threaded rods. I took out the dremmel with the metal brush attachment and got to work. I went pretty light on them to not create scratches but it did a pretty nice job getting rid of most of the rust.
[attachment=26218]
Now, for the main body. There is no way I'm spending a lot of time try to strip this thing by hand, it has a ton of rust on it. Time for electrolysis. Just a disclaimer, never do this indoors, keep the positive lead of your battery charger out of the water, and make sure the scrap steel and the main piece you are stripping never touch or your battery charger might catch on fire. Ok, so I have the plane bed, I've used hot water and baking soda as the wash liquid to saturate the water creating an electrolyte medium for the charge to travel through. This will probably have to sit for a full 24 hours to get it stripped to the level I want it to be.
[attachment=26219]
[attachment=26220]
Keep an eye on the charger periodically, the amperage shouldn't be up super high, if it does start raising up it's best to turn it off and add more space between your scrap metal and your main piece to keep your charger at a lower level since you'll be using it for a long period of time. Here's a picture after about 2 hours, you can see some of the water is clouding a copper color and that the electrolysis is starting to work, now all that's needed is some more time.
[attachment=26221]
Next thing I did was I took the polishing attachment on the dremel and with mother's polish I started giving that shine to the different metal components. The brass pieces were scraped and polished to a fine sheen but the steel components were left with a decent amount of patina left on them. The big thing in this project is that I didn't want the plane to look brand new to keep some of the age with it after restoration.
[attachment=26222]
Here is the first part of the project where I have to start creating some "jerry-rigged" contraptions to get the work done. Normally it would be easiest to pop the front handle on a drill press to sand it down but I don't own one so I used a couple clamps to hold it in place while is worked up to 2000 grit. I didn't sand all of the way past the scratches but just resurfaced the bulk of the handle so it feels nice, but still has the look that it's been used in the past.
[attachment=26223]
[attachment=26224]
That's the last little bit for today. I might work on it a little more tonight once I get back from work around 11:30 but that's where I am at now. I'm looking forward to start working on the steel components and redoing the japaning on the various parts.


 ). Anyway, the results of this little mishap was that I completely re-stripped all of the paint again and re-masked the plane and repainted. This ended up being for the better because I found some spare razor blades which made the paint lines crisper and I refined the painting process and I like the finish more as well. It took a good bit of time but I think it was generally worth it in the end. It put me back a day in the process but I'm pretty confident I won't regret going back and fixing my mistake.
 In other words, don't beat yourself up over the details and trying to be so authentic, make it nice and enjoy using it.