

Steve asked how to replicate the grind on the tools he just received from me, this tutorial is meant to answer his questions and hopefully will help others that may not be happy with their current results.
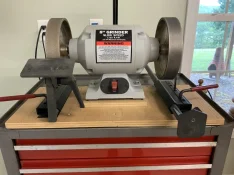
1. This is the setup I use, 80 grit on left for rough shaping and scrapers, 180 grit on right for most everything else. CBN wheel are the way to go, size stays consistent, very little heat generated, easy to care for and should last a lifetime, worth the investment. Note how the grinder and jigs are mounted, secondary 3/4 ply under grinder, if yours is different the geometry will be slightly different but if close the difference will be negligible.
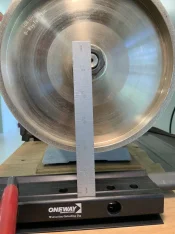
2. If this dimension is the same you will be able to exactly replicate no matter how the grinder and jigs are mounted.
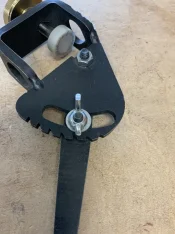
3. Use this setting for most gouges, don’t ever change the setting and have others set differently for different grinds, ie 40/40, traditional. The more left the arm is moved the steeper the angle will be on the wings, the more right the arm moves the straighter the angle will be.
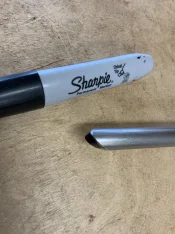
4. Here’s a simple way to know if the setup is right each time the tools is presented to the wheel. Color the entire bevel.
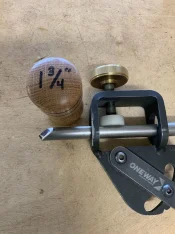
5. Set the tool in the jig with 1 3/4” extending out. No need to over tighten the knob, snug is good and tighten it the same every time. A hole drilled in a piece of wood is a simple way to maintain consistency every time.
6. Place the loaded jig in the arm and adjust the arm until the proper angle is set. Hold the tool against the wheel a spin the wheel by hand. Look at the tool tip and read the rub mark, adjust until the rub is consistent across the bevel. Once set make a register mark on the arm to make it easy to replicate next time, see bottom left corner of pic.
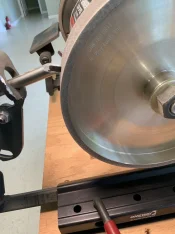
7. Visual of the rub mark.
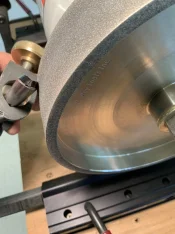
8. Grind the wings first, one side then the other. If the setup is accurate only a few passes will be needed to refresh the edge. Make one pass and read the rub off, should be consistent across the bevel, go until the edge is refreshed.
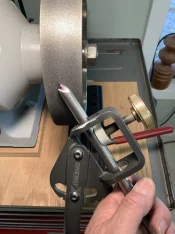
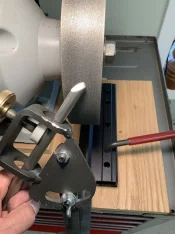
9. Grind the nose to blend in with the wings. The nose will grind quicker, less steel to remove so be gentle.
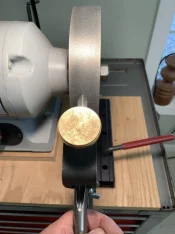
The edge is complete. Once you‘ve done it a few hundred time it becomes second nature. Sharpen often as very sharp tools and proper technique will greatly reduce your sanding time and make each wood turning experience more enjoyable. Hope this helps, questions are always welcome.
1. This is the setup I use, 80 grit on left for rough shaping and scrapers, 180 grit on right for most everything else. CBN wheel are the way to go, size stays consistent, very little heat generated, easy to care for and should last a lifetime, worth the investment. Note how the grinder and jigs are mounted, secondary 3/4 ply under grinder, if yours is different the geometry will be slightly different but if close the difference will be negligible.
2. If this dimension is the same you will be able to exactly replicate no matter how the grinder and jigs are mounted.
3. Use this setting for most gouges, don’t ever change the setting and have others set differently for different grinds, ie 40/40, traditional. The more left the arm is moved the steeper the angle will be on the wings, the more right the arm moves the straighter the angle will be.
4. Here’s a simple way to know if the setup is right each time the tools is presented to the wheel. Color the entire bevel.
5. Set the tool in the jig with 1 3/4” extending out. No need to over tighten the knob, snug is good and tighten it the same every time. A hole drilled in a piece of wood is a simple way to maintain consistency every time.
6. Place the loaded jig in the arm and adjust the arm until the proper angle is set. Hold the tool against the wheel a spin the wheel by hand. Look at the tool tip and read the rub mark, adjust until the rub is consistent across the bevel. Once set make a register mark on the arm to make it easy to replicate next time, see bottom left corner of pic.
7. Visual of the rub mark.
8. Grind the wings first, one side then the other. If the setup is accurate only a few passes will be needed to refresh the edge. Make one pass and read the rub off, should be consistent across the bevel, go until the edge is refreshed.
9. Grind the nose to blend in with the wings. The nose will grind quicker, less steel to remove so be gentle.
The edge is complete. Once you‘ve done it a few hundred time it becomes second nature. Sharpen often as very sharp tools and proper technique will greatly reduce your sanding time and make each wood turning experience more enjoyable. Hope this helps, questions are always welcome.


