Southbend metal lathe find

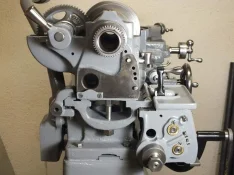
What? nobody noticed that the micrometer carriage stop didn't line up with the unpainted pad? Yup, it's not the correct one for the lathe, but it's the one that came with it. I think I found a correct one, gotta make a call on monday to see. fingers crossed. Well the good thing is I have a real nice restored one to sell. :sarcastic:
 
I'm blown away by this restoration. Just gorgeous.
 
Once you pointed it out its like the elephant in the room that no one sees!

The lathe is looking real nice! Can't wait to see it finished and good luck obtaining that micrometer carriage stop!
 
woodtickgreg said:
What? nobody noticed that the micrometer carriage stop didn't line up with the unpainted pad?

Oh yea saw that right off. :dash2:

I don't even see what you're talking about after you tipped us off. :i_dunno:
 
cody.sheridan-2008 said:
Haven't been on in sooooo long, but I must say this is looking fab!
Where have you been cody? We have missed you here, I hope all is well with you! Drop in to Kenbo's chat room and tell us what you have been up to.
 
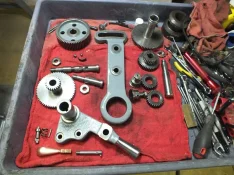
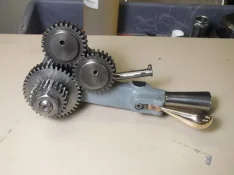
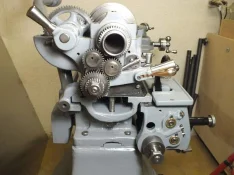
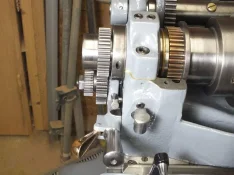
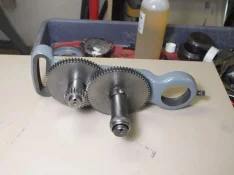
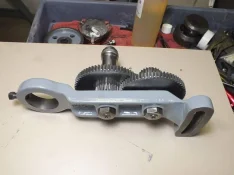
gears-001.webp gears-002.webp gears-003.webp gears-004.webp gears-005.webp gears-006.webp gears-007.webp gears-008.webp gears-009.webp gears-010.webp Well I got all the brackets for the gear train painted and all the gears cleaned and inspected, all is well, no major wear, all the shafts looked great.

[attachment=13602]
A shot of where everything will go.
[attachment=13603]
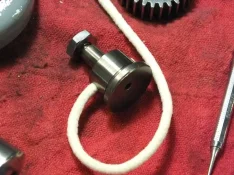
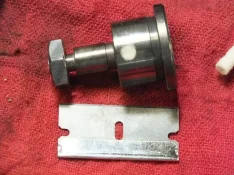
Installing new round wicks into the reversing gear shafts.
[attachment=13604]
And the wick trimmed off.
[attachment=13605]
Reversing gear assembly all ready to be installed on the lathe. Notice the little holes on the top 2 gear shafts, that's where you oil them at, the shafts need to be pressed in so the holes are at the top and gravity feeds the wicks oil.
[attachment=13606]
Reversing gear assembly installed on the lathe. Notice how nice the little bronze lever polished up, that's probably my favorite piece. :biggrin:
[attachment=13607]
Here the top gear on the spindle is driven on, it is a press fit, and centered on the gear it meshes with. There is some room for the take up nut to be adjusted if need be.
[attachment=13608]
Hi - lo range gears all ready to go.
[attachment=13609]
Backside shot of the large nuts that secure the pressed in shafts.
[attachment=13610]
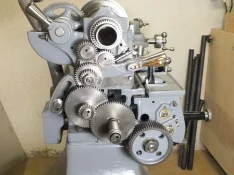
Gear train all installed and centered up, everything turns freely by hand and engages as it should.
[attachment=13611]

 
Last edited:
gears-011.webp gears-012.webp Another shot of the gear train. When I go back and look at the pics of the tear down in the begining the gears where really quite cruddy, this is really quite a transformation
[attachment=13615]
Next up is all the covers. I am going to wash them in the parts washer and take them to a sandblaster for stripping. I wanna wash them first so he doesn't fill his blast cabinet with grease. I have found when you think of others like this you usually get treated better and get good service. I want to blast them to remove all the old paint, especially on the inside where I can't get at them with a wire wheel. All but 2 of these covers are cast iron. American iron.
[attachment=13616]
 
Last edited:
cody.sheridan-2008 said:
Haven't been on in sooooo long, but I must say this is looking fab!

Cody that's no fair. I PM'd you a couple times worried about you now you make a drive-by like this with no update. Crikey! Start a thread and update us mate!

:irishjig:
 
gears-012.webp covers-001.webp covers-002.webp covers-012.webp covers-013.webp covers-003.webp covers-004.webp So I had a little delay in progress of the lathe due to thanksgiving and all, but I have been working on it when I can. Here's what I got so far.
This is a shot of all the covers before I had them glass beaded, the small piece on the bottom right was missing when I got the lathe, found this one on ebay with the 2 top gear covers. These are cast iron, mine where aluminum, I like iron so I used em.
[attachment=14061]
This little aluminum cover is to protect the lead screw and gear box shafts from chips. It is so close to the oil caps I can't get my fingers in there to lift the covers and add oil.
[attachment=14062]
So I filed of the tab that sticks out and now access is easier, Glad I tried it before I painted it.
[attachment=14063]
Here you can see the belt cover and gear covers in place, I painted the inside of the belt cover and installed a reproduction bearing adjustment instruction plate inside.
[attachment=14064]
A close up of the plate.
[attachment=14065]
Since the belt cover is cast aluminum I didn't paint the top, I buffed it instead and added a new reproduction lubrication plate. I think it looks cool polished instead of painted. The cover is a little warped but I don't dare try and bend cast aluminum!
[attachment=14068]
A shot of all the covers in place, 2 of them where missing when I got it, now all the covers are complete.
[attachment=14069]
 
Last edited:
covers-006.webp covers-007.webp covers-008.webp covers-005.webp covers-010.webp covers-011.webp These 2 plates are not replacable so I cleaned them up as best I could.

[attachment=14070]

[attachment=14071]
These tags go on the side gear cover.
[attachment=14072]
A full shot of the side with all the covers on. See the nice 3'x3' sheet of aluminum on the left of the lathe, When the lathe is moved to it's final home up against the wall I am going to mount that sheet to the wall as a backsplash.
[attachment=14073]
Then I tore the tail stock down and started cleaning the parts, gotta strip the paint yet and do some buffing before repainting.
[attachment=14074]
I also gotta try and find one of these small oil cups, it's for oiling the tailstock, the 90 deg ones are hard to find. If I cant find one I have an idea!
[attachment=14075]
What's left? finish the tail stock, refinish the work light, instal and wire the switch, purchase and wire up a vfd converter, run a 220 line to the lathe. I'm close to being done and feeling really good about what I have accomplished so far. It's gonna be a brand new 1949 lathe!
 
Last edited:
Mike1950 said:
WOW- when do we fire it up and what is the first project??????? :yipee::yipee::yipee::yipee::yipee::yipee::yipee::yipee::yipee::yipee::yipee:
maybe another month yet till it's done, then I'm gonna clean my shop and do some wood working, Then I will make some test cuts to check the set up and then make some wood lathe chisels.
 
woodtickgreg said:
Mike1950 said:
WOW- when do we fire it up and what is the first project??????? :yipee::yipee::yipee::yipee::yipee::yipee::yipee::yipee::yipee::yipee::yipee:
maybe another month yet till it's done, then I'm gonna clean my shop and do some wood working, Then I will make some test cuts to check the set up and them make some wood lathe chisels.

I've been watching for those chisels :yipee::yipee::yipee:
 
NYWoodturner said:
woodtickgreg said:
Mike1950 said:
WOW- when do we fire it up and what is the first project??????? :yipee::yipee::yipee::yipee::yipee::yipee::yipee::yipee::yipee::yipee::yipee:
maybe another month yet till it's done, then I'm gonna clean my shop and do some wood working, Then I will make some test cuts to check the set up and them make some wood lathe chisels.

I've been watching for those chisels :yipee::yipee::yipee:
I haven't forgotten about ya! When I start making them again I will start a new thread.
 
I also forgot to mention that I found a correct used southbend micrometer carriage stop, should have it next week maybe. The one that came with the lathe is not correct for this lathe, at least the old one is restored and the future buyer can just bolt it on!
 
Good lord that thing is gorgeous. I'm blown away.
 
chuck-001.webp chuck-002.webp chuck-003.webp chuck-004.webp chuck-005.webp chuck-006.webp A few months ago I found a 4 jaw independent chuck, tool holder, and a live center on craigslist. The chuck is an 8" I was looking for a 6" but i figured for $100 bucks for all I could sell the too large mt3 live center and to large tool holder and recover some money to make the chuck really cheap. All the tools are brand new and where coated with cosmoline. A trip to the parts washer cleaned the chuck up nicely. I forgot all about the chuck untill today when I thought hey.......I can put this on and see how it fits! I still need to get some small brass rod to make a couple of shoes for the set screws that lock the chuck on so the spindle threads don't get damaged. Works great and the mass will be a good thing. Some smart guy said " a body that is set in motion tends to stay in motion" but I'm just an idiot with a hammer! Anyway, a few pics.

[attachment=14263]

[attachment=14262]

[attachment=14264]

[attachment=14265]

[attachment=14266]
These are the 2 items that I will resell, I still need to get a mt2 live center, a quick change tool post, and a 3 jaw scroll chuck.
[attachment=14267]

I've been working on the tail stock too, pics when it's done.
 
Last edited:
Greg - that thing is just about too nice to use ! Its falling in to the art category :sarcastic: That picture of the gear train all assembled could be a poster in every shop !
scott
 
tailstock-001.webp tailstock-002.webp tailstock-003.webp Well in my last post you saw the monster chuck that I mounted on the lathe, it was missing the set screws that lock it to the spindle when reversing. So I got a couple of metric socket head cap screws and some 1/4" brass rod. I did not like the idea of the set screws jamming on the threads of the spindle so I made some brass shoes to go under the set screws to lock it down without doing any damage to the threads.
A pic of the shoes and screws
[attachment=14725]
A pic of both screws installed in the chuck.
[attachment=14726]
Closer pic.
[attachment=14727]

This chuck is 8" in diameter and quite heavy as it's all cast iron. If the chuck was to spin off and drop onto the lathe bed it could cause some serious damage to the ways. Now I am not worried. :biggrin:
More pics coming.
 
Last edited:
Back
Top