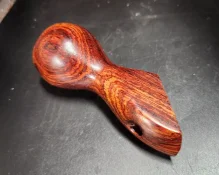
Stanley #78 Front Knob

Asssiss

Member
Full Member
Messages
456
Reaction score
1,407
Location
Brazil
First name
Emerson
Hello folks...I always start a new project before finish another...for while my sheep shears handles are in hold but not for so long.

I recentely known about a front knob used at a WS #78 plane...it is very useful but in my opinion to ugly too...and it dosen't matter if they chage for exotic wood ...I don't like the shape.My personal opinion...I don't want to change yours.


So I was thinking about to make one knob for my Stanley #78 but with my signture.
I made the first draw ( and did only one) and started.

I'll feel it...choose the correct angle to attach the "neck" and knob/handle and check how comfortable will be.


See the pictures below:

First draw
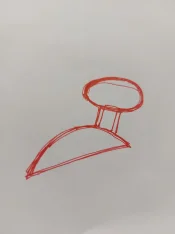
20250609_032751.jpg


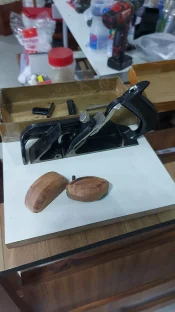
The pieces are ready to sand
IMG-20250615-WA0045.jpeg
Changed the blade for a Lie Nielsen and saved the original
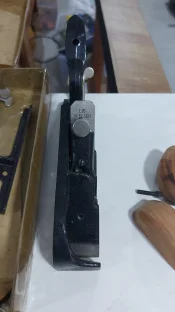
IMG-20250615-WA0041.jpeg
Main idea..just need to find the correct position and sand to final shape (the neck will be short because hidden inside both parts)
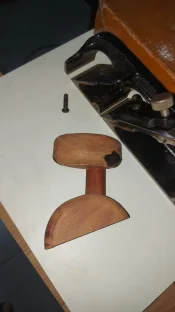
IMG-20250615-WA0049.jpeg
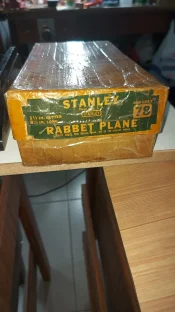
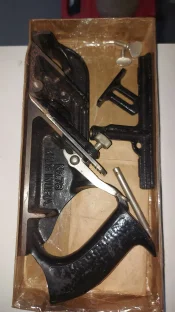
Original box
IMG-20250615-WA0047.jpeg

IMG-20250615-WA0060.jpeg
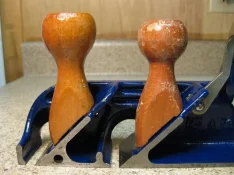
Two differents shapes
images (14).jpeg
Beautiful wood and ugly shape ( my opinion)
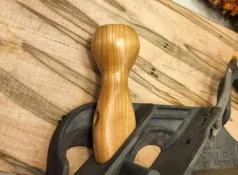
IMG-20250615-WA0062.jpg

Exotic wood
IMG-20250615-WA0064.jpg
Thanks for attention
 
Last edited:
  • Thread Starter Thread Starter
  • #2
Hello folks...a little more work today....
My Luban block plane has a 90⁰ blade like this idea below.

I just can't understand the "math" about how he found 112⁰ using 90⁰ plus 12⁰.

See the pictures below:

Findind the position of "neck"
IMG-20250616-WA0060.jpeg
Rough cut
IMG-20250616-WA0090.jpeg
I used a spokeshave
IMG-20250616-WA0093.jpeg
Thin shaves
IMG-20250616-WA0097.jpeg
Here the reverse grain...spokeshave damage
IMG-20250616-WA0099.jpeg
I used a card and palm plane scraper
IMG-20250616-WA0102.jpeg
This block plane has a blade honed at 90⁰.
IMG-20250616-WA0104.jpeg
The base just a two playing cards from edge
IMG-20250616-WA0107.jpeg
Router bit marks
IMG-20250616-WA0110.jpeg
Cleaned by card scraper
IMG-20250616-WA0112.jpeg
Thanks for attention
 
Last edited:
  • Thread Starter Thread Starter
  • #5
Hello folks...today I sanded and scraped a litte.

Here I used one hand to film...but worked using both


I glued the sand paper at curve from pieces of project
IMG-20250617-WA0047.jpeg
Easy to work
IMG-20250617-WA0051.jpeg
Other curve from project
IMG-20250617-WA0063.jpeg

IMG-20250617-WA0065.jpeg
You can find the curves
IMG-20250617-WA0068.jpeg
Better clamp for scraping job
IMG-20250617-WA0108.jpeg
This kind of scraper
IMG-20250617-WA0110.jpeg
You can see how smooth and clean at right up
IMG-20250617-WA0116.jpeg

IMG-20250617-WA0118.jpeg
Here you can see sandpaper lines at left and scraper surface at right
IMG-20250617-WA0125.jpeg
I just add two short videos from YT...
Thanks for attention
 
Last edited:
  • Thread Starter Thread Starter
  • #6
Hello folks...one more step....
Since the begining I was planing to make a knob wich can rotate 90⁰ for the better position for each task.
See the pictures below:

A piece of brass for tap and improve the tight fit
IMG-20250618-WA0067.jpeg
Glued by epoxy glue
IMG-20250618-WA0074.jpeg

IMG-20250618-WA0076.jpeg

IMG-20250618-WA0079.jpeg
The extra point for tight fit and can use a drill for rotate at sandpaper time (as a bonus)
IMG-20250618-WA0083.jpeg
Can rotate 90⁰ (four times) ...two holes as a cross and tapered...four positions possible and screwed ...the brass improve the tight fit because no glue.
IMG-20250618-WA0091.jpeg
A bolt (4 mm) will tight at half moon piece at side of metal wall to hide the bolt...you'll can't see the bolt from here (when done)
IMG-20250616-WA0107.jpeg
Thanks for attention
 
Last edited:
  • Thread Starter Thread Starter
  • #7
Hello folks ...I did a litte advance today...
Sometimes (almost always) I start a new project before finish other.
It is my relaxing time and to me is like playing cards or dominoes...both are nice games and relaxing but each one has itself skils and strategies...the same here any project is relaxing but each has itself challenges and sometime I don't want that task at that time...make sense?

See the pictures below:

Using the extra brass point to drill sand
IMG-20250619-WA0044.jpeg
Shaping by hand using sandpaper and scraper...the first part was using router bit and template sander
IMG-20250619-WA0046.jpeg
How smooth at left
IMG-20250619-WA0051.jpeg
Two holes
IMG-20250619-WA0073.jpeg
It is a tight fit and maybe 'll cut off the extra point to avoid trouble trying to change positions...'ll check at final
IMG-20250619-WA0076.jpeg
Just plum and drill
IMG-20250619-WA0066.jpeg
Thanks for attention
 
Last edited:
  • Thread Starter Thread Starter
  • #8
Again folks...sometimes we need a scraper and don't have one nearby or have to custom a blade...make a hole at special hard steel.
Look this....


I don't need to make a weapon but a useful way to make a more efficient tool for the time

Thanks for attention
 
Last edited:
  • Thread Starter Thread Starter
  • #9
Hello folks...here some more steps.
I still sanding parts and today I did a dry fit.
I have some job to do until ready.

Is totaly different from original and more comfortable and gorgeous (sorry for no modesty).

See the pictures below? :

Knob hole 11/16"
IMG-20250620-WA0059.jpeg
Find the lines for cross screw
IMG-20250620-WA0074.jpeg
Use a bolt and nuts as a gauge
IMG-20250620-WA0078.jpeg

IMG-20250620-WA0076.jpeg
Dry fit one position
IMG-20250620-WA0062.jpeg
Other position
IMG-20250620-WA0066.jpeg

IMG-20250620-WA0064.jpeg
One more
IMG-20250620-WA0070.jpeg
And other
IMG-20250620-WA0072.jpeg

IMG-20250620-WA0068.jpeg
Thanks for attention
 
Last edited:
  • Thread Starter Thread Starter
  • #10
Hello folks...more steps today.

See the pictures below:

How far the hole will be
IMG-20250621-WA0080.jpeg
Brass and wood
IMG-20250621-WA0083.jpeg
Rough surface
IMG-20250621-WA0087.jpeg

IMG-20250621-WA0091.jpeg
One coat of linseed oil
IMG-20250622-WA0040.jpeg
Waiting until tomorrow and apply more
IMG-20250622-WA0043.jpeg

IMG-20250622-WA0046.jpeg

IMG-20250622-WA0049.jpeg

IMG-20250622-WA0051.jpeg
Thanks for attention
 
Last edited:
  • Thread Starter Thread Starter
  • #12
Hello folks...now it is the final steps...we are at winter in Brazil now...today I started to apply the final coat finish at knob.

I add three coats of linseed oil and now a wood varnish by spray can ...I believe in US this is similar to lacquer...with sun filter.

See the pictures below:

I made the hole for bolt
IMG-20250625-WA0011.jpeg
Just a few down the surface
IMG-20250625-WA0014.jpeg
I love this countersink/counterbore
IMG-20250625-WA0016.jpeg
The linseed oil shows up the wood beauty
IMG-20250625-WA0022.jpeg
Bamboo stick to help
IMG-20250625-WA0025.jpeg
Wainting dry for next coat
IMG-20250625-WA0033.jpeg

IMG-20250625-WA0035.jpeg

IMG-20250625-WA0038.jpeg
Thanks for attention
 
Last edited:
Hello folks...now it is the final steps...we are at winter in Brazil now...today I started to apply the final coat finish at knob.

I add three coats of linseed oil and now a wood varnish by spray can ...I believe in US this is similar to lacquer...with sun filter.

See the pictures below:

I made the hole for bolt
View attachment 275157
Just a few down the surface
View attachment 275158
I love this countersink/counterbore
View attachment 275159
The linseed oil shows up the wood beauty
View attachment 275160
Bamboo stick to help
View attachment 275161
Wainting dry for next coat
View attachment 275162

View attachment 275163

View attachment 275164
Thanks for attention
Some great ideas here! Chuck
 
  • Thread Starter Thread Starter
  • #14
Hello folks...all job done and the knob now is at box with plane.

Now I can be back at sheep shears knives handles.

See the pictures below:

I applied wax over varnish
IMG-20250626-WA0078.jpeg

IMG-20250626-WA0080.jpeg

IMG-20250626-WA0082.jpeg
Other position...better to put at box
IMG-20250626-WA0087.jpeg
At box
IMG-20250626-WA0090.jpeg
I'll add a washer and a pair of nuts to lock better.
IMG-20250626-WA0094.jpeg
Thanks for attention
 
Last edited:
  • Thread Starter Thread Starter
  • #16
Like NEW!
I purchased this plane at Jim Bode site...It's in amazing condition and with the Lie-Nielsen blade works very very well...no longer avaible at Lie-Nielsen site...make all difference.
With new knob rise to another level
 
Last edited:
Back
Top