The Conestoga Wagon build

  • Thread Starter Thread Starter
  • #41
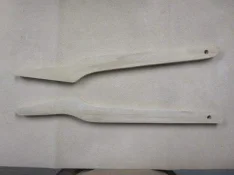
Spent another hour and a half out in the shop today after work. I was able to get the left and right hounds sanded that I made yesterday. I also cut, drilled and sanded the tongue and assembled those pieces together. I then did a dry fit of the tongue assembly with the axle tree and the upper and lower bolsters. I then cut, drilled, shaped and sanded the front end back brace and did a dry fit of that. Looks good to me but I'm done for the day.
[attachment=11575]

[attachment=11576]

[attachment=11577]

[attachment=11578]

[attachment=11579]

[attachment=11580]
IMG_2758.webp

IMG_2759.webp

IMG_2760.webp

IMG_2761.webp

IMG_2762.webp

IMG_2763.webp
 
Looking great Ken. Are you going to carve an ox to go into the yoke or just hitch it to that awesome bike you built last year? Give the peeps here a peep at that bike will ya?

:good2:
 
You made lots of progress today! :biggrin: looking good! :good::good2:
 
Ken - I said it on your tank build and I will say it again here - your attention to detail is inspiring. Truly amazing. (Except maybe when it comes to your shop) :sarcastic:
Great progress - thanks for sharing
Scott
 
  • Thread Starter Thread Starter
  • #45
Well, let's see. I spent the morning having a brain scan at the hospital in downtown T.O., then I came home and spent some time with Mrs Kenbo and then we went out for a nice lunch and ice cream, and then..............you knew this was coming............I went to the shop.

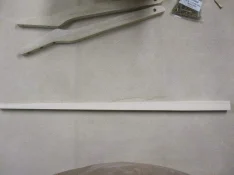
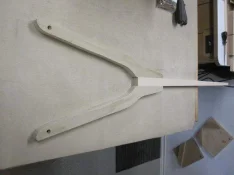
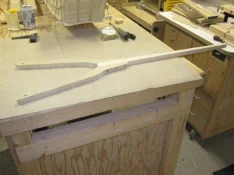
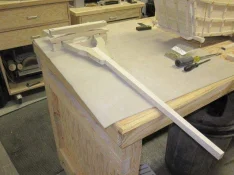
I put in 3 1/2 hours today and I set my goals for what I wanted to get done before I went out there. I managed to get the rear upper bolster, the rear axle tree, the rear hounds, the axle rods and (as a bonus because it was over and above my goal that I set) I got the tapered connecting rod cut. I did a few dry fits to see how everything is going to piece together and let me tell you, this thing is mahusive!!

I still have to sand the pieces that I cut today. You might see some discolouration in the wood. That is some mineral spirits that I used to wash away the glue residue.

I have hopes for a productive weekend as it is our Thanksgiving and I have a 3 day weekend. I only have a couple of hours to work on it tomorrow, but I have all day Sunday and Monday. Slow and steady boys, slow and steady.

[attachment=11690]

[attachment=11691]

[attachment=11692]

[attachment=11693]

IMG_2764.webp

IMG_2765.webp

IMG_2766.webp

IMG_2767.webp
 
Looking good Ken! I think it's gonna need wooden horses to pull it! LOL :good::good2:
 
Glad you had a good day all-in-all. Be better when you get some concrete results from your numerous tests . . . .

Man that thing really *is* massive. Forget carving a ox for it. Just attach a dowel at the end of the tongue to make a T-handle, so Mrs Kenbo can use it like a little red wagon to haul fresh tomatoes and produce from the garden back to the house. :pleasantry:

Looking great Ken.
 
  • Thread Starter Thread Starter
  • #48
I was only able to get a little time in the shop today. I really needed to take advantage of the weather and remove the soft top from my Jeep and put the hard top on for the winter. Sadly enough, that means that summer is over.

I got all the pieces sanded that I made yesterday and assembled the rear hounds to the connection bar. I also managed to cut the rear bolster standards. I decided to make a template for these just because I could. After assembling the pieces and doing a dry fit, I found that a few things didn't quite fit right. I'm not sure how this happened, but instead of going through the process of making new pieces, I made a few modification to the hounds to make them fit properly. I marked the modifications with the red arrows. I may still end up making new ones, but I wont be able to decided that until later. Another quick dry fit and the day in the shop was done. No worries, even though I only got 2 small pieces made, I still have 2 more days in the shop lined up.
[attachment=11754]

[attachment=11755]

[attachment=11756]

[attachment=11757]

[attachment=11758]

[attachment=11759]

IMG_2768.webp

IMG_2769.webp

IMG_2770.webp

IMG_2771.webp

IMG_2772.webp

IMG_2772(2).webp
 
Man - I dont know where you pull it from - especially given what you are going through, but it speaks volumes about your level of focus, commitment and determination. Otherwise known as "Grit".
Color me impressed.
Scott
 
  • Thread Starter Thread Starter
  • #50
NYWoodturner said:
Man - I dont know where you pull it from - especially given what you are going through, but it speaks volumes about your level of focus, commitment and determination. Otherwise known as "Grit".
Color me impressed.
Scott

Thank you for your kind words. I don't know if it's called grit or focus or what the name is, but I have to keep moving. The left arm has started aching now but I can't let it stop me. When I head to the shop, I set obtainable goals for each session and for the most part, I reach those goals and in some cases I surpass them. I've accepted that I'm a little slower these days but I wont accept that some silly little numbness in my arm and hand will rob me of a hobby that I love. After all, that hobby is mine and this "condition" has no right to take it away. I'd rather do a little work on something that I love to do than to sit back and watch my tools rot by me saying that "I can't do it". Heading out to the shop now to set my goals and surpass them. :good2:

By the way, just for a good laugh, here's a picture of me at the hospital on Friday getting the brain thing done. I thought it was going to be something like a tube or a machine that they put you into. It turns out it was 30+ electrodes that they attach to your melon and monitor brain waves. It wouldn't look so silly if the cotton balls weren't in place. A buddy of mine said it looks like I went for a manicure and they went nuts. ha ha ha ha ha. Thought you might like the funny image.

[attachment=11764]

photo.webp
 
Hell I thought it was your new dooo!! :rotflmao3::rotflmao3::rotflmao3::rotflmao3::rotflmao3::rotflmao3:
Grit-- We all have a different name for it. I look at the world seperated into 2 groups- the hard workers -the hard wanters.... The I cans-the I cants.
You make it very obvious to all which group you are in. :good2::good2::good2::good2:

The wagon is Incredible-I give you a first prize for it and you are not done yet. :yipee::yipee::yipee::yipee::yipee::yipee::yipee:
 
Kenbo said:
NYWoodturner said:
Man - I dont know where you pull it from - especially given what you are going through, but it speaks volumes about your level of focus, commitment and determination. Otherwise known as "Grit".
Color me impressed.
Scott

I've accepted that I'm a little slower these days but I wont accept that some silly little numbness in my arm and hand will rob me of a hobby that I love. After all, that hobby is mine and this "condition" has no right to take it away. I'd rather do a little work on something that I love to do than to sit back and watch my tools rot by me saying that "I can't do it". Heading out to the shop now to set my goals and surpass them. :good2:
Good for you Ken, I feel the same way, I have no strength in my left arm yet but I still get in the shop and do what I can. A little bit of something is better than a whole lot of nothing. :good: It still gives us joy! :biggrin: I've gotten pretty good at doing things with one hand. :lolol: I know you enjoy your shop time too and are having fun and that's all that matters. I'm off to the shop now to work on my lathe restore, I need my therapy!
 
  • Thread Starter Thread Starter
  • #54
7 hours in the shop today. 6 pieces made. I also screwed up a few pieces and bolted the under carriage together instead of just dry fitting it. I worked on the brake system today and started cutting out pieces for that. There isn't much to tell, so I'll just post the pictures.
[attachment=11799]

[attachment=11800]

[attachment=11801]

[attachment=11802]

[attachment=11803]

[attachment=11804]

[attachment=11805]

[attachment=11806]

[attachment=11807]

[attachment=11808]

IMG_2773.webp

IMG_2774.webp

IMG_2775.webp

IMG_2776.webp

IMG_2777.webp

IMG_2778.webp

IMG_2779.webp

IMG_2780.webp

IMG_2781.webp

IMG_2786.webp
 
  • Thread Starter Thread Starter
  • #56
I'll try to make this brief.
I started out by cutting the dowel for the main shaft of the brakes.
[attachment=11846]

I then cut some 3/8" and 1/8" holes in a piece of MDF.
[attachment=11847]

I then inserted some 3/8" dowel and drilled and pinned them with a 1/8" dowel.
[attachment=11848]

Then I set my table saw fence and made 2 passes through the table saw.
[attachment=11849]

Which gave me my connecting rods for the brake assembly.
[attachment=11850]

A little shaping and hand sanding and they are done.
[attachment=11851]

Here they are, in place for a dry fit in the brake assembly.
[attachment=11852]

Then, there was a commotion in my stove pipe. So I opened the door to the woodstove and there was this little fella. Very black with soot and needing some help. So of course, I rescued the little guy. He's fine now. Dirty, but fine.
[attachment=11853]

Then I cut some mounting brackets and retaining clips for the brake assembly. I'm not going to glue or mount any of this until the wheels are done. This way, I have a solid reference for mounting them.
[attachment=11854]

And now, I cut some 1/8" hardboard to make some test cuts for the wheels.
[attachment=11855]

IMG_2787.webp

IMG_2788.webp

IMG_2789.webp

IMG_2790.webp

IMG_2791.webp

IMG_2792.webp

IMG_2793.webp

IMG_2794.webp

IMG_2795.webp
 
  • Thread Starter Thread Starter
  • #57
Here are the hardboard pieces ready for testing.
[attachment=11856]

I did the math a knew that I needed a 25.7 degree angle for the cuts to make a heptagon. So I did some test cutting.
[attachment=11857]

Until I got it right.
[attachment=11858]

The test cuts in the hardboard prove to be bang on.
[attachment=11859]

I then reassembled them to allow for the 3/4" half lap joints.
[attachment=11860]

Time for the real deal. Cut the angles in the poplar.
[attachment=11861]

And cut all the rabbets for the half lap joints.
[attachment=11862]


Here are all the pieces cut and ready for sanding. Problem is, something isn't right. The total size of the heptagon is too large. I'm either going to have to cut them down, or make new ones and salvage these for the smaller front wheels.
[attachment=11863]

No worries. This was an experiment today and I think it proved pretty successful. 8 hours later...........I had a good time.

IMG_2796.webp

IMG_2797.webp

IMG_2798.webp

IMG_2799.webp

IMG_2800.webp

IMG_2801.webp

IMG_2802.webp

IMG_2803.webp
 
The wheels remind me of segmented rings for turning, only without the half laps. cool stuff, gotta get me one of those tilt boxes. :good::good2:
 
  • Thread Starter Thread Starter
  • #60
I got out to the shop today and put in 2 hours. :yipee:
Sadly enough, all the work I did on the weekend was nothing more than designer fire wood and kindling. There were several problems that made them that way. The main problem was that the wheel would not fit in the main area of the heptagon without encroaching into the waste areas. I considered cutting the pieces smaller to try and shrink the heptagon and avoid the waste areas but I decided that this was more trouble than it was worth. So, I cut all new wagon sections.
[attachment=11929]

I know it doesn't seem like much, but remember that I had to cut the stock from 8/4 rough sawn, then thickness plane down to the 3/4" that I needed. The resaw and stock prep took some time.
Here's the difference in the old pieces and the new.
[attachment=11930]


Part of my problem with the wheels, is that I don't have a compass large enough to draw the 13 1/2" diameter so I was kinda Mickey Mousing it. I got tired of that and headed to Lee Valley today. I've always been a fan of Veritas products and the fact that they are Canadian is just a bonus. I don't think that I've ever been disappointed with a Veritas purchase.
I decided that I would pick up a set of Veritas beam compass ends. They seem a little expensive, but I'm worth it.
[attachment=11931]

They attach firmly onto the beam and once they are set, they do not move. There is absolutely no play in these puppies at all. They are extremely sturdy feeling and you never feel like you are going to break them.
[attachment=11932]

They even come with their own rigid carrying case to keep them safe. I've wanted a set of these for years. I don't know why I didn't do it earlier.
[attachment=11933]

IMG_2806.webp

IMG_2807.webp

IMG_2808.webp

IMG_2809.webp

IMG_2810.webp
 
Back
Top