
BUILD DA BOX

  • Thread Starter Thread Starter
  • #41
Coves are done- One heck of a lot less sanding to get smooth which is what I was hoping for. No complaints-pricey but if you do much of this kind of cove you will save what you spent in sanding time and sandpaper very quickly. Lost my top spline and almost my bottom spline in reject test piece- sure is light though. Here is a semi sanded walnut and I bet you can guess this one now. PS. no more mistakes.:yipee::yipee::yipee::yipee::yipee::yipee:

[attachment=8537]

[attachment=8538]

This last one is by FAR the hardest and heaviest. It amazes me how hard it is- makes the persimmon seem soft.
32 hrs.
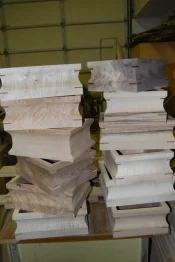
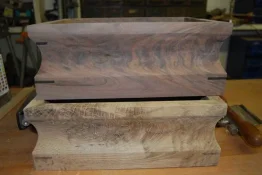
box build 010s.webp

box build 009s.webp
 
  • Thread Starter Thread Starter
  • #42
Also the 2 persimmon- to me the one with the dark on bottom looks right and the other looks upside down- what do you think......
 
Mike1950 said:
Also the 2 persimmon- to me the one with the dark on bottom looks right and the other looks upside down- what do you think......
Dunno Mike, they all look great to me, not a bad one in the bunch.:good2::good:
 
  • Thread Starter Thread Starter
  • #44
Putting a simple rounded edge on top and bottom of half the boxes. Useing a 1 1/2" radius bit- I call it the airplane wing-large enough to be a little scarey. Fast and simple.

[attachment=8557]

[attachment=8558]

Once I get the other half shaped I will show you how I do legs- simple router operation.

box build 002s.webp

box build 003s.webp
 
Lookin good Mike!:good2::good: It's interesting that you are keeping track of the hours to build these. I am curious to see what the total hours will be for all the boxes, divided by the number of boxes = hrs for one box. gonna be cool.
Hey Coug, is that a foxtail I see?:sarcastic:
 
  • Thread Starter Thread Starter
  • #46
Greg, I thought I would keep track and the easiest-only way for me to keep track is to write it down- seems like this is a spot I won't lose. I don't think that is a foxtail- I think it is a very furry spider. :yipee::yipee::yipee: Don't want to ruin my image..... I have a vacumn cleaner hooked to my router table and for some reason with this bit the dust collection stinks.:dash2::dash2::dash2: Bit cuts very fine feathery shavings and it seems none get in vacumn. I will take a pic when I am done so they have something to kid me about. Not that there seems to be any shortage of reasons to pick on the ol man!!! :yipee::yipee::yipee:
 
  • Thread Starter Thread Starter
  • #47
WOW- I am always amazed at how clunky and out of porportion a 12 x9 box 7/8's thick looks. Then you remove just a little pesky unwanted wood and presto the propotions are right. All about the illusion of design. Used a 1/2 radius bit on these. just need the feet and boxe's are done well except for sanding and finish.

[attachment=8560]

[attachment=8561]

Had to look back to see hour total- that is why I have to write down -34

box build 005s.webp

box build 004s.webp
 
Nice profile on the boxes, Mike. It might look good if you put the lid in the box, so all you will see is the profile of the sides. Just a thought.
Thanks for posting a how to on the Da box.
 
  • Thread Starter Thread Starter
  • #49
David- good Idea-but on this group I already have stock for lids in the started stage. also I love having the pofile of the lid being part of design- changing it some every time makes it a challenge.
In this last picture the top one is the one I was asking for wood type guess- no guess's now??? I think it is the second one on left that is crazy grained red oak. I usually only use red oak for drawers but this has crazy grain and color. Will try to get the feet done later- got an auction preveiw to check out.
 
The figure in the boxes on the left and the top box is really nice, with figure like that who cares what kind of wood it is! LOL How about a closer shot of the mystery wood. Keep it goin Mike, I'm enjoying this and will be with ya till the end.:good2::good:
 
  • Thread Starter Thread Starter
  • #51
Greg, there is a picture of the figured walnut and the mystery box on page 5 with the walnut on top. The 3 walnut ones have great color and figure. You are right though- with wood like that it is a huge step to making nice boxes.
 
If it's the one below the highly figured walnut, it's an oak, it has medulary ray flecs. White, red, or? Who cares, it's beautiful, gonna look really nice with the finish, hopefully oil finish.
 
  • Thread Starter Thread Starter
  • #53
We have a winner- white oak-it will be my standard oil poly wipe on.
 
Great thread and work Mike. You got this cove box making down.

:good:
 
  • Thread Starter Thread Starter
  • #55
Thanks Kevin, It is the closest I figure I get to making round things. Making flat things it is nice to use imagination and use curves.
 
  • Thread Starter Thread Starter
  • #56
The legs- I used a 1/2" straight bit- pretty simple but the first few cuts it is hard to see. I used to make marks but now I just kinda know where to start and stop. Go slow with this and take small bites 1/16" or less. One oppps and your box just got shorter. I have one small chip on the hard as a rock white oak but I saved chip and it will glue right on. The first one I finished the legs on I had to sand, finish and see what the future brings???? Multiple styles of legs with subtle changes in depth and size.

[attachment=8581]

[attachment=8582]

[attachment=8583]

37 hrs

box build 013s.webp

box build 014s.webp

box build 015s.webp
 
  • Thread Starter Thread Starter
  • #58
Scott, first off there are no silly questions!!!! On the large cove I use the ROS with 150. I put box on edge of desk and with the sander cocked at an angle move it up and down and sideways. With tht new cutter I can use 150 -before I started with 60 and it was a lot!!! more sanding. The maple piece has the small coves and the have to be hand sanded-lucky for me there is not much to be sanded. The other base and top style I use the ROS on all of it. ASK away if not clear on anything.
 
  • Thread Starter Thread Starter
  • #59
Post is what I will call a premature box build gloat. Got 7 sanded and a coat of finish and have honey dos for today and tomorrow. Wood one of the many wonderments of nature...........

[attachment=8617]

[attachment=8616]

[attachment=8615]

[attachment=8618]

[attachment=8619]

40 hrs Picture number 3 & 4 the walnut box ended up with white feet- does not quite look real.

box build 001s.webp

box build 002s.webp

box build 004s.webp

box build 008s.webp

box build 009s.webp
 
Oh wow! That magical moment when you wipe on the finish and the wood morphs into something beautiful and you just stare at it in awe and see things that you didn't see before.:good2::good:
 
Back
Top