BUILD DA BOX

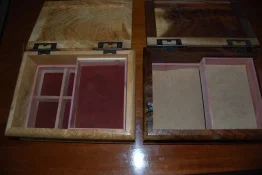
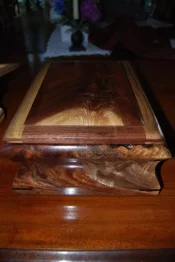
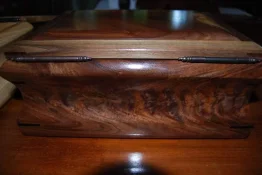
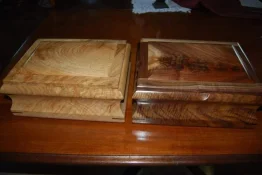
Probably my second to last post. These are complete other then pads on feet and lid. Sorry this has got so drawn out-not the best time of the year for a build thread. Pics of insides and out. Walnut one is off to our son next week with DKMD's wonderful stamp handles inside. They have been fun and thanks for your patience!!!

[attachment=9602]

[attachment=9603]

[attachment=9604]

[attachment=9605]

90 hrs
box build 001s.webp

box build 002s.webp

box build 003s.webp

box build 004s.webp
 
No apologies needed Mike, this has been a wonderful build and I have really enjoyed it! :good::good2: It takes as long as it takes. The final result is well worth the wait, they are beautiful. And you have kept me entertained during my rehab, thanks for all that you do.
 
Roy, I have not really cleaned in at least a month- I need more like a really big horse tail or what would be even better would be a fairly large miracle. Build has been fun. As soon as I get done with some work I am going to do what I call a stumble bum build- Kathie bought a knife and now I have to make a handle- Will be using the knife build that is in classroom and stuble through it. PS- burl showed up thanks...........
 
Mike, this is one of my favorite threads. Thank you for showing us how to make boxes.

:good:
 
Thanks Kevin , Greg and all it has been fun. I will do it again this fall. Little more complicated. Crummy weather gives me lots of shop time though.
 
PS- had my grandaughter bugging me while I was typing post. The Cedar in the bottom of the box is mitered and friction fit. The divider is friction fit also. Tough to disassemble and could see no reason for glue.
If you want to build a bigger project(dresser-desk-etc.) practice on a box using your desired joinery. You will be amazed at how it gets you up to speed on the joinery-practice and you get something nice....
 
Here ya go pictures for ya Cory.

Persimmon and walnut

[attachment=10748]

[attachment=10749]

[attachment=10750]

[attachment=10751]

[attachment=10752]

[attachment=10753]

[attachment=10754]

The last couple are Soft maple and Sycamore. I added a persimmon. They are the same wood but there are style differences to box.

Definitely will trade for some of your fantastic BAB.

finish boxes 002s.webp

finish boxes 001s.webp

finish boxes 003s.webp

finish boxes 004s.webp

finish boxes 005s.webp

finish boxes 006.webp

finish boxes 008s.webp
 
Ah ha- 3-4-5 on right are the same- walnut- crotch on top and sides. Ebony splines. I love the side of that one.
 
Cory- Whatever works for you. I will use it for inlays. Pm your address. I want to complete the dividers this week and I will send. thanks Mike
 
Finaly, I got back to shop and did the last work to finish boxes. I added the mahagony one-had it and lined added tray and dividers. Through attrition -trading, beads of courage and give away I am down to 8 left. Guess will be 120 hrs total. Sure was not the most efficient way to make a bunch of boxes- here and there but then again I do not care- I am only competing with myself.:yipee::yipee: Red oak one Kathie has taken over so really I have 7. They are fun- opportunity to use very unique pieces of wood. Thanks for all the compliments and I will be doing another build this fall hopefully a little quicker from start to finish.

PS these are available for trade or???

[attachment=11311]

[attachment=11312]

[attachment=11313]

[attachment=11314]

boxes done 001s.webp

boxes done 002s.webp

boxes done 003s.webp

boxes done 004s.webp
 
120 hrs. to build all of those is really not bad Mike! There is a lot of work in one of those, I think you did really well and they look great! Was a fun build to watch. :good: :good2:
 
Mike, I'm really glad you linked to this thread in your post elsewhere. I hadn't seen this thread before - and I'm really glad I got the chance to now! These boxes are amazing, and your write-up, descriptions, and pictures are excellent. A lot of inspiration, ideas, and how-to for when I am able to give box building a go soon.
 
Thanks Matt, I try to make it to where some one like you can follow. The box completed looks difficult but if you separate into individual steps it is not difficult. You can make it without the cove to start- use 1/2" sides. The cove is just an add on for the next one then.
 
The box completed looks difficult but if you separate into individual steps it is not difficult.

That is so very true. If I had skipped to the end and just looked at the completed boxes (and also from looking at the ones you've recently posted), I'd have said that there's no way I could do anything like that anytime soon. But seeing each step broken down makes me realize that it's not difficult when you take it one step at a time and that I could make boxes like these with less time than I previously thought.
 
Back
Top