

A while back somebody asked how I did my credenza drawer fronts. I said a picture was worth a thousand words. I told them the next time I did one I would picture process. Actually quite simple.
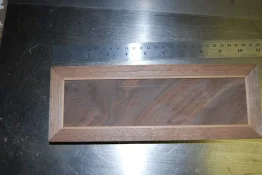
I used a darker(not white) very straight grained walnut sapwood. It is quite consistent in grain and color for walnut. Made it all the same thickness and width. Glued a strip of maple to one side.
Select and cut the body piece. Ran it thru the sander to thickness sand.
Cut to dimension -making sure it is perfectly square. These 2 drawer fronts are about 3 1/2 by 10- not very big.
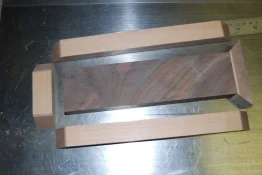
I 45 the end of 4 pieces. sneak up on 45 on long pieces until they are exact length. then start matching and adjusting the end 45's to match one long side. Then adjust to other long side. once the 45 on that side is right I adjust length. sometimes using folded post it notes for fine adjustments under wood.
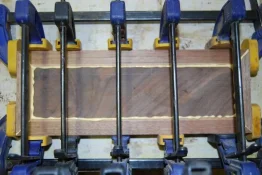
Pictures show glue stage. once it dries I will sand flat, resaw, sand flat again and start matching to drawer.
[attachment=19219]
[attachment=19220]
[attachment=19221]
I used a darker(not white) very straight grained walnut sapwood. It is quite consistent in grain and color for walnut. Made it all the same thickness and width. Glued a strip of maple to one side.
Select and cut the body piece. Ran it thru the sander to thickness sand.
Cut to dimension -making sure it is perfectly square. These 2 drawer fronts are about 3 1/2 by 10- not very big.
I 45 the end of 4 pieces. sneak up on 45 on long pieces until they are exact length. then start matching and adjusting the end 45's to match one long side. Then adjust to other long side. once the 45 on that side is right I adjust length. sometimes using folded post it notes for fine adjustments under wood.
Pictures show glue stage. once it dries I will sand flat, resaw, sand flat again and start matching to drawer.
[attachment=19219]
[attachment=19220]
[attachment=19221]


