Inlaid drawer fronts

Mike1950

Founding Member
Founding Member
Full Member
Messages
30,166
Reaction score
46,312
Location
Eastern Washington
First name
Mike
A while back somebody asked how I did my credenza drawer fronts. I said a picture was worth a thousand words. I told them the next time I did one I would picture process. Actually quite simple.
I used a darker(not white) very straight grained walnut sapwood. It is quite consistent in grain and color for walnut. Made it all the same thickness and width. Glued a strip of maple to one side.
Select and cut the body piece. Ran it thru the sander to thickness sand.
Cut to dimension -making sure it is perfectly square. These 2 drawer fronts are about 3 1/2 by 10- not very big.
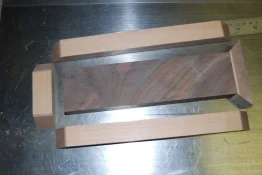
I 45 the end of 4 pieces. sneak up on 45 on long pieces until they are exact length. then start matching and adjusting the end 45's to match one long side. Then adjust to other long side. once the 45 on that side is right I adjust length. sometimes using folded post it notes for fine adjustments under wood.
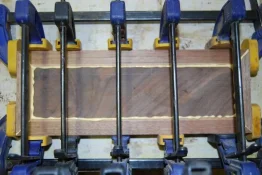
Pictures show glue stage. once it dries I will sand flat, resaw, sand flat again and start matching to drawer.

[attachment=19219]

[attachment=19220]

[attachment=19221]
DSC_0066ss.webp

DSC_0067ss.webp

DSC_0068ss.webp
 
Wow! It looked like a professional veneer job, I didn't know the figured pieces were solid. I love it!:good2:
 
  • Thread Starter Thread Starter
  • #3
It is my lazy man's version of repeated veneer drawer fronts. I could easily get 4 fronts out of this block- I only need 2 though.
 
  • Thread Starter Thread Starter
  • #7
I think everyone is going to be disappointed- this will be a very short thread. There is not much to these. After this post I will show installing fronts on drawers- in a couple days.
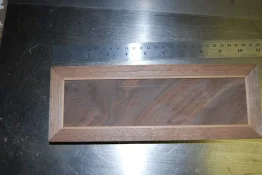
Sanded both sides of glued blank and resawed piece right down the center. Sanded flat again and then sanded finish side to 180. Checked fit in cabinet-they are a little large and I will fine tune when I attach to drawer fronts. Last picture shows my lack of discipline -I just had to put finish on and see the finished look. Enjoy :yipee::yipee::yipee::yipee: Both types of walnut came from the same tree. What variety!!!!!

[attachment=19257]

[attachment=19258]

[attachment=19259]

If you have questions- do not hesitate to ask..

DSC_0069ss.webp

DSC_0070ss.webp

DSC_0071ss.webp
 
  • Thread Starter Thread Starter
  • #9
jimmyjames said:
Beautiful mike! I will be doing this in the near future with some small modifications, is the white wood maple?

It was supposed to be maple but I have a sneaky suspicion it is beech. Not that it matters.
 
  • Thread Starter Thread Starter
  • #11
jimmyjames said:
Im curious how you did your divider between the drawers, stopped dado? Kreg screws? Whats the top look like :)

glue and counter sunk screws- it is there to hold the persimmon slides-I hid the divider in the credenza with rabbets on the drawers.
 
Never dissapointed with your work mike. You gave all the info needed to learn how to do this, good job. :good::good2: A supper easy way to get solid wood book matched drawer fronts. I like them better than a veneer, and they look great, and so does the rest of the piece by the way. :biggrin: :hi2:
 
  • Thread Starter Thread Starter
  • #13
Here are a couple pictures of drawers and simple persimmon slides. also a picture as requested of top-even though top will probably raise a few eyebrows............

[attachment=19423]

[attachment=19424]

[attachment=19425]

DSC_0080ss.webp

DSC_0082ss.webp

DSC_0081ss.webp
 
  • Thread Starter Thread Starter
  • #14
Just about done- I mark the holes- clamp face on drawer in place- drill holes thru drawer face- put tight fitting screws and nuts on. Remove clamps and make sure drawer works right- fine tune if needed. Remove screws- glue face on-install screws again and test fit. If all is well- which it was -clamp and wait. I will post pictures of finished project but for all intents these drawers are finished. Now there are probably many ways to do this- this is my way-enjoy and I hope it helps. I absolutely love making these drawers. :yipee::yipee::yipee::yipee::yipee:

[attachment=19504]

[attachment=19505]

DSC_0087ss.webp

DSC_0088ss.webp
 
  • Thread Starter Thread Starter
  • #15
Finally got my wheels so cabinet is done- made 2 matching tables- for computers in our sitting room. If Kathie sees I took a picture of this table before it got dusted- I am dead meat.. Fun builds- quick easy and I love doing these drawers!!!!!!!!!

[attachment=19947]

[attachment=19948]

[attachment=19949]

DSC_0042ss.webp

DSC_0043ss.webp

DSC_0044.webp
 
Back
Top