

- Thread Starter Thread Starter
- #21
Another post, this time a partial about my chamber build. It's going to be a 4" schedule 40 PVC tubular pipe with a cap on one end and a fitting that has the threaded female cap on it. My plan was to cut a 2" wide piece, then super glue it on a 4 1/2" square. That worked out great as after cutting it in half at 2 3/16" x 4 1/2" pieces. My next step would be to heat each piece only across the highest point, then apply downward pressure with the pipe to get the legs to conform to the OD of the pipe. HUGE failure as the whole piece heated heated to where it looked like a thick slice of bologna in my hand. It was still hot and I did everything I could think of to get to to look good, but the first leg won the battle.
I went to the second one, and heated it a little differently, but still had bologna issues. I got it looking better than the first one and decided I was going to use both, so get my sander ready to sand the PVC before applying the primes. No go with the small Ryobi as the plug was missing one of the blades on the plug. So grabbed one of my trustworthy Rockwell 505's, and did the sanding.
Got both legs attached with the glue, and will be 3-4 hours before I pick it up and install the 2 end caps. Then it's attaching the air supply. I haven't really decided where I want the connector to go. I also must figure out how to attach a diffuser so the air doesn't blast out the resin in the boxes when I'm pressurizing the chamber.
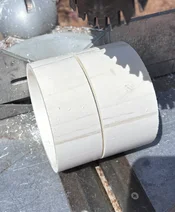
This shows the leg. I'm only going to use the cut on the right for the two legs, and the piece on the left was going to be used to bend the legs to conform to the body of the chamber.
This shows the legs after being heated and bent. Pretty bad job on my part.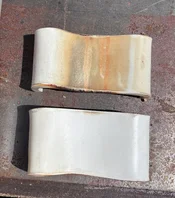
I set the legs up on it to mark the area for sanding.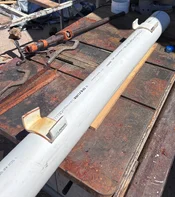
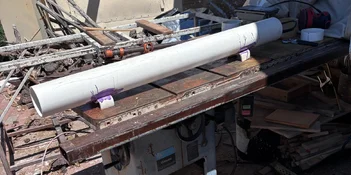
Got the chamber and legs primed and glued. I used a couple lead castings, about 15 pounds each inside the chamber that I normally use to hold down my tarp on the saw. I positioned them just above the legs to get the pressure I need.
I almost had a problem with my cursor, but as you can see, it worked today. More posts coming as I progress.
Later today I might get the ends secured. Not sure about that just yet. I might wait 24 hours before I mess with anything more. ................. Nubs
I went to the second one, and heated it a little differently, but still had bologna issues. I got it looking better than the first one and decided I was going to use both, so get my sander ready to sand the PVC before applying the primes. No go with the small Ryobi as the plug was missing one of the blades on the plug. So grabbed one of my trustworthy Rockwell 505's, and did the sanding.
Got both legs attached with the glue, and will be 3-4 hours before I pick it up and install the 2 end caps. Then it's attaching the air supply. I haven't really decided where I want the connector to go. I also must figure out how to attach a diffuser so the air doesn't blast out the resin in the boxes when I'm pressurizing the chamber.
This shows the leg. I'm only going to use the cut on the right for the two legs, and the piece on the left was going to be used to bend the legs to conform to the body of the chamber.
This shows the legs after being heated and bent. Pretty bad job on my part.
I set the legs up on it to mark the area for sanding.
Got the chamber and legs primed and glued. I used a couple lead castings, about 15 pounds each inside the chamber that I normally use to hold down my tarp on the saw. I positioned them just above the legs to get the pressure I need.
I almost had a problem with my cursor, but as you can see, it worked today. More posts coming as I progress.
Later today I might get the ends secured. Not sure about that just yet. I might wait 24 hours before I mess with anything more. ................. Nubs
Last edited: