

You are using an out of date browser. It may not display this or other websites correctly.
You should upgrade or use an alternative browser.
You should upgrade or use an alternative browser.
What did you do in your shop today?
- Thread starter woodtickgreg
- Start date

@Sprung nice mallet
I like both of the mallets I got in the last swap. The one I got from @Blueglass resides in my basement shop, for times I need a mallet down there. The one pictured was from @Schroedc and I really like it for furniture assembly because it's got a little heft to it, plus it has leather on one face, for some cushioned persuasion of stubborn things. Today it persuaded a few drawers together where the rabbets fit into the dados nicely before glue up, but once I put glue in the dado, the wood swelled enough to need just a little force to get it all in.

The next phase of the shop organization - adding drawers to the lower cabinets.
I have 4 lower cabinets that are just open. Im in the process of adding pull out shelving so that I no longer lose stiff in the back.
Now that one of them is completed I'll batch out the others so I don't have top repeat setups.
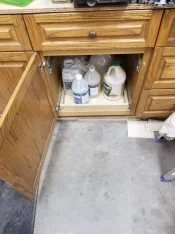
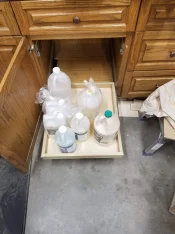
100 lb full extension slides. This cabinet only gets two. The one above it will have mold making materials, coloring agents, etc.
The others will all have 3 and I'l get plenty of practice with box joints as I intend to make small open boxes to separate contents that will fit in/on the shelves.
I have 4 lower cabinets that are just open. Im in the process of adding pull out shelving so that I no longer lose stiff in the back.
Now that one of them is completed I'll batch out the others so I don't have top repeat setups.
100 lb full extension slides. This cabinet only gets two. The one above it will have mold making materials, coloring agents, etc.
The others will all have 3 and I'l get plenty of practice with box joints as I intend to make small open boxes to separate contents that will fit in/on the shelves.
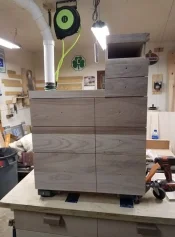
More progress. Almost done with this stand. Just a little trim work yet to do. Then I can apply a couple coats of finish and install drawer pulls. Then, once the saw is installed on the base, I can get to work on building the fence for it. Wood is Elm. Switched to a different option for mobility since the casters I had on it didn't lock it tight enough in place.

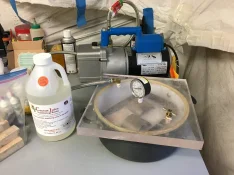
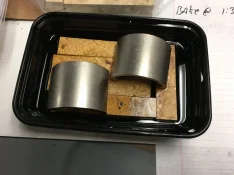
Finally starting on my stabilizing. Using Cactus Juice for the first time. One batch done, but slow process so as not to waste fluid. I really appreciate a buddy that built the set up for us a few years ago. However, using a plastic container inside limits the pen blanks: 4 regular sized and one short. But, I am started! Starting with box elder burl since I have the most of it and I can do trial and error.
Last edited:
Nice, Garry. If you've got any questions along the way, don't be afraid to ask - there's lots of us here who stabilize.
But pretty soon you'll start buying it in larger quantities, instead of that cute little 1/2 gallon jug.
I have two gallons of Cactus Juice arriving Monday. I've gone through more than 25 gallons of the stuff since I started stabilizing...
But pretty soon you'll start buying it in larger quantities, instead of that cute little 1/2 gallon jug.
I have two gallons of Cactus Juice arriving Monday. I've gone through more than 25 gallons of the stuff since I started stabilizing...

Don't wrap it at all Garry, sanding is a pain in the ass when wrapped.
Allow them to drip dry over your pot. Reduce your temperature to 185 - 190o, and put a tin foil lined drip tray in the bottom of your oven. You don't lose any more resin, you won't have 1/10th the amount of sanding to do, and you won't see any difference in quality of the blank once sanded up. Which you'll accomplish way faster and way easier. This not to mention the time required to wrap and unwrap every blank that you'll save.
Allow them to drip dry over your pot. Reduce your temperature to 185 - 190o, and put a tin foil lined drip tray in the bottom of your oven. You don't lose any more resin, you won't have 1/10th the amount of sanding to do, and you won't see any difference in quality of the blank once sanded up. Which you'll accomplish way faster and way easier. This not to mention the time required to wrap and unwrap every blank that you'll save.
Yup, Rocky's right - don't wrap it, if you can avoid it. Too much of a hassle. I put them on a rack above a foil lined tray. I also let them drip dry first for 20 to 30 minutes before they go on the pan/rack to cure. I cure in an electric smoker at about 190F and use quarter sheet pans lined with foil with cooling racks sized to fit in the pan to get the blanks off the bottom of the pan/foil.
The only time I wrap anything now is if it's something that will not fit on my trays, which is very, very rare - and then it's always a hassle cleaning off foil and sanding.
If you insist on foil, unwrap and sand them while they're still hot and fresh from the oven - the foil will be easier to remove and it will be easier to sand.
The only time I wrap anything now is if it's something that will not fit on my trays, which is very, very rare - and then it's always a hassle cleaning off foil and sanding.
If you insist on foil, unwrap and sand them while they're still hot and fresh from the oven - the foil will be easier to remove and it will be easier to sand.
Sanding warm goes wrapped or unwrapped. Makes a huge difference wrapped, but even unwrapped, if you'll pull them out of the oven and let them cool just enough you can handle them, they sand a whole lot easier, and quicker! Going unwrapped, sanding warm, you can sand a blank in a matter of seconds. Makes life much simpler, and it doesn't make as much dust!
Finally got the blanks baked, need to get a picture of them.
Wife then helped me get motivated back on my slab table. Been wanting/needing to do a butterfly across a crack that developed but been nervous about it. I have the jasper templates but not the jasper router plate for my router. I just used a guide bit, but it wasn’t long enough......just realized what I could have done......darn......oh well, learn. Practiced on a piece with a nice crack first. Anyway, tough part was making the insert. Has to be an easier way than I did it. Just need to trim it down now and finish it.
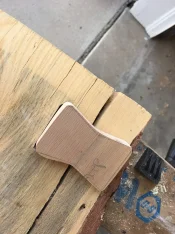
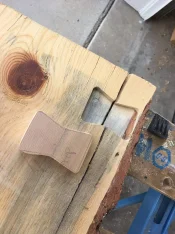
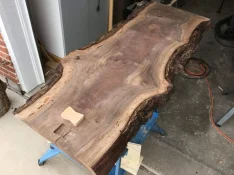
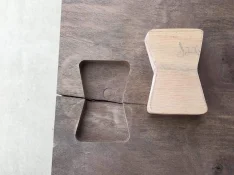
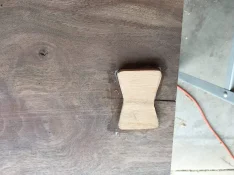
Wife then helped me get motivated back on my slab table. Been wanting/needing to do a butterfly across a crack that developed but been nervous about it. I have the jasper templates but not the jasper router plate for my router. I just used a guide bit, but it wasn’t long enough......just realized what I could have done......darn......oh well, learn. Practiced on a piece with a nice crack first. Anyway, tough part was making the insert. Has to be an easier way than I did it. Just need to trim it down now and finish it.

Finally got the blanks baked, need to get a picture of them.
Wife then helped me get motivated back on my slab table. Been wanting/needing to do a butterfly across a crack that developed but been nervous about it. I have the jasper templates but not the jasper router plate for my router. I just used a guide bit, but it wasn’t long enough......just realized what I could have done......darn......oh well, learn. Practiced on a piece with a nice crack first. Anyway, tough part was making the insert. Has to be an easier way than I did it. Just need to trim it down now and finish it.
View attachment 165217
View attachment 165218
View attachment 165219
View attachment 165220
View attachment 165221
Garry, please do not be upset with my comment, usually the 'butterfly' grain is oriented opposite, as long ways grain adds strength. With the grain is easier to sand and adds some strength, not a lot. The gluing agent is likely doing most of the work.
Another method I've seen but have not tried is using a plywood butterfly bow recessed with a decorative laminated over it. So the glue is a big part, plywood, having alternating directional laminations carries most of the brunt, and the decorative inlay on top to seal the deal. Using a two piece allows flexibility with the plywood bow-tie, just fill the voids with glue / bonding agent. Then the decorative cap is the only piece that needs real precision...
Last edited:
Scroll saw if you have one. Jig saw might be easier. Back to basics... Coping saw.
How did you do it?
How did you do it?
Scroll saw if you have one. Jig saw might be easier. Back to basics... Coping saw.
How did you do it?
bandsaw and lots of sanding. I thought there might be something special I was missing with the router....... I will look at some of the Japanese type saws to take the top part off. I certainly understand about grain running the wrong way; just completely forgot to consider that when cutting the butterfly out.

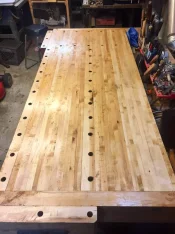
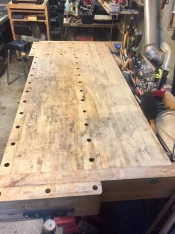
Cleaned up my bench, today.
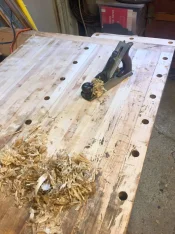
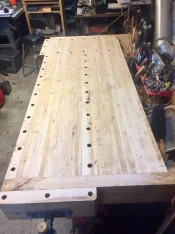

Nice bench!

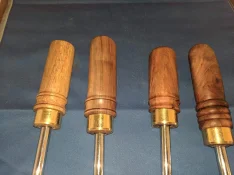
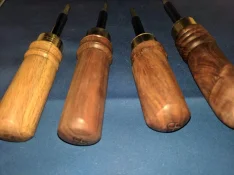
Turned some handles for screwdriver kits. Hard to see in pics, but there are three lobes. Happy with how they turned out. L to R: Persimmon, walnut, Chinese tallow & black walnut.

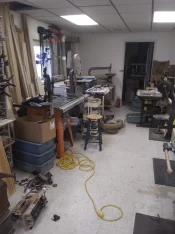
Spent the day cleansing the shop. @woodtickgreg has one of my pedal adapters and I sent a sample to the organizer of a 7,000 member sewing group. He reviewed it and posted about it. I've had 80+ ordered in the last 4 days. Now to go pick up a ton of lumber and drill lots of holes
Plus show season starts in 3 weeks and I have almost no inventory made up. I'm going to be busy if I can figure out how to pay for 200-300 kits....
Plus show season starts in 3 weeks and I have almost no inventory made up. I'm going to be busy if I can figure out how to pay for 200-300 kits....
I've had 80+ ordered in the last 4 days.
Wooo! That's awesome!!!
Wait till word gets out on those nifty laser engraved cabinets and bases.