What did you do in your shop today?

Well not today because it's too early but last couple days anyhow...

Been playing with dying, and double/triple dying, and casting, and dying and casting and what not, and kinda meeting with mixed results.

- Learned that running short of alumilite, mixing more and repouring doesn't necessarily work, and even if you do get it turned, getting a decent finish on it after the fact is not likely.

---- I didn't take pictures of that one!! --- :blush::blush::blush:

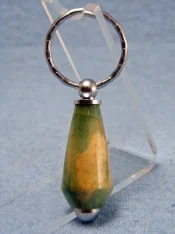
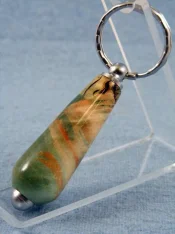
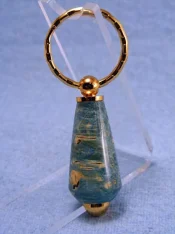
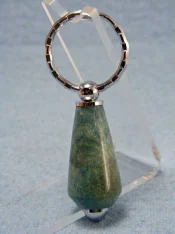
- Learned that you can dye half a dozen similar blanks, (all were box elder scraps, sorta) and cook them off in the same batch, and no 2 will look anything alike! They'll all behave differently. First two were soaked in blue, second two were soaked in green first run, swapped containers and soaked for a week or so without vacuum, cooked, then pulled vacuum with all of them in Orange, held that a day or two, then let them soak under pressure for a week, and cooked. And...
DSCF4444_W.webp DSCF4449_W.webp
DSCF4450_W.webp DSCF4457_W.webp

- Learned Bamboo Laminate is interesting when dyed, but not as interesting as I thought it might be. And, that glue streaks really show up when present.
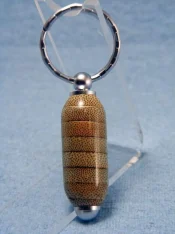
DSCF4446_W.webp


- Learned alumilite doesn't always stick to wood as perfect as we would like for it too. Was supposed to be a pen! Other half the blank blew out.
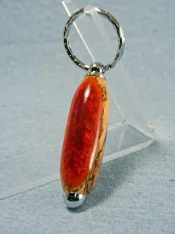
DSCF4442_W.webp

- Learned some times it does stick, and despite best laid plans, it turns away before you get to size... Casting actually ran up to about the ball on the end of the clip. But it vanished as I was turning it.
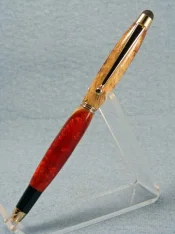
DSCF4438_W.webp

- Learned Norman's Russian Olive Burl is elegant not matter what you turn it into! Although this picture doesn't really do it justice.
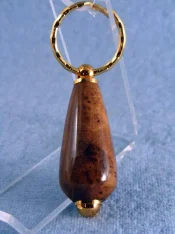
DSCF4459_W.webp

- Learned that with all man's attempts to make wood more beautiful, you simply can't outdo nature! (Same keychain, totally different figure from one side to the other.)
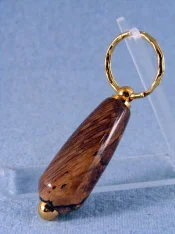
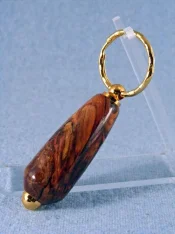
DSCF4463_W.webp DSCF4462_W.webp


Guess long as you learn that much, the weekend wasn't a total loss!
 
Last edited:
Ran out of upload room :cowboy:


Credit Card Stylus/Pen in Russian Olive Burl... Camera didn't want to work well on all the pictures so we only got two, because I wasn't going back out there to take more at 1 am.

DSCF4437_W.webp DSCF4432_W.webp

- Burnt Orange w/orange pearl Alumilite casting on Spalted Red Oak. Kit was a 24 carat gold stylus pen from PSI.

DSCF4438_W.webp DSCF4439_W.webp DSCF4440_W.webp DSCF4441_W.webp
 
You've been busy. And as per usual you have turned out some very pretty items! I need to get with you on some beeswax but I think I am going to wait until the end of the month as this wedding on the 25th is eating up all my profits and then some.
 
I promise I won't cut into your profits to bad! :wink:

LOL. That's just the problem... there are no profits left. But soon. Last one. Soon. Very soon. Someone else will be sharing their profits. Soon. March 25th. One more. Last one. Soon.
 
The new picture taking set up works really sweet Lou. Able to move light wherever to bring out certain features in things, but just as importantly, I can set the camera on tripod, click the timer, and let it do it's thing. Camera is settled when the shutter trips, and I'm not wiggling or shaking it. My camera has 2 settings, 10 seconds and 2 seconds, which while the latter may not seem like much, is more than adequate for what I'm doing; although I do use both of them a great deal.

I've really been impressed with that investment!! Worth way more than what I got into it, and it was WAY simple to build.
 
The ones I'm using are a 60 watt rated Daylight LED. Actual wattage is only 12-14 watts or something like that.

I tested 4, Halogen with clear glass (couldn't find a daylight halogen), CFL and 2 LED bulbs -soft white and daylight, all were 60 watt rating so it was an honest comparison, and this one on the blue shop towel background seemed to work best.

Light Test
 
They do in those photos Marc, however... The test itself was about which bulb afforded best light, and how background affected that, and the page was set up simply to look at the differences in those factors. Not so much which camera would take a better picture. My lamps were set in a position that was easily repeatable, not necessarily optimum position for a great picture, something I could find consistently for all the pictures on that page. I stood out there taking pictures literally for almost 8 hours, changing bulbs and changing objects, and changing backgrounds, after botching several hours work the day before when moving lamps, trying to get them back in the same spot that gave me really nice pictures, and not quite getting them there.

If I adjust my light to the right location to give me a better picture, then it's frequently a toss up. Camera gives me an edge with not having it in hand to take pictures, cell phone gives me an edge with being able to adjust white balance with a touch of the screen. So both have qualities that can and do make them out perform the other on any given picture.

But, when I toss them in my antiquated copy of Photoshop Elements, click 'Auto-Enhance', 'Auto-Levels', and 'Auto Contrast', then the camera pictures typically shine. The colors come out far more accurate off the camera than off the Cell Phone. Every once in awhile cell phone pictures throw some really weird colors into things, and I honestly don't know why!

But pictures on the light test page were not touched with Photoshop, again the test and page were about which afforded me the best light.

And, honestly that was kind of a toss up.

I did learn that the camera would not take a decent picture of an ink pen over camo background. Redid those more than once, and the pen blurred in every photo.
 
Last edited:
after botching several hours work the day before when moving lamps, trying to get them back in the same spot that gave me really nice pictures, and not quite getting them there.

I did learn that the camera would not take a decent picture of an ink pen over camo background. Redid those more than once, and the pen blurred in every photo.

Is it possible to mark the spots on the floor/table with tape where the things go in relation to the set up?
also take a picture of the set up for future reference, and leave it with the set up.

And lighter backgrounds are always better, you want the focus on the object, and not have to look for like playing where's waldo...
I noticed that too...I did a bunch of testing a while back, I have a light box and stuff, but I found a spot in my backyard on the old concrete steps where it everything comes out great. It does need to be close to the afternoon for the good pix to start. and they all look good up until the sun starts to set.

I went from this...

12239510_10208005062347817_538961657037733275_n.webp

To this.....

IMG_20161004_143714693.webp

I still need to tweak it a little, I'm not happy with the light colored bar that shows on the top side of the pen....
 
Last edited:
Is it possible to mark the spots on the floor/table with tape where the things go in relation to the set up?
also take a picture of the set up for future reference, and leave it with the set up.

And lighter backgrounds are always better, you want the focus on the object, and not have to look for like playing where's waldo...
I noticed that too...I did a bunch of testing a while back, I have a light box and stuff, but I found a spot in my backyard on the old concrete steps where it everything comes out great. It does need to be close to the afternoon for the good pix to start. and they all look good up until the sun starts to set.

I went from this...

View attachment 123056

To this.....

View attachment 123055

I still need to tweak it a little, I'm not happy with the light colored bar that shows on the top side of the pen....

Amazing how the lighting changed the style of the pen!!! :sofa:
 
Is it possible to mark the spots on the floor/table with tape where the things go in relation to the set up?
also take a picture of the set up for future reference, and leave it with the set up.

Actually it varies according to color of the object, time of day in the shop (whether there is influence from ambient light and such), how the object is placed, etc. Ambient light is probably the biggest issue, it changes light placement drastically.

And lighter backgrounds are always better, you want the focus on the object, and not have to look for like playing where's waldo...
I noticed that too...I did a bunch of testing a while back, I have a light box and stuff, but I found a spot in my backyard on the old concrete steps where it everything comes out great. It does need to be close to the afternoon for the good pix to start. and they all look good up until the sun starts to set.

Yes and no.... If you get too light in color you throw white balance off, and it may cause a darker object to come out quite dark. Lighter colored objects may show better against darker backgrounds as well. But again, as is evident in the Light Test photos, black can cause your white balance to go the other way, and may create issues.

I still need to tweak it a little, I'm not happy with the light colored bar that shows on the top side of the pen....

Would be nice to get rid of all reflection, but then it doesn't look shiny!!
 
I decided to see how far a pot call will fly when flung by the buffer today.

In the first pic you can see how the dyed calls look after a few coats of satin WOP have dried, in the last you can see how it pops once it's been buffed and waxed. Tomorrow I'll start gluing in the glass and slate and get started on striker handles.


2017-03-01 12.34.18.webp 2017-03-01 15.10.31.webp 2017-03-01 15.55.56.webp 2017-03-01 15.56.13.webp
 
Well, it really depends on what insert you're using. Since you're harvesting an insert from a mug, what you need will be different that what I need.

The blanks I've been working with are blanks that haven't been fully dried, so I've been rough turning them, drying them, and then finish turning. In rough turning them I've been drilling them with a forstner bit of the diameter of the smallest end of the inserts I'm using. I think it's 2 1/8", but can't remember for certain. So, the wall is a consistent thickness while drying. Then, after it's dry and ready for finish turning, I go at it with tools to open up the inside and then finish turn the outside, etc.

I've only got one complete one so far (plus one that would have been complete, but I turned it too thin in one spot, so I cut it short and it's now a pen cup in the shop) and a handful in progress.

Did you wver finish that one mug we were talking about? Carob maybe?
 
Did you wver finish that one mug we were talking about? Carob maybe?

Last coat went on recently. I plan to post pictures once it's all assembled and ready to go. Indian Rosewood w/ sap was the one I was working on.
 
Back
Top