

You are using an out of date browser. It may not display this or other websites correctly.
You should upgrade or use an alternative browser.
You should upgrade or use an alternative browser.
What did you do in your shop today?
- Thread starter woodtickgreg
- Start date


Overview:
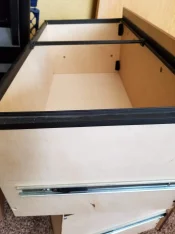
Top rail removed:
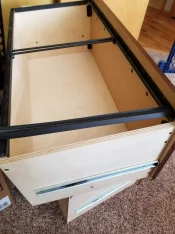
Interesting drawer slides:
Those two largest holes on the far side? Those are threaded nylon inserts the three drawer slide screws go in to. They're more of a pressure fit, not actually threaded, but it's how they prevent the screws from stripping out.
More interesting hardware:
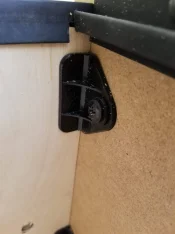
This screws into the front panel. On one of the drawers I had to unscrew from the front so I put thick CA in the holes when I reassembled.
The side of the piece has two through pieces so the screws on the outside don't actually screw into the wood, but into those little tubes.
The back was pre-drilled and countersunk for #8 x 1 1/2" screws.
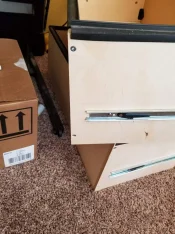
I like the Robertson drive, but it seems like they have a tendency for the driver to stick in them.
Enough pictures?
Top rail removed:
Interesting drawer slides:
Those two largest holes on the far side? Those are threaded nylon inserts the three drawer slide screws go in to. They're more of a pressure fit, not actually threaded, but it's how they prevent the screws from stripping out.
More interesting hardware:
This screws into the front panel. On one of the drawers I had to unscrew from the front so I put thick CA in the holes when I reassembled.
The side of the piece has two through pieces so the screws on the outside don't actually screw into the wood, but into those little tubes.
The back was pre-drilled and countersunk for #8 x 1 1/2" screws.
I like the Robertson drive, but it seems like they have a tendency for the driver to stick in them.
Enough pictures?
Last edited:


Actually did something out in the shop. Not fine woodworking. Maybe not even woodworking at all but it checked an item off my wife's list.
Last week we bought a 2 drawer lateral file cabinet from Nextdoor. It was fairly inexpensive but after we got it home it was probably something we should have turned down. I did notice that the bottom was out of one of the drawers but didn't think that would be a big deal to fix. It wasn't until after getting it home that I saw that the back of one of drawers had been broken out. It was that compressed chipboard stuff.
Made a trip to pick up some plywood (I also picked up the 3/4 BB for the other project, extra 1/2 BB for containers for my shop drawers, and some 1/8 BB for drawer bottoms - and that stuff is expensive!) and rebuilt both drawers.
The drawer fronts are still in fine shape so I kept those.
I didn't realize that the hardware for setting up drawers was available to 'normal' people. Stuff like:

Which is very similar to what was used in this cabinet or I may have just built one. Even with replacing the drawers sides and bottom it was cheaper to go this way in the long run.
At any rate, we now have a two drawer lateral file cabinet (about 26" wide) that has much sturdier drawers and I have one project checked off the list. All in all not a bad 3 or 4 hours.
Remind me what BB stands for in this post...Thanks.

Baltic Birch


- Messages
- 3,087
- Reaction score
- 6,406
- First name
- David
Did another impulse buy. Several of the turning club members have the Sorby texturing tool so I splurged. Thinking most about using it on the bottoms of my bowls to dress them up a bit. Will see. In the process of doing two more bowls as well as hoping to cast my first blanks.
View attachment 161291
View attachment 161292
Have one— same circumstance—— try it on some “scrap” to get a feel for it.
- Messages
- 3,087
- Reaction score
- 6,406
- First name
- David
I cutand cleaned- I always clean- never enough though- never to find the pot of gold at rainbow end- there is always more mess.....
then cleaning. never to be clean.....
ps I would post pictures but I do not want to be responsible for a certain Canadian members health @Kenbo
My shop??—Think he’d pass completely out—- should he venture this far south.
Working on finding an industrial strength blower...
My shop??—Think he’d pass completely out—- should he venture this far south.
Working on finding an industrial strength blower...
I do need to visit you, I would feel at home!
So on Saturday I spent about 4 hours out there before it got overly warm (well, that and my wife wanted some help in the house.)
I am working on building a laminar flow filter for mushroom growing work. Yes, it's not actually laminar flow but that's how the guy describes it.
I got the main box cut and assembled which includes the stop strips for the filter and the hole for the blower. I was quite pleased with it as the filter is a nice fit all around. Maybe 1/16 inch clearance on three sides (it sits on the bottom) and it slides right in. The guy stopped by last night to pay for materials and we discussed whether or not he'd ever need to take it back out as I found I had to push it from the back to get it out. Just nothing to grab on to from the front :) The filter itself is 24 x 48 x 7 so it's fairly substantial.
I've made a couple of changes from the original plans and this will be one more - I'll put in a lip all around the back and use more weatherstripping to seal the back. That way he can take the back off if he ever needs to push the filter out.
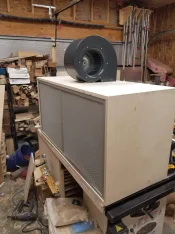
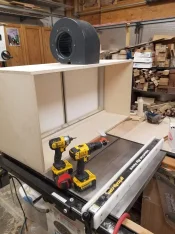
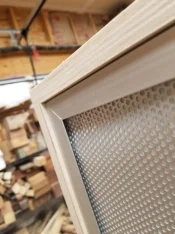
The filter is inset because a 'flange' will be added to the front with weatherstripping between the filter and ply to seal it up. That inset is sufficient that the weatherstripping will compress and still let the flange lay flat.
I am working on building a laminar flow filter for mushroom growing work. Yes, it's not actually laminar flow but that's how the guy describes it.
I got the main box cut and assembled which includes the stop strips for the filter and the hole for the blower. I was quite pleased with it as the filter is a nice fit all around. Maybe 1/16 inch clearance on three sides (it sits on the bottom) and it slides right in. The guy stopped by last night to pay for materials and we discussed whether or not he'd ever need to take it back out as I found I had to push it from the back to get it out. Just nothing to grab on to from the front :) The filter itself is 24 x 48 x 7 so it's fairly substantial.
I've made a couple of changes from the original plans and this will be one more - I'll put in a lip all around the back and use more weatherstripping to seal the back. That way he can take the back off if he ever needs to push the filter out.
The filter is inset because a 'flange' will be added to the front with weatherstripping between the filter and ply to seal it up. That inset is sufficient that the weatherstripping will compress and still let the flange lay flat.
Last edited:


Working on CNC projects today. Picture will come later.
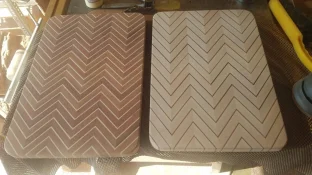
I've been working on some of these.

Made a bloodwood pen on Sunday,and wrecked the walnut bowl I was working on.

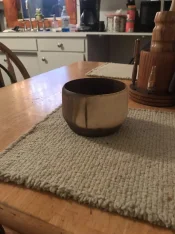
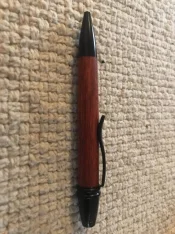
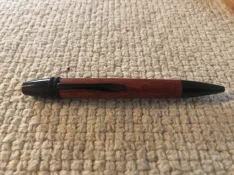

Wondering how thick the bottom of the bowl is? That is a nice pen. You were more productive than me.


You could always drill more holes and call it a Colander!
Get better pictures of it Troy, someone here will have an idea or two on how to fix it.
Rocky is right.
Well,I didn’t measure the bottom,all I can tell you is it’s thicker than the laminated one the blew up. The bottom is ok, i cracked it in three places on the side,i glued up the first two,went out resanded it and cracked it in another spot,sooooo the smart guy I am I thought why not put a ca finish on it to hold all the cracks,well that didn’t turn out very well inside or out. Will need to be redone to fix it imo. I’ll post some pics after work.