What did you do in your shop today?

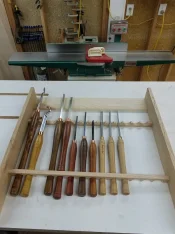
Now can you see where I'm going with this?
20200412_165917.webp
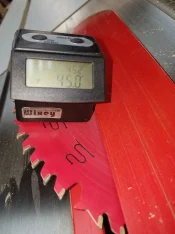
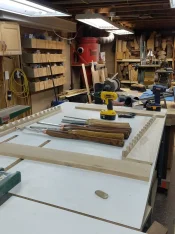
I set the table saw up to rip 2 edges of the bottom board to 45 degrees.
20200412_171321.webp
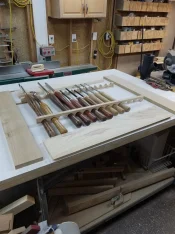
Heres all the parts cut.
20200412_172146.webp
The bottom board will be screwed on at a 45 degree angle. This should help with chip cleanup, and it should also lock the chisels in by gravity.
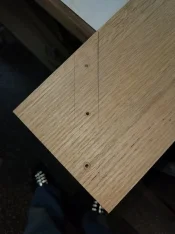
Since this is all hardwood all screw holes will be pre drilled and countersunk.
20200412_173043.webp
Hopefully tomorrow I can get it glued, screwed, and assembled.
20200412_184739.webp
 
Last edited:
I built a table saw sled using William Ng's 5 cut method to get the fence to 90°. Got close and called it good enough 89.997°. I can see next on my agenda is getting that tablesaw top cleaned up and waxed. This saltwater atmosphere around here is He$$ on my tools

katzmoses.webp
 
I was going to do some wood turning today, but thought.......gee I sure could use some new chisels. So I decided to start making some on the ole south bend. So I oiled her up and had at it. It was a fun day in the shop doing a little machining, had so much fun running the south bend that I made a bunch of extra blanks to sell as well. Running the south bend is just an absolute joy! This was the longest I ran her since the restore, I ran it about 5 hours straight and the bearing caps never even got warm. It tickled me to see oil running out of the shafts and dripping on the machine, that told me it was getting properly lubed. I put the 4 jaw independent chuck back on and ground up a hss cutter and set it up in the tool holder. I played with the speeds and depth of cuts as well. I love the smell of cutting oil! :yipee: It's like gun oil and solvent, or wd 40, or marvel mystery oil. I know that's weird. :dunno: So here's a few pics...........

First three pics are of the lathe running and making a cut. Turning square stock round for the handle end of the chisels.
[attachment=33028]

[attachment=33029]

[attachment=33030]
I said I was going to use this lathe and get her dirty, it's not an art or museum piece. She's covered with oil and chips and being used as it was meant to. I think it's as close to running a brand new 1949 lathe as you can get. It just flat out works. :biggrin:
[attachment=33031]
I used this cart during the restore of the lathe, now it has been re purposed as a machinist cart. Some of my machining tools are on it, oils for the lathe, some steel stock etc. I can pull it out when I want to use the lathe or mill and push it back between the mill and lathe when I'm done.
[attachment=33032]
This is what I am starting to work on, 3/8" square cold rolled stock.
[attachment=33033]
If I turn the ends round it will make it easier to handle them when they are done. Just drill a 3/8" hole in the end of the handle and epoxy them in.
[attachment=33034]

[attachment=33035]
Was a fun day in the shop. :biggrin:
What did you guys do in the shop today?

View attachment 33028

View attachment 33029

View attachment 33030

View attachment 33031

View attachment 33032

View attachment 33033

View attachment 33034

View attachment 33035

Made doors for my workshop (actually did it a few days ago). See the post in the “classroom” forum. Fell and broke some ribs Thursday, so i have been pretty sore for 5 days! But today I feel like firing up the chain saw and clearing brush along the edge of the cliff in front of my house.
 
@Ralph Muhs
Your a sick man Ralph, that's what I like about you. :cool: I love sarcastic humor:sarcastic:
 
Actually did this yesterday. Two Z bar cabinet doors in Cedar I didn't know I had. Drove all over town Friday looking for some old wood to make these doors. I've had this cedar over 10 years sitting outside on my flatbed trailer I haven't used in a longer period than that. I'd cut up the old wood I found, but was short two 3" pieces x door height. I was looking around in frustration and spotted my trailer. I can't really describe that moment other than, jeez, all that time wasted and here it is, right under my nose. Kinda like looking for the car keys for 10 minutes realizing they are in your left hand the time.........
Anyway, here they are.....

8CE5803B-013D-49F3-B523-BB030DE3F0A3_1_201_a.webp

The customer wanted distressed. No putty, not much sanding, gaps ok, and saw marks are a plus.......... Jerry (in Tucson)
 
Cut dados for the seat on the next stool.

F84013A1-20EC-42E6-8F85-C1069718512D.webp

C6441E8D-28E2-4B5D-B26A-9461D862B633.webp

Great feather on this walnut. I saved this piece for the second stool so I would make the mistakes on the first. I had hoped to get the seat roughed out today but I ran up against the shop idiot.

I have a contractor size Saw Stop (love Craigslist). To use a dado stack you have to change the safety cartridge to one sized for dados. After installing it I kept getting an error code that said to adjust the position of the brake cartridge. I messed around with that for an hour and gave up. Thought I just use the regular 10” blade. After putting the regular brake cartridge back in, same message and another frustrating 45 minutes. I resigned myself to calling Saw Stop, but before I did I dug out the manual. That’s like admitting defeat, you might as well get the map out if driving. In less than a minute I learned you have to put the blade back on and then check it. Did that and magic. Back in business. And it makes all the sense in the world. The machine was doing exactly what it was supposed to do.

So I guess I’ll have to finish roughing the seat later this week.
 
I got the chisel rack assembled today, glued and screwed.
20200414_184926.webp it worked as planned, gravity holds them in place. Easy in and out.
20200414_184942.webp I plugged all the holes with oak dowels since the sides are oak.
20200414_192659.webp I'll let the glue set up overnight and I'll cut them off tomorrow and sand everything smooth.
20200414_192707.webp
 
I got the chisel rack assembled today, glued and screwed.
View attachment 184778 it worked as planned, gravity holds them in place. Easy in and out.
View attachment 184779 I plugged all the holes with oak dowels since the sides are oak.
View attachment 184780 I'll let the glue set up overnight and I'll cut them off tomorrow and sand everything smooth.
View attachment 184781
Greg, did you think about having any binding issues when you reach out for a tool. I think the CI1, 3rd from left in the pictures might be the only one with that 3 points of contact setup you have. ............ Jerry (in Tucson)
 
Greg, did you think about having any binding issues when you reach out for a tool. I think the CI1, 3rd from left in the pictures might be the only one with that 3 points of contact setup you have. ............ Jerry (in Tucson)
I tested them, they all go in and out easily. Really works well. This will be mounted on a wall. Nothing will fall out and they dont seem to bind in any way.
 
Cut off all the plugs in preparation for sanding everything and finishing this project up.
Here's a little trick I do when cutting the plugs off. I use an old piece of sandpaper from my sander to protect the wood as I cut them off. It works pretty good, leaves them just a little proud of the surface and then they sand real easy with some 150 grit.
20200415_123811.webp First coat of water based poly. Itll get another coat or 2 since this stuff dries so fast. 20 to 30 minutes between coats.
20200415_140423.webp 20200415_140443.webp 20200415_140456.webp 20200415_140734.webp
Another salvaged and free wood project.
 
Back
Top