
What did you do in your shop today?

Thanks fellas, I appreciate the kind words. I got 2 coats on and I'm gonna call that good. I want to get it hung today.
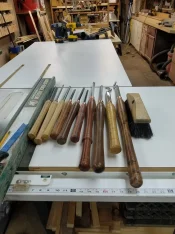
This will be the last day my turning tools are piled on a counter or workbench.
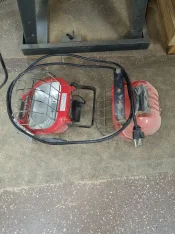
20200415_142111.webp I had these lights mounted over the lathe, had them in my old shop too. They're halogens and on the yellow side of the light spectrum. I decided they have to go. I have a clip on light with a 5k led in it and I like the light it throws better, plus they are way more efficient. These are going in the trash, a scrapper will be happy this week. Lol.
20200415_154027.webp
 
Finished it up and now it's time to hang it.
Since it's just a panel wall from an earlier time when it was a finished basement I needed to use some anchors on the thin hollow wall.
20200415_163425.webp And its mounted.
20200415_164056.webp And I loaded it up with my chisels. All but 3 of them I made, theres room for a few more.
20200415_164854.webp I'm going to like this. I've never had a good place to store my turning chisels before.
20200415_164935.webp A little better light.
20200415_165013.webp
It's only new once, lol.
 
Since I was cleaning up the shop after completing the chisel rack I turned my attention to the spindle sander. I purchased this at an auction, it came with a milk crate of spindle sleeves, the original owners manual, and the sales receipt from when it was purchased. It spent its life at a pump company in Detroit. It probably only sanded metal and never wood. The scratches on the top kinda show that. The top had some rust and needed some love.
20200415_165828.webp So I hit it with a random orbit sander and some 220 grit to clean it up and remove the rust.
20200415_170219.webp And I waxed it afterwards with some minwax paste wax. I coat all my machines with this.
20200415_170642.webp Much better and going back to its spot on the tool cart lower level until I need it again.
20200415_171127.webp
 
Since I was cleaning up the shop after completing the chisel rack I turned my attention to the spindle sander. I purchased this at an auction, it came with a milk crate of spindle sleeves, the original owners manual, and the sales receipt from when it was purchased. It spent its life at a pump company in Detroit. It probably only sanded metal and never wood. The scratches on the top kinda show that. The top had some rust and needed some love.
OK now you're just pissing me off!! :sofa:
 
Finished this stuff up for Tony, hes getting a care package.
20200416_125108.webp
Not my best work, ugly welds, but hell be able to use them on his new lathe.
Straight rest are hex stock, kinda cool and different.
 
I need some rest for myself and I cant make them at this time. Grrr:mad:
 
Todays project is to start making the drawer for the drill press/oscillating sander cart.
I started by setting up the drawer lock bit that I recently purchased.
20200416_151420.webp 20200416_151525.webp One cut is made on the flat.....
20200416_151920.webp And one cut is made vertical.
20200416_151939.webp The bit didnt come with any instructions. I'm a genius! Not really, I have Google. Lol. After many minor adjustments I finally got it set right. I just kept cutting off the bad ones and re routing them.
20200416_151606.webp And this is what I was shooting for. This will give lots of glue surface and be a strong joint. Once you get the bit set it's super easy to make the drawers.
But man there was a learning curve. It's all about challenging yourself and trying new things.
20200416_151542.webp The dry fit drawer frame.
20200416_153506.webp 3 passes on the table saw made the dado groove for the 1/4" bottom panel.
20200416_162135.webp Another dry fit.
20200416_163237.webp And then I glued one side at a time to keep it square.
20200416_170552.webp
That's all for today.
 
Take a piece of scrap and run it through the router now that you have it adjusted. Save that piece with the lock joint bit for a setup block for next time!
 
Take a piece of scrap and run it through the router now that you have it adjusted. Save that piece with the lock joint bit for a setup block for next time!
Yup, I already did that.:cool: but thanks for the tip.:good2::thanx2:
 
I finished up the drawer today. Installed some repurposed drawer roller guides.
20200417_144121.webp
And I only had to mount the cabinet part of the guides twice because the first time I couldn't get the drawer in, lol.
20200417_152207.webp
I have to make sure the spindle sander is at the bottom of its stroke, it just clears the drawer by 1/4"
20200417_153410.webp
I put some 2 sided carpet tape on the drawer to hold the face on so I could get screws into it from the inside.
20200417_155216.webp
3 deck screws are plenty to attach the face.
20200417_155729.webp
The face is box elder, round the edges with a router and sanded to 150, good enough for the shop. No finish will be applied to the cart.
20200417_155818.webp
I made the drawer to hold the sander accessories and some sanding sleeves.
20200417_155903.webp
This is better than just dumping the stuff out of a milk crate.
20200417_160241.webp
But the leftovers went back in the crate and into the storage closet.
20200417_160250.webp
 
Last edited:
The next project........
20200417_162411.webp
I may do this one in the classroom.
 
I was in the shop this afternoon with the door open. I was turning a platter and looked up and saw one of my neighbors standing just outside. He said that he had been walking his dog and ran across a home owner about a two minute drive away that was cutting up a plum tree. I was there in about five minutes. The story goes that last Saturday a "small twister" showed up unannounced and took his tree down along with tearing up his patio furniture. No other apparent damage in the area. The wood was already promised to someone for firewood. I showed him a plum bowl I finished a couple of weeks ago. He didn't look all that impressed but grabbed his chain saw and was willing to cut AND LOAD all the wood that I wanted. I can't handle big stuff due to defective and sketchy shoulder. The wood has some great color and one fair burl. Any suggestions on what I should do with one of the pieces that is about 5 inches in diameter?

Plum 1.webp

plum 2.webp
 
Back
Top