Work bench build - picture heavy.

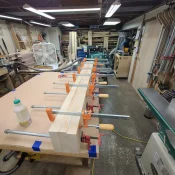
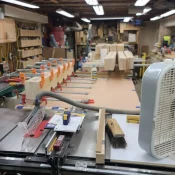
Working on the last of the glue ups, 3 more to go after this. Then I'll dimension the glue ups and start joinery.
20231224_162350.webp 20231224_162501.webp
 
Last edited:
Had a good day in the shop today. Put the new planer to work. Created another drum of wood chips.
Dimensioning the glue ups now. These are 5 5/8"×6" The finished size will be 5 1/2" w 5 1/2"
20231226_163726.jpg
These are the leg end cross stretchers.
20231226_164734.jpg
Filled a knot with CA.
20231226_164750.jpg
These are the leg uprights, they will be 5 1/2" square as well. Just trued up and square at this point.
20231226_172130.jpg
And another glue up in the clamps. 1 more to go.
20231226_172143.jpg
Once the glue ups are done and all the stock is planed and dimensioned I can finally start the joinery on the base.
 
Last edited:
The last glue up is in the clamps.
20231227_171322.webp
 
All the leg stock is now dimensioned, it cleaned up at 5 9/16" I call it 5 1/2"
20231230_152404.webp
Ripping the upper cross stretchers to width.
20231230_152421.webp
And the same for the lowers. Cut, flip, cut again.
20231230_152920.webp
I then ran the cross stretchers through the planer for a light skim cut to clean them up.
20231230_154402.webp

Cross stretchers are now dimensioned.
20231230_155649.webp
I marked the legs to be cut to length.
20231230_164728.webp
And cut them on the table saw.
20231230_164841.webp
Cut, roll, cut.
20231230_164904.webp
 
Legs are now all cut to length.
20231230_170418.webp
Did some layout for the mortices.
20231230_175654.webp 20231230_180631.webp
And calculated how long to cut the short cross stretchers for the legs. Tennon length etc.
20231230_180748.webp
 
Well I got off work early today so I started drilling out the mortices. First I'll drill with a small forster bit in the corner and then drill the bulk of the waste out with a larger bit. I set the depth at 1 3/4" and set the drill press to its slowest speed.
20240102_170735.jpg
I was making good progress and then I heard thwap thwap thwap and rubber came flying out the back of the drill press right before it locked up with the bit at full depth. Hmmm, I smell rubber!
Shredded the belt and it got all wrapped up in the reeves drive.
20240102_172957.jpg 20240102_173013.jpg
Covered the spring with my hand and removed the snap ring.
20240102_175402.jpg
Pulled the upper sheeve half off and un wrapped the shredded belt.
20240102_175417.jpg
Old delta, parts are hard to find. Some people wanted $89 for one belt. I found them on ebay for $16 a piece if I ordered 2, so I did. Coming from bandsaw tire warehouse. I liked the sound of that. They also cary drive belts for a lot of machines. I do like this little delta so I'll fix her up, it's just a belt. I'll blow out the top of the machine and clean her up while I'm waiting on the belt. Stuff happens.
But for now I'm dead in the water until the belt comes and I can get the drill press back together.
 
Last edited:
Sorry to hear about the inconvenience when you’re in go mode! I’m sure if anyone can recover quickly and efficiently to get an old tool back running you’re the man!
 
Once you get the belt, might I suggest getting it's measurements and then you can cross reference them at AutoZone.
Well I ordered 2 of them so I would have a spare on hand. And it's not a plain v belt, its cogged on the inside. I dont know if it would make a difference or not but it may be that way to make a tight bend on the pulleys.
 
Well I got the belts. My hand is still out of commission but I figured out how to get this back together with basicly one hand.
First I took off the lock ring on the front pully Assy then loosened the set screw on the top pully. Removed the top pully with the aid of a couple of wood wedges and very light tapping. You can't pry on the cast aluminum pullys.
20240115_134008.jpg
After putting the belt in place it was time to reassemble the rear pully. Since my hand doesn't have the strength to compress the spring I clamped it in a vice and put some zip ties on it.
20240115_140244.jpg
This made it easy to get the cap on and the snap ring. Once the snap ring was in place I just cut the zip ties to release the spring and pulled the zip ties out with pliers.
20240115_140336.jpg
And now the belt is on and both pulleys are re assembled.
20240115_140827.jpg
Now the front pully has to be adjusted so that when it's at its slowest speed it doesn't push the belt out past the edge of the front pully.
Here I'm backing it off.
20240115_141422.jpg
If the belt comes out to far it will rub on the speed controll assembly. Here you can see there's not much room between the pully and controll shaft so the adjustment is important.
20240115_141714.jpg
So the drill press is back together and ready for work. Now I just need my hand to heal up a bit more so I have the strength in it to hold the heavy leg stock without pain. Maybe this weekend, it gets better everyday but it's still painful and I don't have full grip strength yet.
 
Last edited:
Hope your thumb heals quickly Greg. Many years ago I landed a shark for a friend who wanted to catch one on fly. It was a little lemon shark, maybe four and half feet long, 25-27 lbs. (Not the one in the photo, that one is much smaller and was an accident, hooked it with my bonefish fly right in the tip of his nose). Small sharks have a natural handle along the top of their heads, just back of the eyes. There's a flat plate there that you can get your fingers and thumb under to provide a good grip and control the dangerous end. Anyway, this shark made a violent thrash and pulled out of my right hand grip. It must have tore ligaments or tendons or something in my thumb, in the knuckle where it attaches to my hand. To this day, it's way weaker than my left and often hurts when I try to grip something. Hope your's does better.

lemon landing 2.jpg
 
Last edited:
Well after my setback from the accident I got the drill press operational again and it's time to get back in the shop. My thumb is still sore and I don't have a lot of grip strength yet but if I wear my brace I think I can get some work done. It would actually probably be good therapy for it.
So I got to work and finished drilling out the corner hole waste.
20240120_124900.webp
Then i switched to a larger forstner bit to drill out the bulk of the waste.
20240120_131340.webp
Drilled out one side then flipped the workpice and drilled out the other side.
20240120_132839.webp
I also clamped a strip of wood to the front of the drill press table to help hold the work piece against tyhe fence. Made it easier with my sore thumb.
20240120_140426.webp
Then I finished drilling out the center waste.
20240120_150042.webp 20240120_150923.webp
The drilling carrnage, lol.
20240120_153414.webp
Next I slide the new top onto the saw outfeed table so I can use the old bench to clean up the mortices. The top is seriously heavy!
20240120_161008.webp
But now I can clamp a workpiece to the bench and chop out the rest of the waste and square up the mortices.This will be a slow process with my sore thumb that is still healing. 20240120_161023.webp
 
Well after my setback from the accident I got the drill press operational again and it's time to get back in the shop. My thumb is still sore and I don't have a lot of grip strength yet but if I wear my brace I think I can get some work done. It would actually probably be good therapy for it.
So I got to work and finished drilling out the corner hole waste.
View attachment 252383
Then i switched to a larger forstner bit to drill out the bulk of the waste.
View attachment 252384
Drilled out one side then flipped the workpice and drilled out the other side.
View attachment 252385
I also clamped a strip of wood to the front of the drill press table to help hold the work piece against tyhe fence. Made it easier with my sore thumb.
View attachment 252386
Then I finished drilling out the center waste.
View attachment 252387View attachment 252388
The drilling carrnage, lol.
View attachment 252389
Next I slide the new top onto the saw outfeed table so I can use the old bench to clean up the mortices. The top is seriously heavy!
View attachment 252390
But now I can clamp a workpiece to the bench and chop out the rest of the waste and square up the mortices.This will be a slow process with my sore thumb that is still healing. View attachment 252391

Take it slow & methodical! Don’t want to hear about any setbacks with your thumb! Progress is impressive! Chuck
 
One down and seven to go for this stage of the legs.
20240121_183433.webp
Keeping the sharpening platten out for touch ups.
20240121_190117.webp
 
I had another short day at work. So I came home and went to the shop. It was dry when I got down there but as I was working water started to weep in. We are in a mid winter thaw, warm Temps, days of rain, and snow melt off. The ground is still frozen except for around the basement walls, so that's where the water goes. I just mop it up and put a fan on the floor to dry it up, just an inconvenience. Everything is off the floor or on rubber pads.
20240124_164647.jpg
It has leaked like this since I moved in here, either the wall is cracked or it comes up from the slab.
20240124_164723.jpg
But I did get more work done on the mortices. 3 legs are done.
20240124_173344.jpg
1 more to go.
20240124_173416.jpg
Once the mortices are done it will be time for tennons and fitting them. Still plugging along.
 
Last edited:
Back
Top