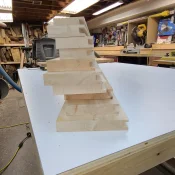
Table saw outfeed tables

  • Thread Starter Thread Starter
  • #61
You planning on parking a Tank on that table, Gregg??? :sofa:

BTW, looking good. It's looks pretty sturdy and if kept indoors, should outlast you and your grandkids.... Good job on the build..... .......... Jerry In Tucson)
Thanks Jerry. Remember, wood is free! Except for the plywood this is all found or salvaged lumber from pallets.
 
and what's not in this photo? That's right, no tapir. That's a giant river otter who's really pissed because there's no tapir. You got some serious 'splainin' to do Lucy.

giant river otter head.webp
 
  • Thread Starter Thread Starter
  • #64
Ok, back to work on the table.
I set up a redneck spray booth.......
20210704_132458.webp
Plenty of room to walk around it.
20210704_132703.webp
Took the leveling feet of and put some blue tape over the threaded holes. I'll shoot one coat of finish on the bottom.
20210704_132946.webp
Strained some wbp and filled the paint cup.
20210704_133527.webp
I cup gives one coat. First coat is on and I'll give it an hour and recoat it. I just did the legs and the outside rim of the table.
20210704_141406.webp
 
  • Thread Starter Thread Starter
  • #65
What it looks like dry.
20210704_195328.webp
It's not furniture quality finish but for a shop table it's fine. I'm happy with it and at least it's sealed, 4 coats. I'llet it dry overnight, it might hit the ground tomorrow.
 
  • Thread Starter Thread Starter
  • #66
This table is useless even with a pic so off with it. Lol.
20210705_123348.webp
I put the leveling feet back on and got the table on the ground.
20210705_124337.webp
My calculations came out pretty good and I have room for adjustment and to level it. Got about an 1/8"
20210705_124352.webp
Going to be so useful. this is just set in place temporarily to see how it was going to match up to the saw.
20210705_124513.webp
Here's the old table sitting on the new table for size comparison.
20210705_131522.webp
Next I picked out some maple pallet boards for the shelf.
20210705_132524.webp 20210705_132535.webp
Then I cut them to length about an inch oversize.
20210705_134430.webp
These will get run through the jointer and planer
 
  • Thread Starter Thread Starter
  • #67
Next I gave the top a quick sand with a rose and 220 grit just to clean it up.
20210705_135206.jpg
It's laminate time!
20210705_135351.jpg
This was my set up to cut the laminate to size.
20210705_140919.jpg
I sprayed 2 17oz cans of 3m high strength contact adhesive, 1 can on each piece. Set some sticker boards in place so that I could position the laminate.
20210705_144228.jpg
Laminate is set in place. I'll pull the middle sticker out and start rolling with the J roller from the center out.
20210705_144414.jpg
Once the laminate was rolled down I trimmed it off with a laminate trimmer.
20210705_145409.jpg
I went around the edge with some 220 grit on a block of wood to break the sharp edges. And now the top is done.
20210705_150435.jpg
 
Last edited:
Nice table Greg. Don't you need to route some dado grooves so the rails on your various sleds and jigs can run out?
 
  • Thread Starter Thread Starter
  • #69
Nice table Greg. Don't you need to route some dado grooves so the rails on your various sleds and jigs can run out?
I am going to do that but it will be the last thing I do before bolting it to the saw. And before I do that I need to make the side table to match. It's all a work in progress still.
 
  • Thread Starter Thread Starter
  • #71
Got the shelf boards jointed on 2 sides after work today. These must clean up to 1" no less. I already rejected 2 boards because they would not have cleaned up.
Pretty cool mix of hard and soft maple, some ambrosia figure and a couple pieces with some light curl.
20210706_184644.webp
Once there planed to 1" thickness I'll rip the last rough edge off.
 
  • Thread Starter Thread Starter
  • #72
Finally got some shop time today to work on the table.
I think this top board is hickory, really heavy and hard. Once planed it doesn't have any of the characteristics of maple..
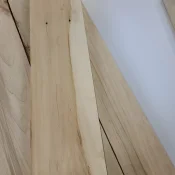
20210711_161115.webp
I ran the boards through the planer and got 1" boards for the shelf.
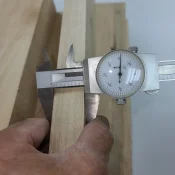
20210711_165022.webp
Then I ripped the last rough edge off on the table saw. Now I have the dimensioned boards for the shelf.
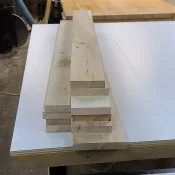
20210711_171249.webp
Set up my cheapie craftsman router table.
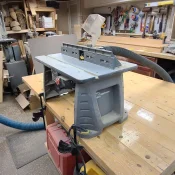
20210711_175523.webp
And also set it up with one of the tongue and groove bits, this one is for the groove. I centered it on the board best as possible.
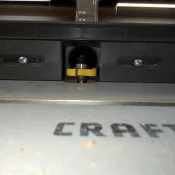
20210711_175533.webp
All the grooves are now cut.
20210711_175550.webp
Then I switched to the tongue bit and did the same. I set it as close as I could to the already cut groove.
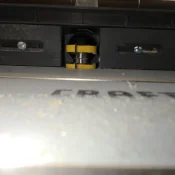
20210711_184412.webp
And here we have tongue and groove hardwood boards for the shelf. A mix of maple and a few hickory boards.
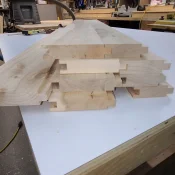
20210711_184452.webp
This is what it will look like when I put it in place on the table as a shelf. I forgot to leave 1 plain edge on 2 boards so I'll have to rip the tongue and groove off of those end boards.
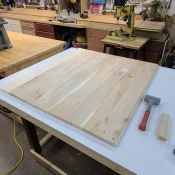
20210711_185748.webp
Almost filled the dust collector drum again just dimensioning these boards.
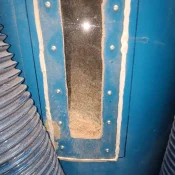
20210711_190403.webp
Now if some.one was building a table like this for their own saw you could just use 3/4" plywood for the shelf. But I salvaged and repurchased enough pallet wood for this Tae that I don't really have to buy much wood at all, in fact just the plywood for the top. It will be very heavy and sturdy, just what you want for a shop table/outfeed table.

 
This is what it will look like when I put it in place on the table as a shelf. I forgot to leave 1 plain edge on 2 boards so I'll have to rip the tongue and groove off of those
How bout just take 1 board and RIP it down the center giving a start and finish board, 1 tongue and one groove with a plain edge on each.
Dont ask how I think these things up :ohno:
 
Last edited:
  • Thread Starter Thread Starter
  • #74
How bout just take 1 board and RIP it down the center giving a start and finish board, 1 tongue and one groove with a plain edge on each.
Dont ask how I think these things up :ohno:
Wow, that's a great idea! Thanks for that, I'll definitely give that a go. I have one board that is really wide that will work well for that. :good2:
 
Greg, good job on the top. Now for the question. When routing for T&G, do you always try to get center as close as possible for the groove. Then you do the same for the tongue. Do you flip the boards to verify they are centered?

I have the same bit you have, but by another maker. The last time I made T&G boards, I used only the groove bit for both T&G. Got it as close to center as possible, ran one side, then flipped it and cleaned any off center there was. After running all grooves, I then lowered the bit until I had the tongue where it's supposed to be. Ran a test piece on both sides. If it's not correct, either raise or lower the bit until tongue fits lit it's supposed to. I've been doing it that way for over 20 years now. When flipping your pieces for both details, you are guaranteed center. Time taken to set up is negligible. ............... Jerry (in Tucson)
 
  • Thread Starter Thread Starter
  • #76
@Nubsnstubs Jerry I guess either way would work. I ran the groove first because it was the easiest to center the bit. Actually I was just going to do it with a dado blade but the dado insert for my saw is on backorder and I dont have one yet.
 
  • Thread Starter Thread Starter
  • #77
Well I went into the shop this morning and looked at the wide board I was going to rip down the middle to give me 2 plain edges but after measuring I still would have been short. So I just dimensioned one more board, and made a tongue on it after work today. And I notched it for the legs on the bandsaw.
20210713_182805.webp
So now I will have a 1" overhang all the way around the base. Hopefully that will keep the boards from splitting at the screw holes. There's 2 boards in this pic.
20210713_182917.webp
I don't plan to use any glue on these boards and I'll be drilling the screw holes oversize to allow for some wood movement. And I'll only use one screw for most of the boards.
 
  • Thread Starter Thread Starter
  • #78
Today is screw the shelf boards down day
One bit for drilling and counter sinking, one bit to drill the holes in the shelf boards oversized, and a torx bit to drive the 2" deck screws. The screws will be a loose fit in the boards but tight in the frame.
20210717_113119.webp
There will only be one screw in each end of the boards. I run them down until they seat and then back them off. This should allow for wood movement and shrinkage. Humidity is the highest its ever been in the shop today, 74% The boards will definitely shrink in the winter. No glue on the boards.
20210717_113137.webp
Here you can see the screw is not tight but still below the surface.
20210717_113218.webp
In this pic you can see the groove is filled in on the end with a strip of wood.
20210717_115857.webp
The last board!
20210717_121002.webp
And then I sanded everything to 80 grit. I didn't go finer because I'll be piling a bunch of jigs and stuff on the shelf.
20210717_130211.webp
But I am going to give it a few coats of wbp to seal it up. Big 3" brush to cover this quickly, lol.
20210717_133929.webp
One coat on. I should be able to get 3 or 4 coats on easy today and be done with the shelf.
20210717_135848.webp
Looks pretty nice, to bad you won't see much of it. Man the 2 hickory boards really look nice with a finish on them.
20210717_135912.webp
With the tongue and groove boards the shelf is very ridged and strong even with no support in the middle. Boards are a true 1" thick. It supports my weight on the shelf no problem. Today will probably be the last time there are no gaps in the boards, when the humidity changes with the seasons the boards will shrink and swell. Today is probably the largest they will ever be.
 
  • Thread Starter Thread Starter
  • #79
Ok I'm gonna call this part done, except for the miter grooves.
This is what it looks like.
20210717_165144.jpg
The second part of this project will be the table on the right of the saw.
20210717_165237.jpg
Notice that I filled the scrap box just with the first part of the build, lol. It was empty when I started. Well looks like I have another backyard fire pit day coming.
 
Last edited:
  • Thread Starter Thread Starter
  • #80
Part 2 has begun, side table is now in progress.
Cutting the plywood to size and already using the outfeed table.
20210718_140559.jpg
I found some oak boards that where salvaged from a steel shipment, I'll use these for the legs.
20210718_144524.jpg
All jointed and planed to 2 1/4" square. I milled the leg stock while I was waiting for glue to dry on the top, framework is in the clamps.
20210718_154521.jpg
After cutting the legs to length I did some lay out for the tennons.
20210718_165040.jpg
The tennons will have a 1/2" shoulder all the way around.
20210718_165050.jpg
I also did the layout for the mortices.
20210718_170625.jpg
Since this table is much smaller than the outfeed table and will be supported by the saw rails I'm only adding one cross support underneath. This wall also give me room for a future router lift I think. No mechanical fastners again, just glue.
20210718_172149.jpg
 
Last edited:
Back
Top