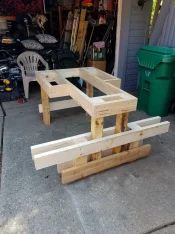
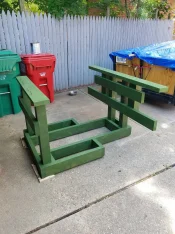
What did you do in your shop today?

Mowed the lawn early this morning so i could work on the shooting bench before it gets too hot.
Carried all the parts upstairs to assemble it. Legs first.
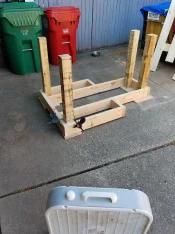
20200703_111330.webp
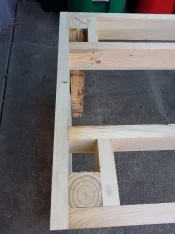
Front leg blocking is in.
20200703_120208.webp
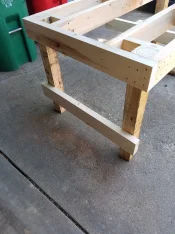
Lower leg cross brace is on.
20200703_120218.webp
Rear legs and cross blocking.
20200703_121531.webp
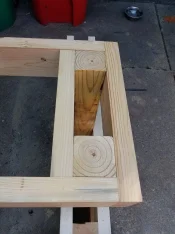
Cross board for the seat clamped in place. It'll get screwed on after the frame work is stained.
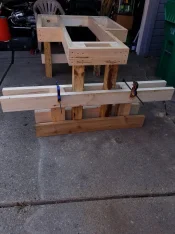
20200703_121550.webp
Framework is done, ready for stain.
20200703_121605.webp
Very sturdy and stable.
20200703_122738.webp
First coat of stain.
20200703_132515.webp
I'm outside in the shade with a fan. The tick don't do well in the heat.
:nodice::mad:
 
Here we go....stabilizing bracket mounted.

0703201453_HDR.jpg
 
Last edited:
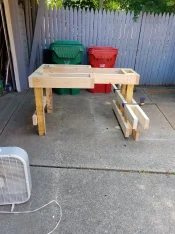
2 coats on everything. It's 92 in the shade, I'm done, going inside to the AC for the rest of the day. I'm losing my shade in the driveway.
20200703_145615.webp 20200703_145658.webp
 
@woodtickgreg , glad you have a left side.....I’m left eyed and so now shoot left handed.
I'm building this for many people to use at a friends place. Some may be left handed, dunno, but it should accommodate everyone.
 
I needed to take my miter saw outside to work on the shooting bench today so I figured this would be a good time to hook up the dust collection for the miter saw.
Right now the dust just piles up behind the saw and blows back on me.
20200704_104537.webp
This is just from cutting the boards for the shooting bench.
20200704_104545.webp
This is a shop made dust hood. Without it dust would be everywhere.
20200704_105000.webp
Here you can see the hole from the set up in my old shop. And the fitting that I'll be using.
20200704_105247.webp
I cut off the parts not needed, 4" was kept.
20200704_105550.webp
Yeah right, like your going to cut through 3 layers of osb with a cordless drill, lol.
20200704_105955.webp
Switched to a 1/2" corded drill. Got her done!
20200704_112416.webp
I taped the fitting in place so I could drive some self drilling screws into it.
20200704_113705.webp
4 screws and a view from the top.
20200704_113738.webp
View from the bottom. Now I can hook it up to the PSI cyclone.
20200704_113830.webp
That's another thing off my list.
 
So then it was outside to work on the shooting bench.
I installed the last 2 boards for the seat.
20200704_120416.webp
I had some 1" Ash left over from my trailer build s I used it for the table top. All but one board was already finished.
20200704_123441.webp
Happiness is a fresh box of deck screws. Lol.
20200704_140509.webp
These are salvaged 5/4 pine deck boards from a pallet. Boards I need for the seat can be cut out from in between the nail holes. More free wood.
20200704_144927.webp
The plan called for 10" seat boards, looked kinda small to me, so I cut them 14"
20200704_145221.webp
Ready to be screwed down.
20200704_145956.webp
After all the boards for the top and seat where screwed down I used my Dewalt trim router to round over all the edges.
20200704_153552.webp
First coat of man o war spar varnish. This stuff is pretty good for outdoor projects. Builds quick, and looks nice, this is semi gloss.
20200704_161654.webp
It'll get 1 more coat tomorrow to match the other boards.
20200704_161707.webp
I still need to attach the gun racks and get some finish on them to seal them.
 
It's done!! Last 2 pieces went on after work, sweat my butt off just to drive 10 screws. 92 today, I dont do well in the heat.
20200706_153406.webp
You gotta have a place to lean your gun when checking or changing targets.
20200706_153634.webp
 
I completed the build of this cabinet for my daughter. It will sit in the corner of her kitchen and hold odd-sized pots and pans that are so difficult to fit in normal size cabinets. It is made of Pennsylvania cherry with a clear water-based Minwax poly finish. The shelves are adjustable and are made of ½" Baltic Birch. The cabinet is a little over 5 ft tall and will sit on a stand that is 11" tall. She had already taken the stand down to her house before I could get a photo of the complete unit.

tKEcmRjQTeGjPq5cgJTJIg.webp

lIJqbiU2TmSTDhRJMxX8bQ.webp
 
I completed the build of this cabinet for my daughter. It will sit in the corner of her kitchen and hold odd-sized pots and pans that are so difficult to fit in normal size cabinets. It is made of Pennsylvania cherry with a clear water-based Minwax poly finish. The shelves are adjustable and are made of ½" Baltic Birch. The cabinet is a little over 5 ft tall and will sit on a stand that is 11" tall. She had already taken the stand down to her house before I could get a photo of the complete unit.

View attachment 190470

View attachment 190471
That’s a quality looking custom cabinet. I’ve done a lot of kitchen designs in 20/20. For a cabinet that size with those details, you’d be looking at $800 to $1200. That’s factory made which wouldn’t come close to the quality of yours.
 
@FranklinWorkshops , Wow Larry!!!!!!!!!!!!!!!!!!!!!!!!!!!!!!!!!!!!!!!!!!!!!!!!! Did I say Wow? Wow!! Seriously; …...well, enough said. Very, very pretty. And if anything like my sister and her relationship with our father, she is going to be so proud of that for the rest of her life!!
 
Well maybe not today but a few days ago I took photos of the cutting boards I just made before they went out to my daughters and daughters in laws. 2 chaotics, 2 zigzags and one other.
One DIL has sent pictures of hers (middle board) in action and said it was the finest she had ever used.

IMG_8626.jpg IMG_0688.png
 
Back
Top