I dont have a garage. Ha ha. Now my carport... um sorry, no pictures available:). And the 10x30 behind the driveway, and the old dog pen... if I rework them maybe I can clear some out of the stacks under used tin in my yard, hmmm. I am lucky my woman likes wood as well as I do. Well, I mean pretends to.^I finally have to say it and I’ll probably have spears get thrown at me- yes, it is a little side track. What do women like showing off with their girlfriends? Their large closet right with the collection of clothes, bags, shoes, jewelry, blah, blah, blah. All finished goods! Those closets typically is clean and organized- I said typically. If they don’t have enough closet space, they take over other closets. But, the garage or dedicated wood shop is “our closet” whether it is clean or dirty. Come on, we laugh or joke when she buys another pair and adds another to the over filled closet. But, look at what we do too- buy wood, fill up the shelves, every inch of the garage or work shop. Then we save scraps just in case one day we might need that 1 effin’ piece of wood (1 in 1,000)- then we save that and we throw away what we really need. The major difference is she would show us what she purchased or wear it on an occasion or when you are just out together so we get a glimpse of it. We have a little guilty pleasure (okay a whole lot)- we buy something when we need it, when we want it or by impulse. But, we don’t need to show it to them to get approval and makes it hard for them to see how much we are accumulating- remember I mentioned “packing the gills” in your garage or your wood shop? Really, who here goes, “hey honey (or whatever you use to work for both of you) look a this purty little thing all curly and nice that I just picked up”. Anybody? Anyone gets back a response?
So, if you came over- my first word is, “hey you want to see the goodies in my closet” (aka as garage or workshop)? People say, wow look at all of those woods! Then they ask what this wood is and what wood is that. I don’t really have a point and just commenting on how much we accumulate in parallel to our wife’s (or partners closet). But, man if you look at every member here- everyone has a collection of wood whether it is small, medium and Amazon big. Which means we all have serious problems and meetings should take place pronto. It be a good place to barterand I am glad we all have this problem! Where was I going with this?

You are using an out of date browser. It may not display this or other websites correctly.
You should upgrade or use an alternative browser.
You should upgrade or use an alternative browser.
What did you do in your shop today?
- Thread starter woodtickgreg
- Start date

That must be one hell of an extension to reach that deepYes it really was, I had to keep tightening set screws, the vibration was so bad. Fortunately I have a 3" drill bit that I bored all the way to the bottom with, that helped a lot....


Went back for the second and last class with a wonder how it was going to be completed during that class. Turns out we poured a flood coat over the whole tray without sealing the wood at all. I questioned the instructor how it was going to contain the air from the wood and he said it would with no problems. Well it definitely didn't. And when I finally left there were still air bubbles releasing from the wood and the epoxy had thickened enough so that no amount of torching was going to clear them. I was instructed to come back after 72 hours to finish up.Well it wasn't in my shop but Rockler's....live edge walnut serving tray with epoxy river.
View attachment 199836
The next day I called them and told them to ship it to me since it was advertised as a 2 day class. They said no can do. After a brief one-sided conversation from my side I hung up. Twenty minutes later the manager called and asked for my shipping address and got it out to me.
It was still a learning experience and well worth the time and money. Just a little disappointed in how it went. Anyway here's the next progress report.
Here's a picture after the flood coat was poured into the form over the unsealed wood by the instructor. Oh BTW it really wasn't a hands on class, but more of a "Watch Me do this" type class

Wish I would have taken a picture of the tray before planing it. Today I planed all that flood coat epoxy back off - top and bottom

Looking at the lower live edge you can see bubbles in the green epoxy at the far left and then about midway right at the live edge. Those are from the 1st pour of the river and can't be taken out.
Next I dry sanded the board/epoxy. 80, 150, 220, 320, 400, 500. Both sides. Wiping down and blowing off the dust between grits.
Then taped off wood on show side only. Next hand sanded wet 800, 1000, 2000 on the "river" only. Wiping the slurry off between grits
Now it's ready for a for finish. Choices would be to do a conventional finish (Poly acrylic, lacquer etc), oil finish (cutting board style) or an epoxy finish. I'm going to do the epoxy finish. Stay tuned!!
All sanded to baby bottom smoothness

Last edited:

Glad you got it back and are getting it finished correctly.
Question, with an epoxy top coat, wouldn't you want a "scratched" surface of the epoxy to help with bonding, or does it not matter since it will be bonded well to the wood on both sides of the river?
Question, with an epoxy top coat, wouldn't you want a "scratched" surface of the epoxy to help with bonding, or does it not matter since it will be bonded well to the wood on both sides of the river?

Barry, here's a tip that can help with finishing when the air in the wood will want to bubble like that.
Find someplace warmer than the area where you're going to apply the finish. Let the piece sit for a while to get warmed up. Take it to the finishing area - or, if in the finishing area, find a way to drop the temp of the area. Apply finish. As the wood cools, even just a handful of degrees, the air in the wood will contract as it cools and will suck the finish into the pores, instead of creating bubbles.
Learned this trick from my dad in building boats. First coat of varnish that would go on to wood, he would turn up the heat in the garage and get everything warm. When it was time to start applying the varnish (or sometimes a skim coat of epoxy), he would turn off the heat and then apply his finish. He never got air bubbles in his finishes because of this.
Find someplace warmer than the area where you're going to apply the finish. Let the piece sit for a while to get warmed up. Take it to the finishing area - or, if in the finishing area, find a way to drop the temp of the area. Apply finish. As the wood cools, even just a handful of degrees, the air in the wood will contract as it cools and will suck the finish into the pores, instead of creating bubbles.
Learned this trick from my dad in building boats. First coat of varnish that would go on to wood, he would turn up the heat in the garage and get everything warm. When it was time to start applying the varnish (or sometimes a skim coat of epoxy), he would turn off the heat and then apply his finish. He never got air bubbles in his finishes because of this.
Yessir if the epoxy is cured it needs to have some type of "scratched" surface for the next layer to adhere.Glad you got it back and are getting it finished correctly.
Question, with an epoxy top coat, wouldn't you want a "scratched" surface of the epoxy to help with bonding, or does it not matter since it will be bonded well to the wood on both sides of the river?
That is a great tip and I will be trying it out. ThanksBarry, here's a tip that can help with finishing when the air in the wood will want to bubble like that.
Find someplace warmer than the area where you're going to apply the finish. Let the piece sit for a while to get warmed up. Take it to the finishing area - or, if in the finishing area, find a way to drop the temp of the area. Apply finish. As the wood cools, even just a handful of degrees, the air in the wood will contract as it cools and will suck the finish into the pores, instead of creating bubbles.
Learned this trick from my dad in building boats. First coat of varnish that would go on to wood, he would turn up the heat in the garage and get everything warm. When it was time to start applying the varnish (or sometimes a skim coat of epoxy), he would turn off the heat and then apply his finish. He never got air bubbles in his finishes because of this.
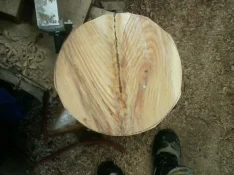
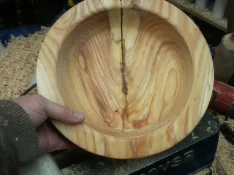
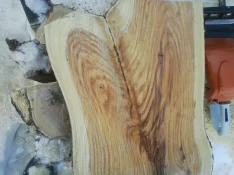
Going a little stir crazy with temps being only in single digits, today though it made it to 13°, so fired up the chainsaw and dropped a section of a multi - trunk honey locust. Once I had it on the ground, figured I might as well cut up a section, make a couple blanks, and rough out a bowl. The bowl is around 11" roughed, and if it stays together is going to offer me lots of opportunities for some epoxy work. ;)


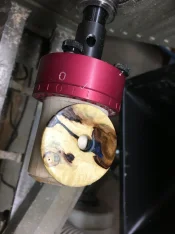
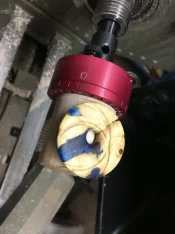
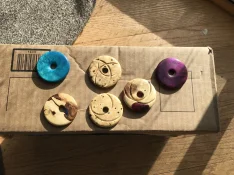
Well, @Tony has taken me down a rabbit hole. Thank you @BangleGuy , Eric certainly has some blame. But with some more practice, I should have a birthday present for my wonderful wife and a thank you present for our hostess in Florida!! Fun stuff. I think there may be some blame on whoever started the off center challenge......
Waiting on Amazon for the bale and necklace
Waiting on Amazon for the bale and necklace

That’s awesome Gary!Well, @Tony has taken me down a rabbit hole. Thank you @BangleGuy , Eric certainly has some blame. But with some more practice, I should have a birthday present for my wonderful wife and a thank you present for our hostess in Florida!! Fun stuff. I think there may be some blame on whoever started the off center challenge......
Waiting on Amazon for the bale and necklace
View attachment 202692
View attachment 202693

Those look great man!Well, @Tony has taken me down a rabbit hole. Thank you @BangleGuy , Eric certainly has some blame. But with some more practice, I should have a birthday present for my wonderful wife and a thank you present for our hostess in Florida!! Fun stuff. I think there may be some blame on whoever started the off center challenge......
Waiting on Amazon for the bale and necklace
View attachment 202692
View attachment 202693
What are they? Asking for a friend 
Pendants; jewelry.What are they? Asking for a friend
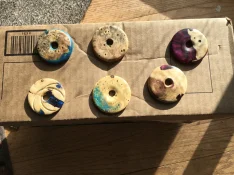
So, couple mor pictures. Finding out that I don’t finish the acrylic very well or the shape is hindering me vs a pen. But getting better. One thing for sure, @BangleGuy sure used pretty wood and did an incredible job of casting!!!!

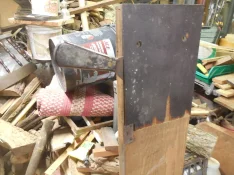
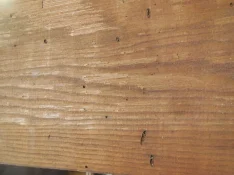
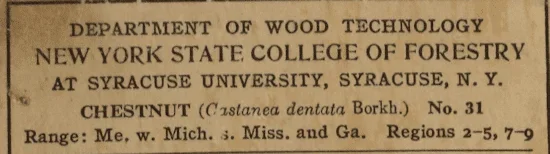
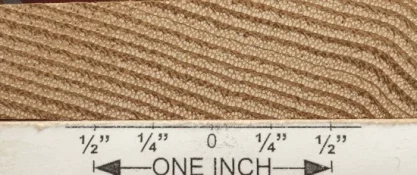
So I was hired to dispose of a player piano that was in super bad shape. Found it neat how many different woods are used. Here is a 1" piece of American chestnut that had been veneered with birch and then mahogany. The chestnut has roughly 20 growth rings per inch. Might be the highest ring count chestnut I've handled.
@phinds
@phinds

Yeah, that's as high as any I've seen. The one I have from the Syracuse collection is about 19 - 20

Some of those old pianos have actual ivory on the white keys too.
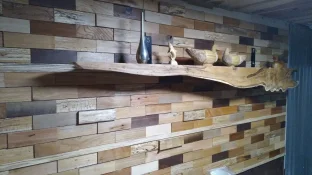
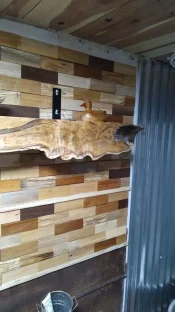
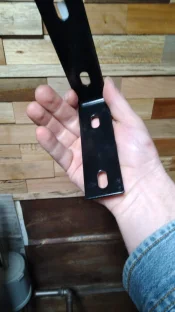
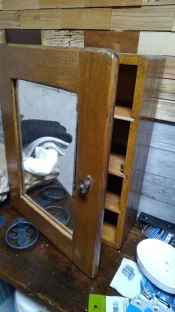
Had to do something this weekend... too cold to work in my carport so I prepped this live edge shelf and mounted it. Those aren't exactly rubber ducks but it was the bathroom so I couldn't resist putting water animals on the shelf before she got in to redecorate it properly... the shelf is live on 2 edges with the only square corner showing top front edge. She wanted to be able to see the burl and who was I to argue? These hangers from rural king are sturdy without being too much in the way. Next up, making french cleats to hang my 3 dollar thrift store medicine cabinet on this bumpy wall that some brilliant soul told her would look "neat".
Like those acorn ducks.
The wife loves birds, cant pass one in a thrift store without it finding it's way to the car. I am as bad about desert ironwood carvings. Got totes of em somewhere around the house.
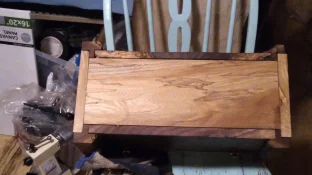
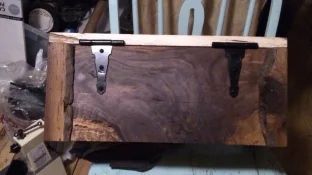
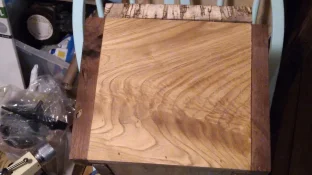
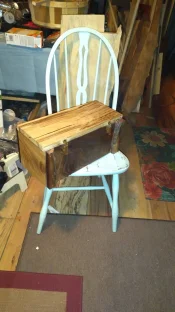
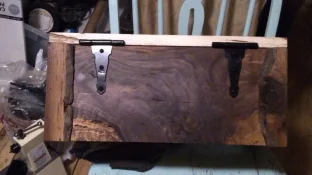
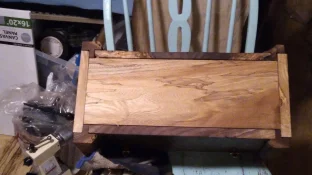
Well, her pen lathe came in this week and suddenly she realized she "needed" a custom box to put her lathe stuff in. So what's a guy to do on valentine's day weekend? Crotch walnut front and back. Crotch american chestnut ends. Spalted hackberry lid. Spalted elm bottom. Corners are cut out of a walnut log from a late 1800s smokehouse with hatchet marks left on the corners. Still have some blend sanding to do. But the chisels now have a home.